Before you begin
Use an iPhone running iOS 26 or later. Have the plan your nutritionist gave you available in Files, iCloud Drive or another document provider. Document processing needs an internet connection and a one-time in-app purchase. Everyday logging, manual plan creation and local reports are free.
Want to explore first? Choose See the sample plan, or Create a plan manually from Settings → My plans. The built-in sample is a demonstration, not a personal nutrition recommendation.
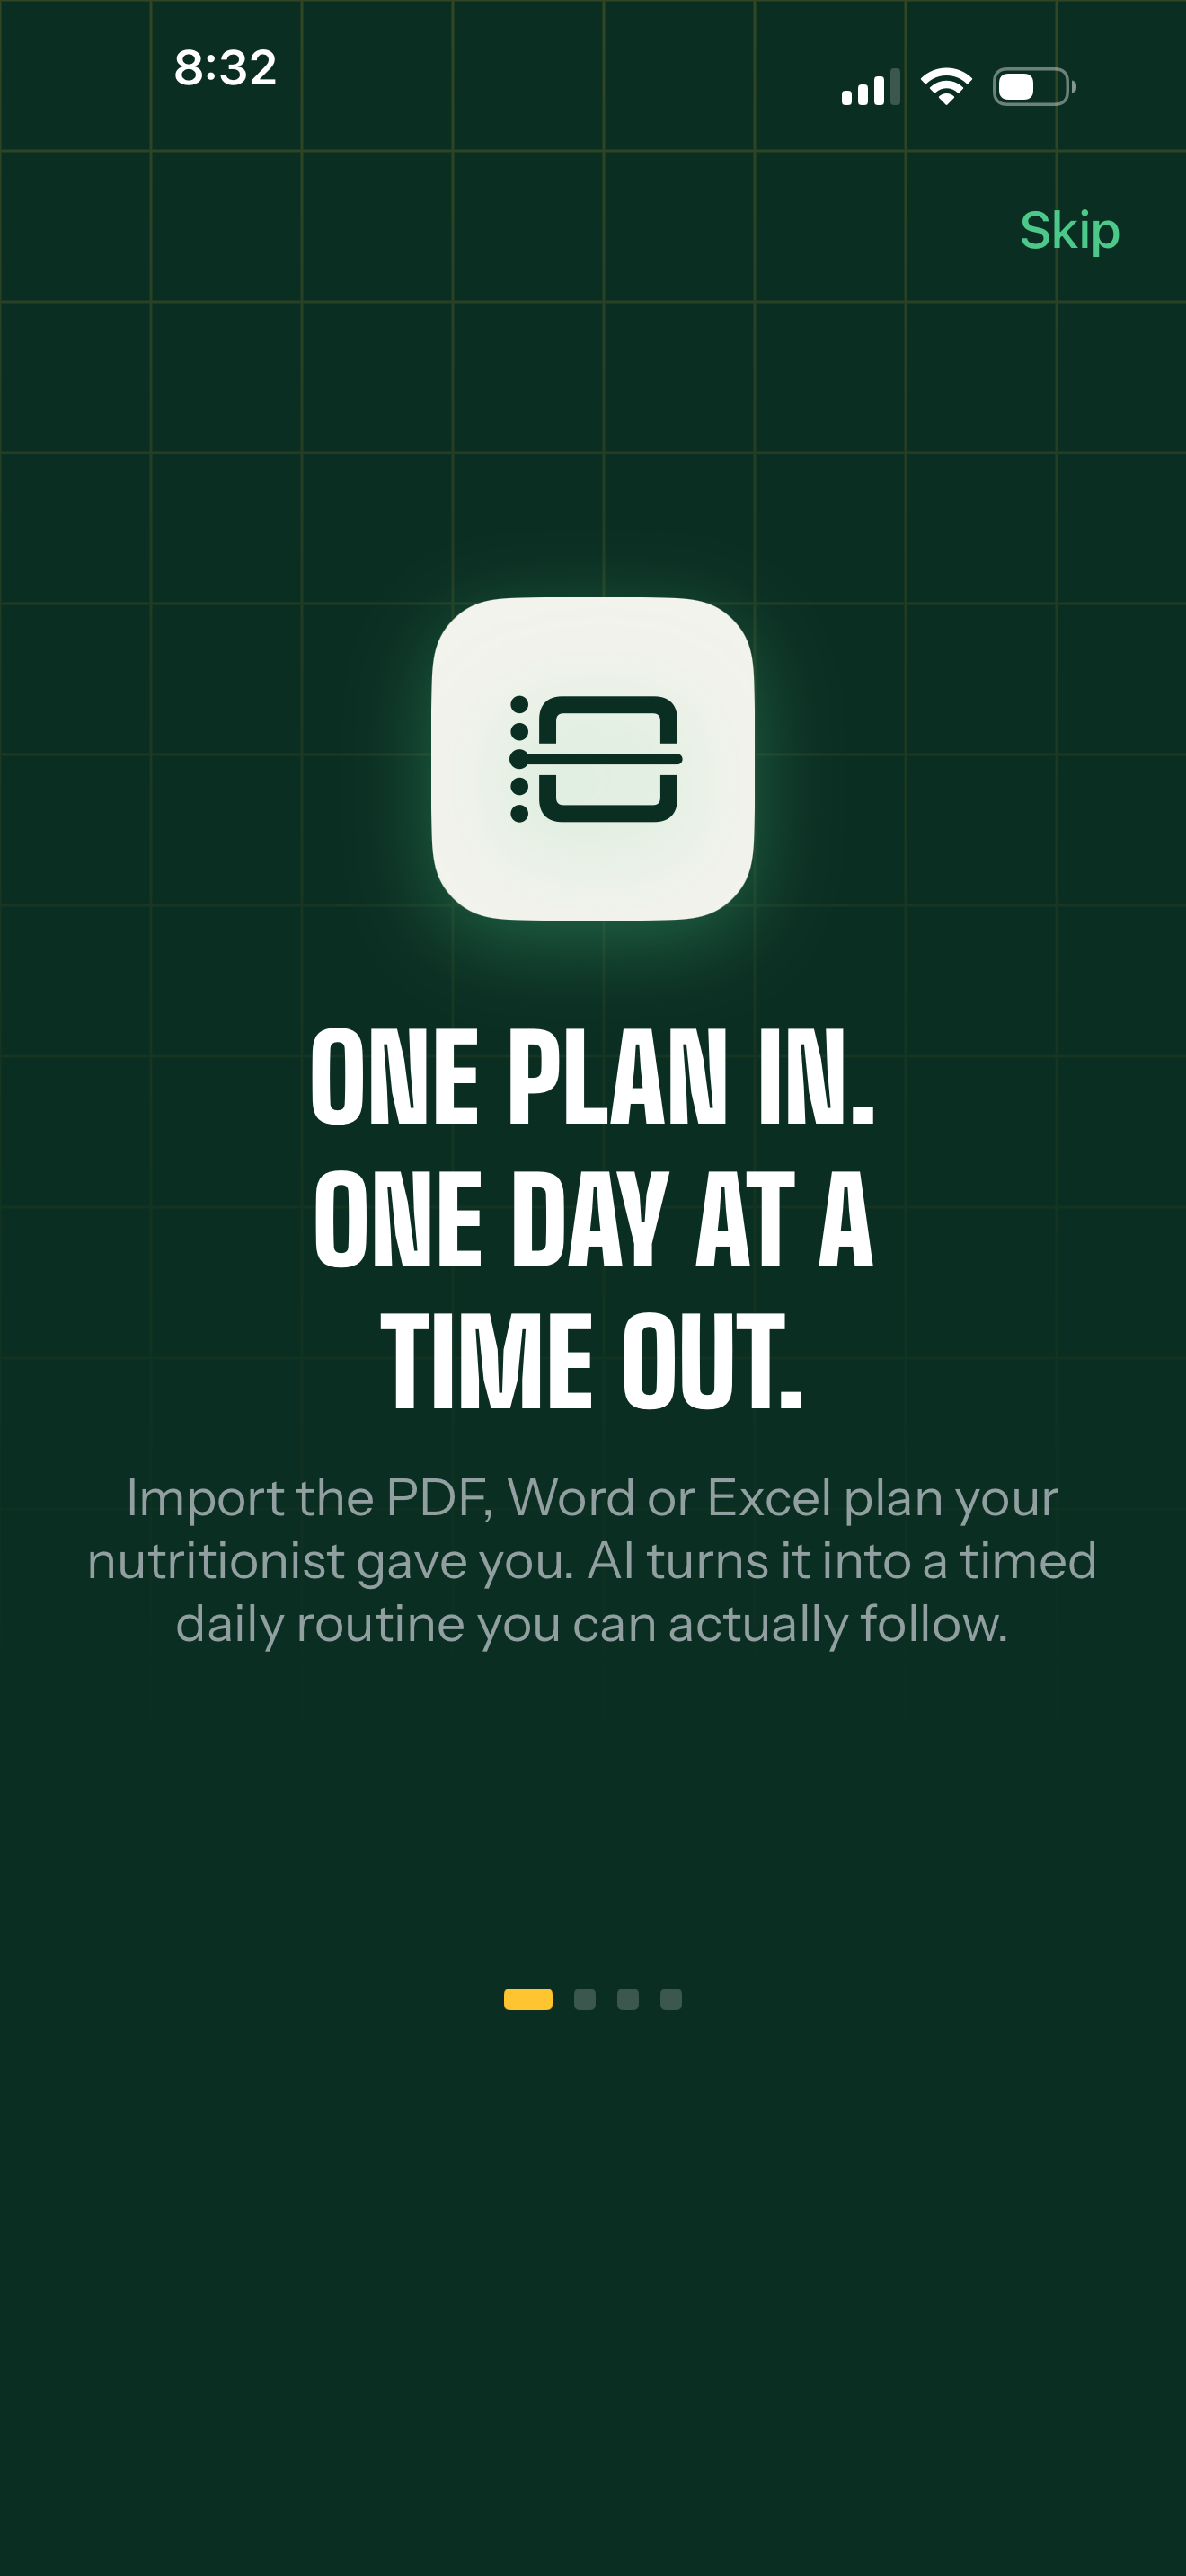
Your first launch.
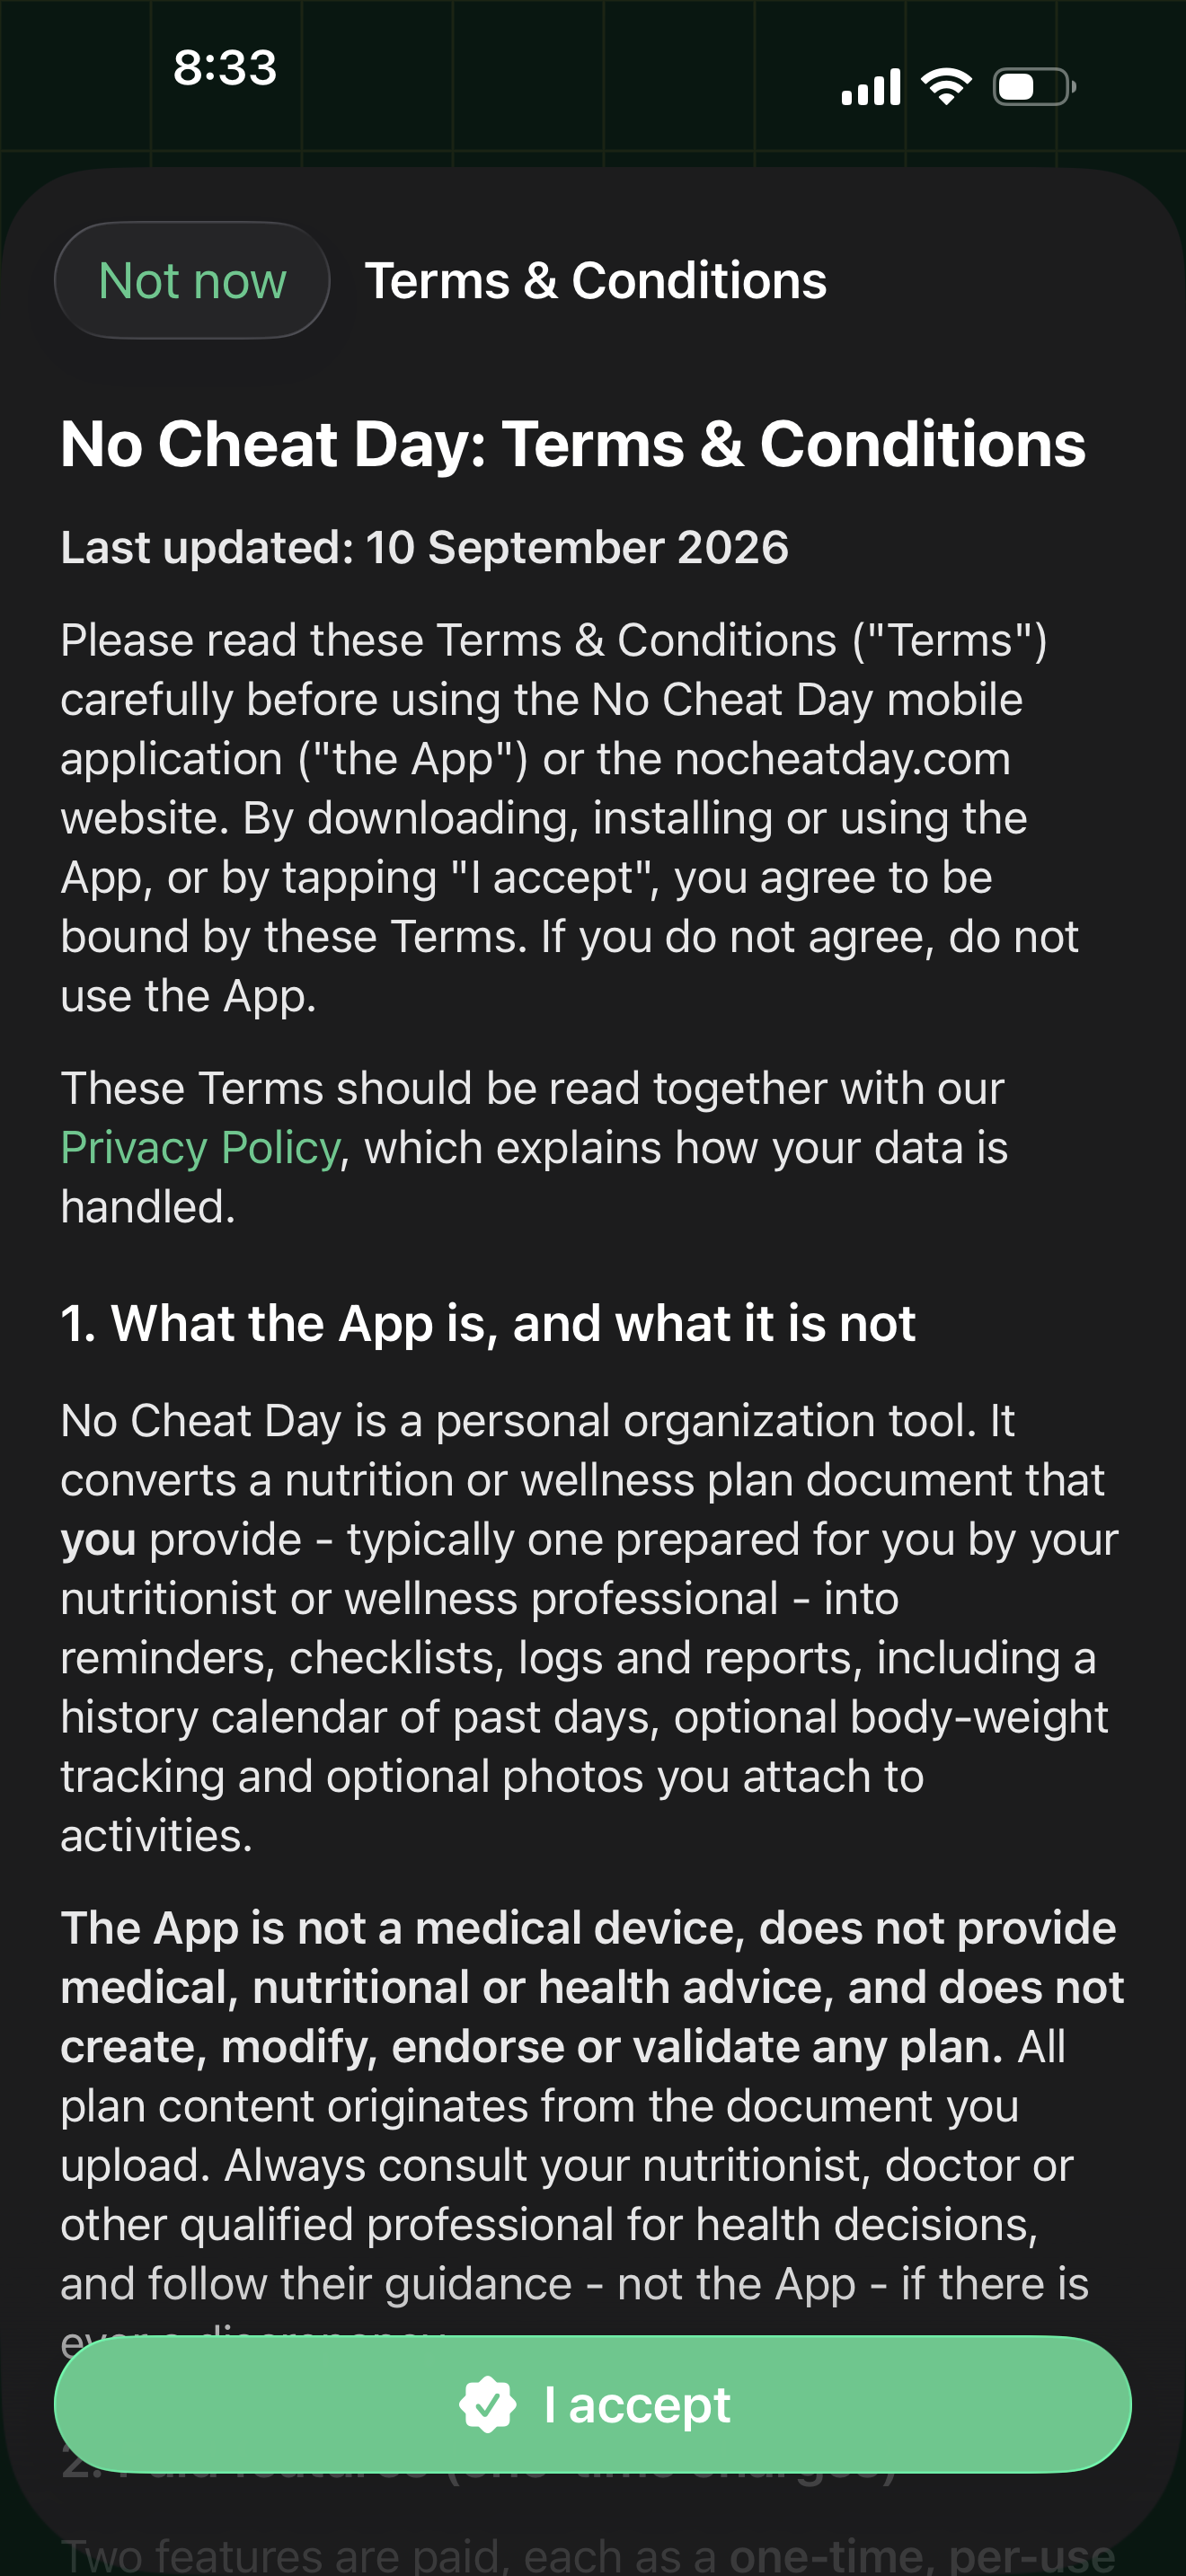
The introduction explains the daily routine. Read the Terms & Conditions and privacy policy before accepting. Then choose a document to bring in your own plan. Paid AI processing sends your document to the cloud; everyday logging is stored locally.
01
Import the document you already have.
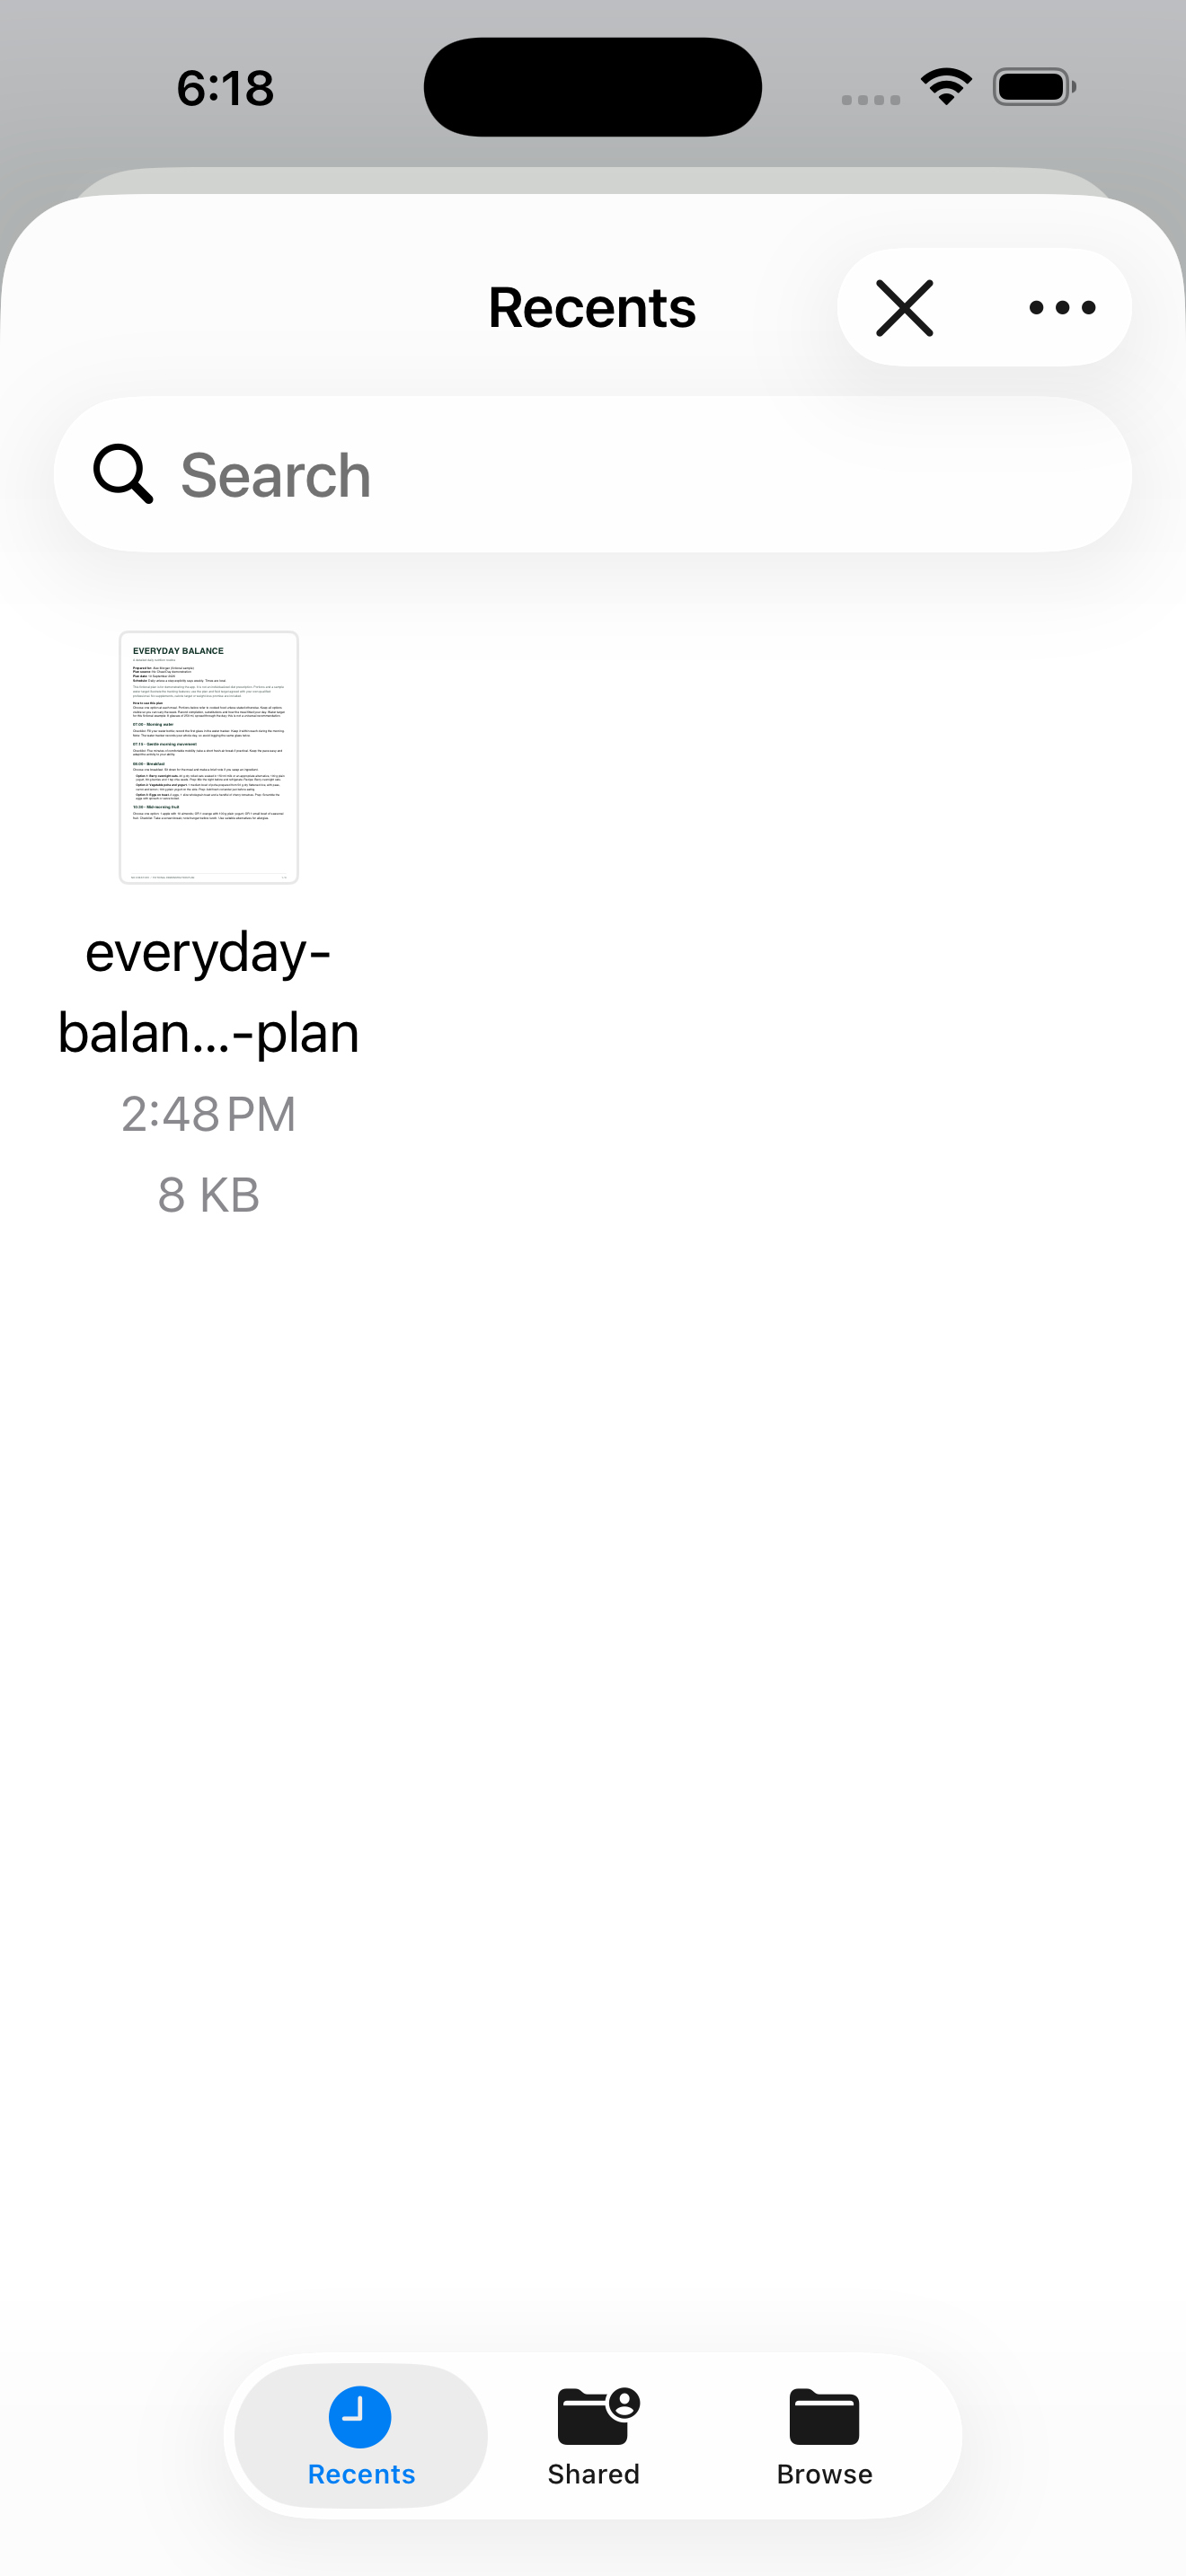
- From the welcome screen, tap Choose a document. If you already have a plan, open Settings → My plans → New plan from a document.
- Select a PDF, Word .docx or Excel .xlsx file. Download cloud-only files first so they are available to open.
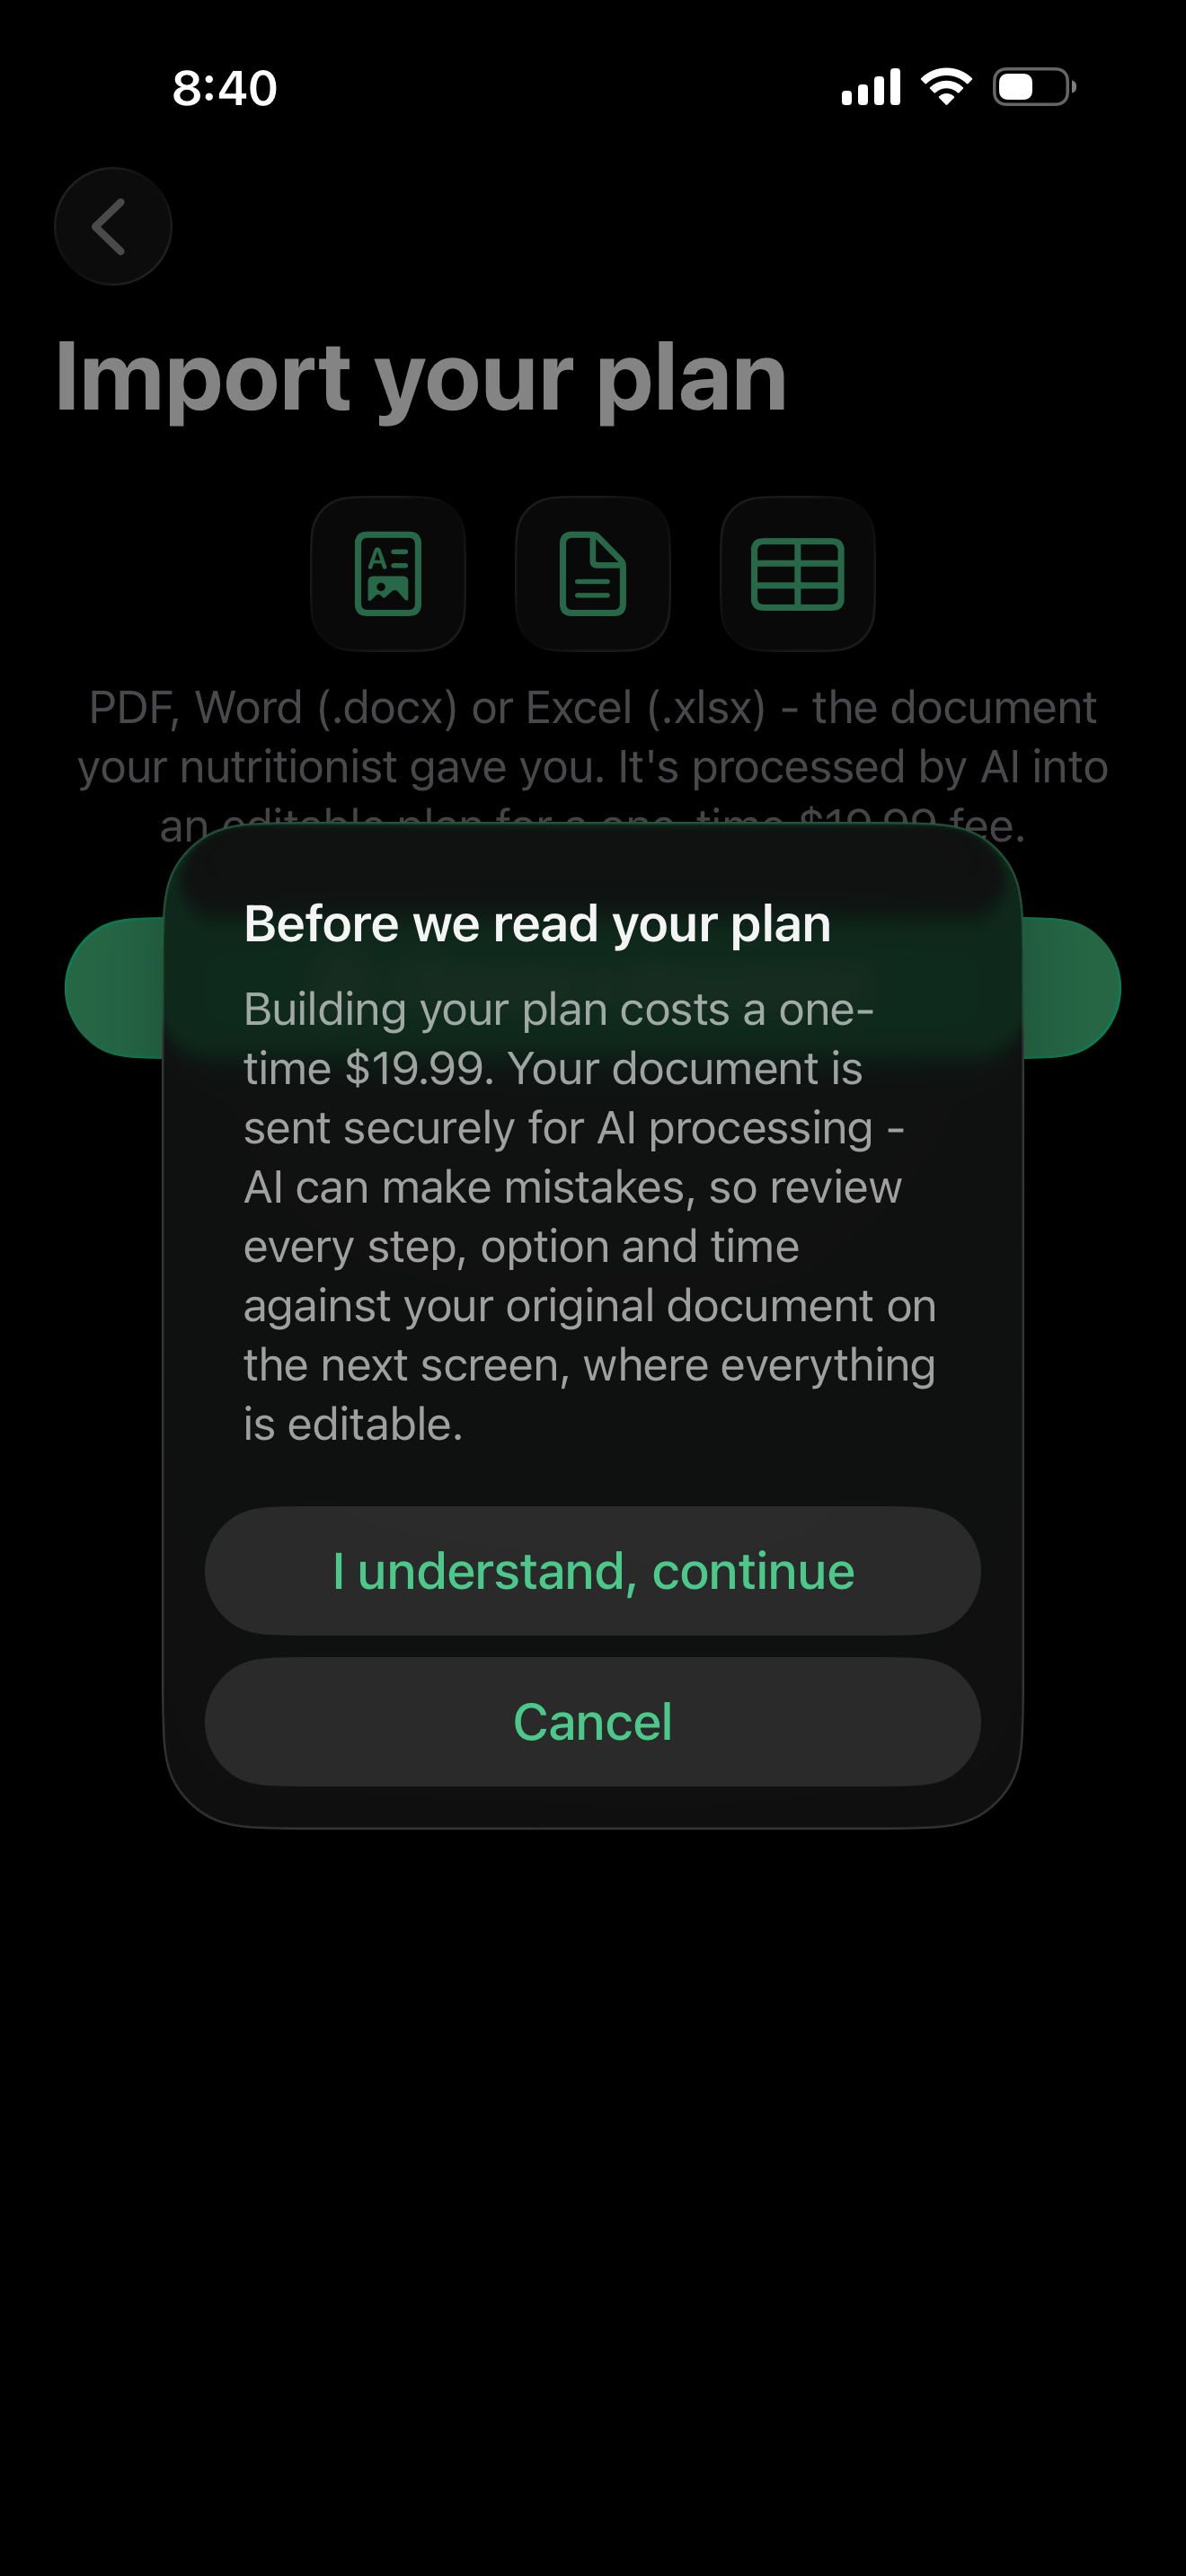
- Read the cloud-processing notice. Continue to Apple's purchase sheet and check its final price and currency.
- Confirm the purchase once. The app reads the document and builds an editable plan; this can take a few minutes.
Use a readable document. PDFs must fit the backend's 5 MB limit; password protection, scans without readable text or unusual layouts can cause trouble. If needed, ask for a text-based PDF or the original Word file before purchasing.

From document selection to review.
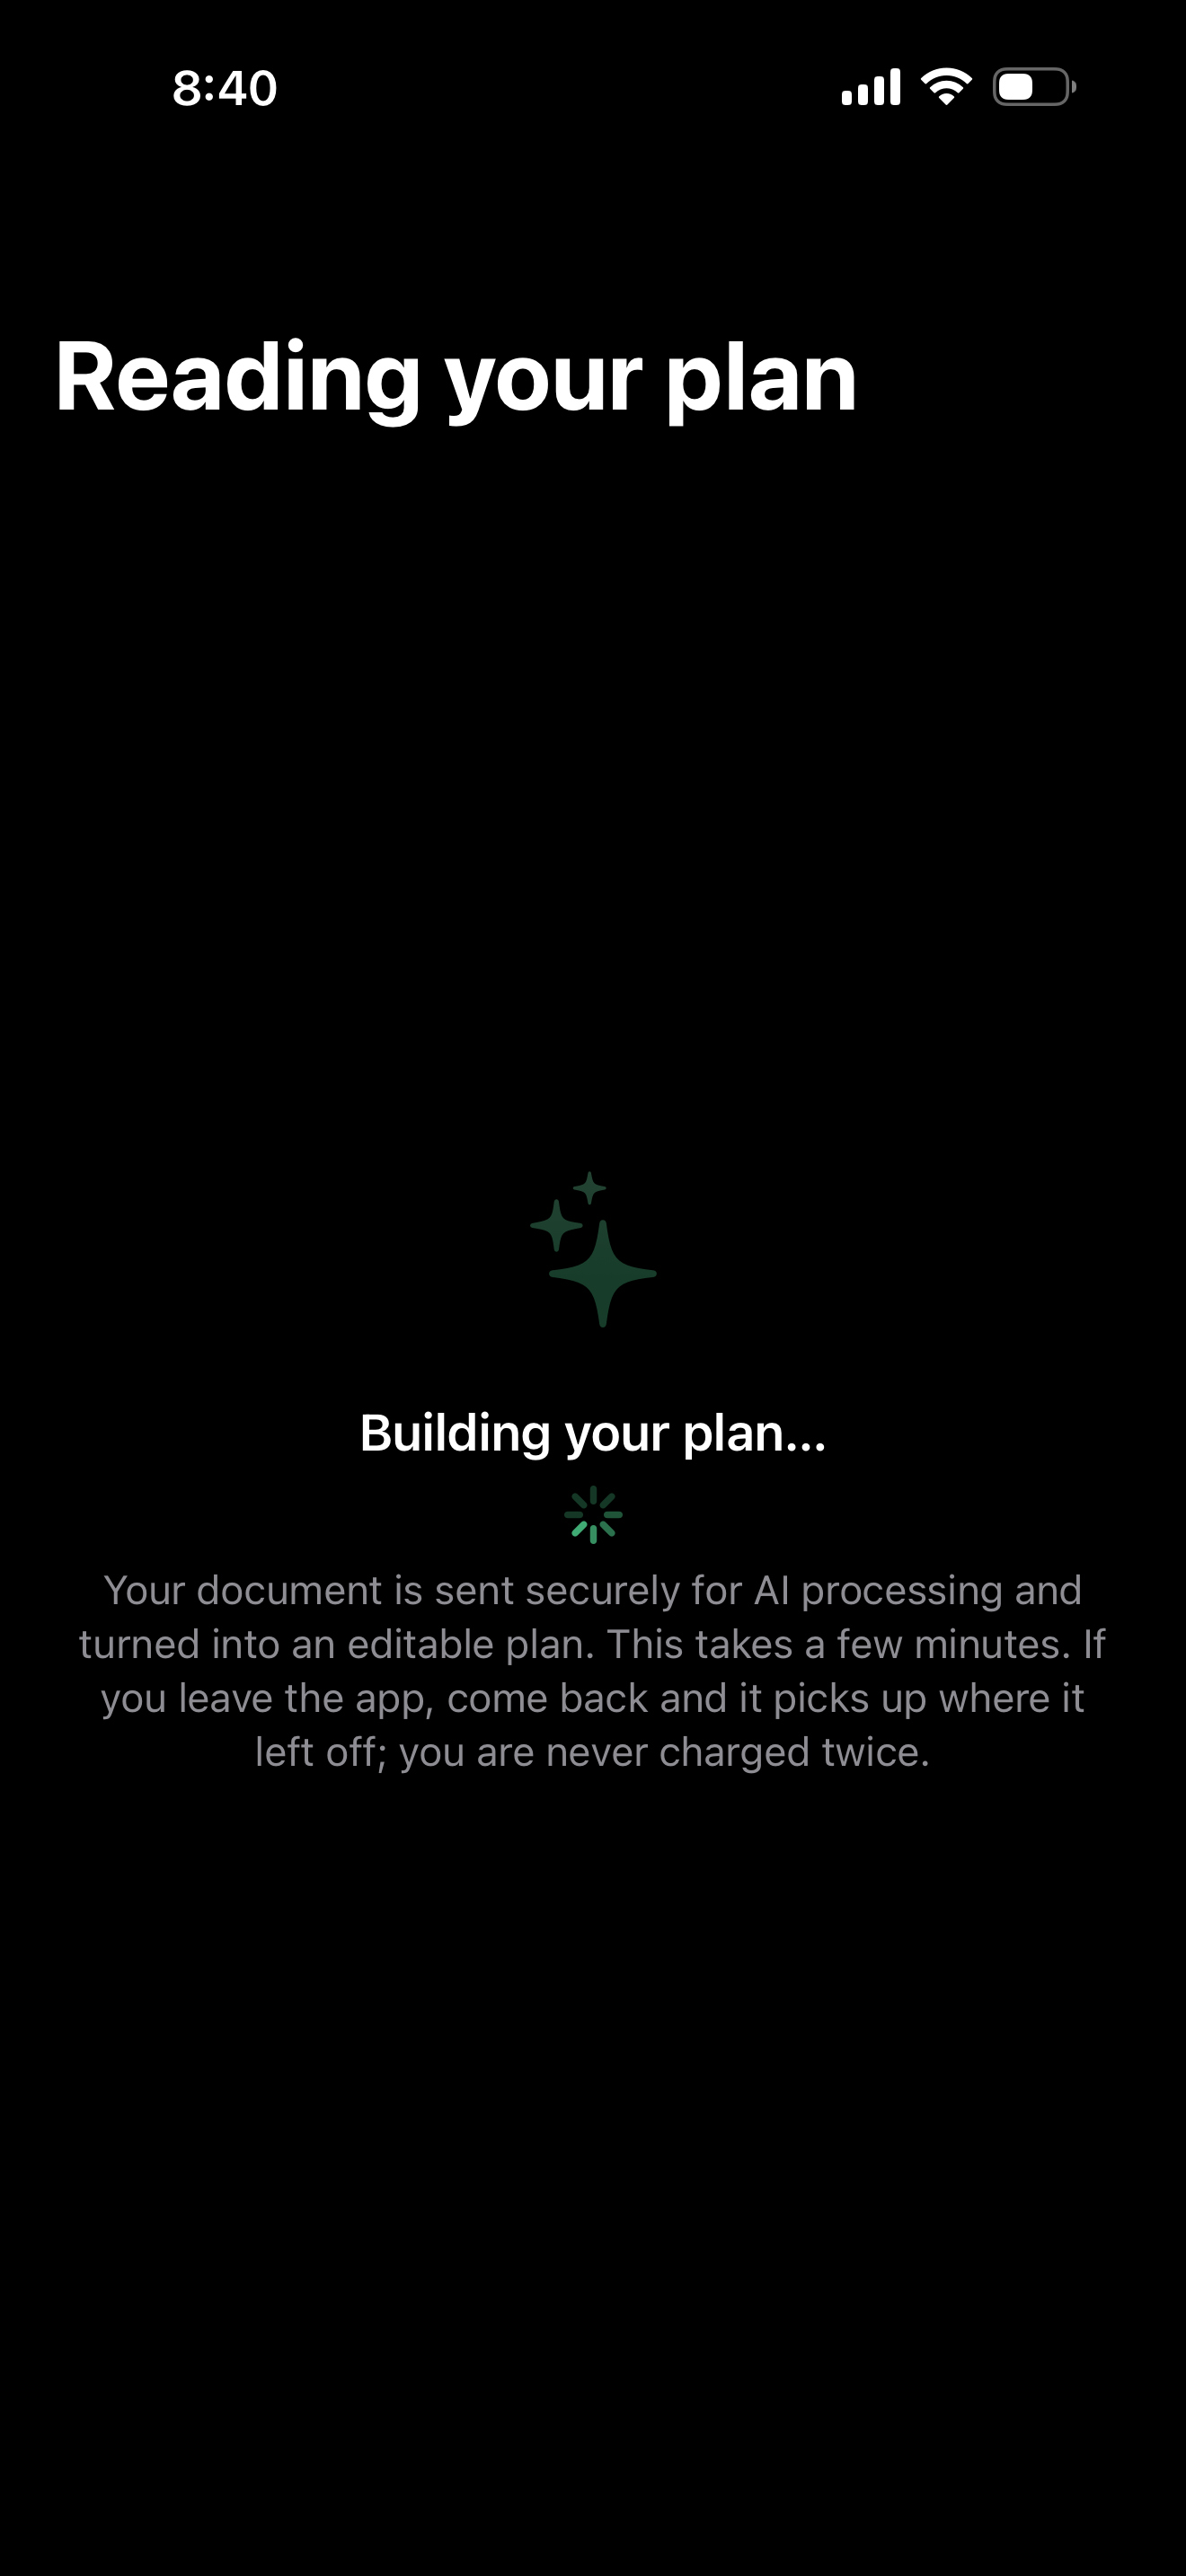
Select your file, read the processing notice, and confirm the purchase once. The building screen means the plan is still being processed. If you return to Welcome or processing stalls, use the recovery steps in the FAQ before purchasing again.
02
Make the plan yours before saving.
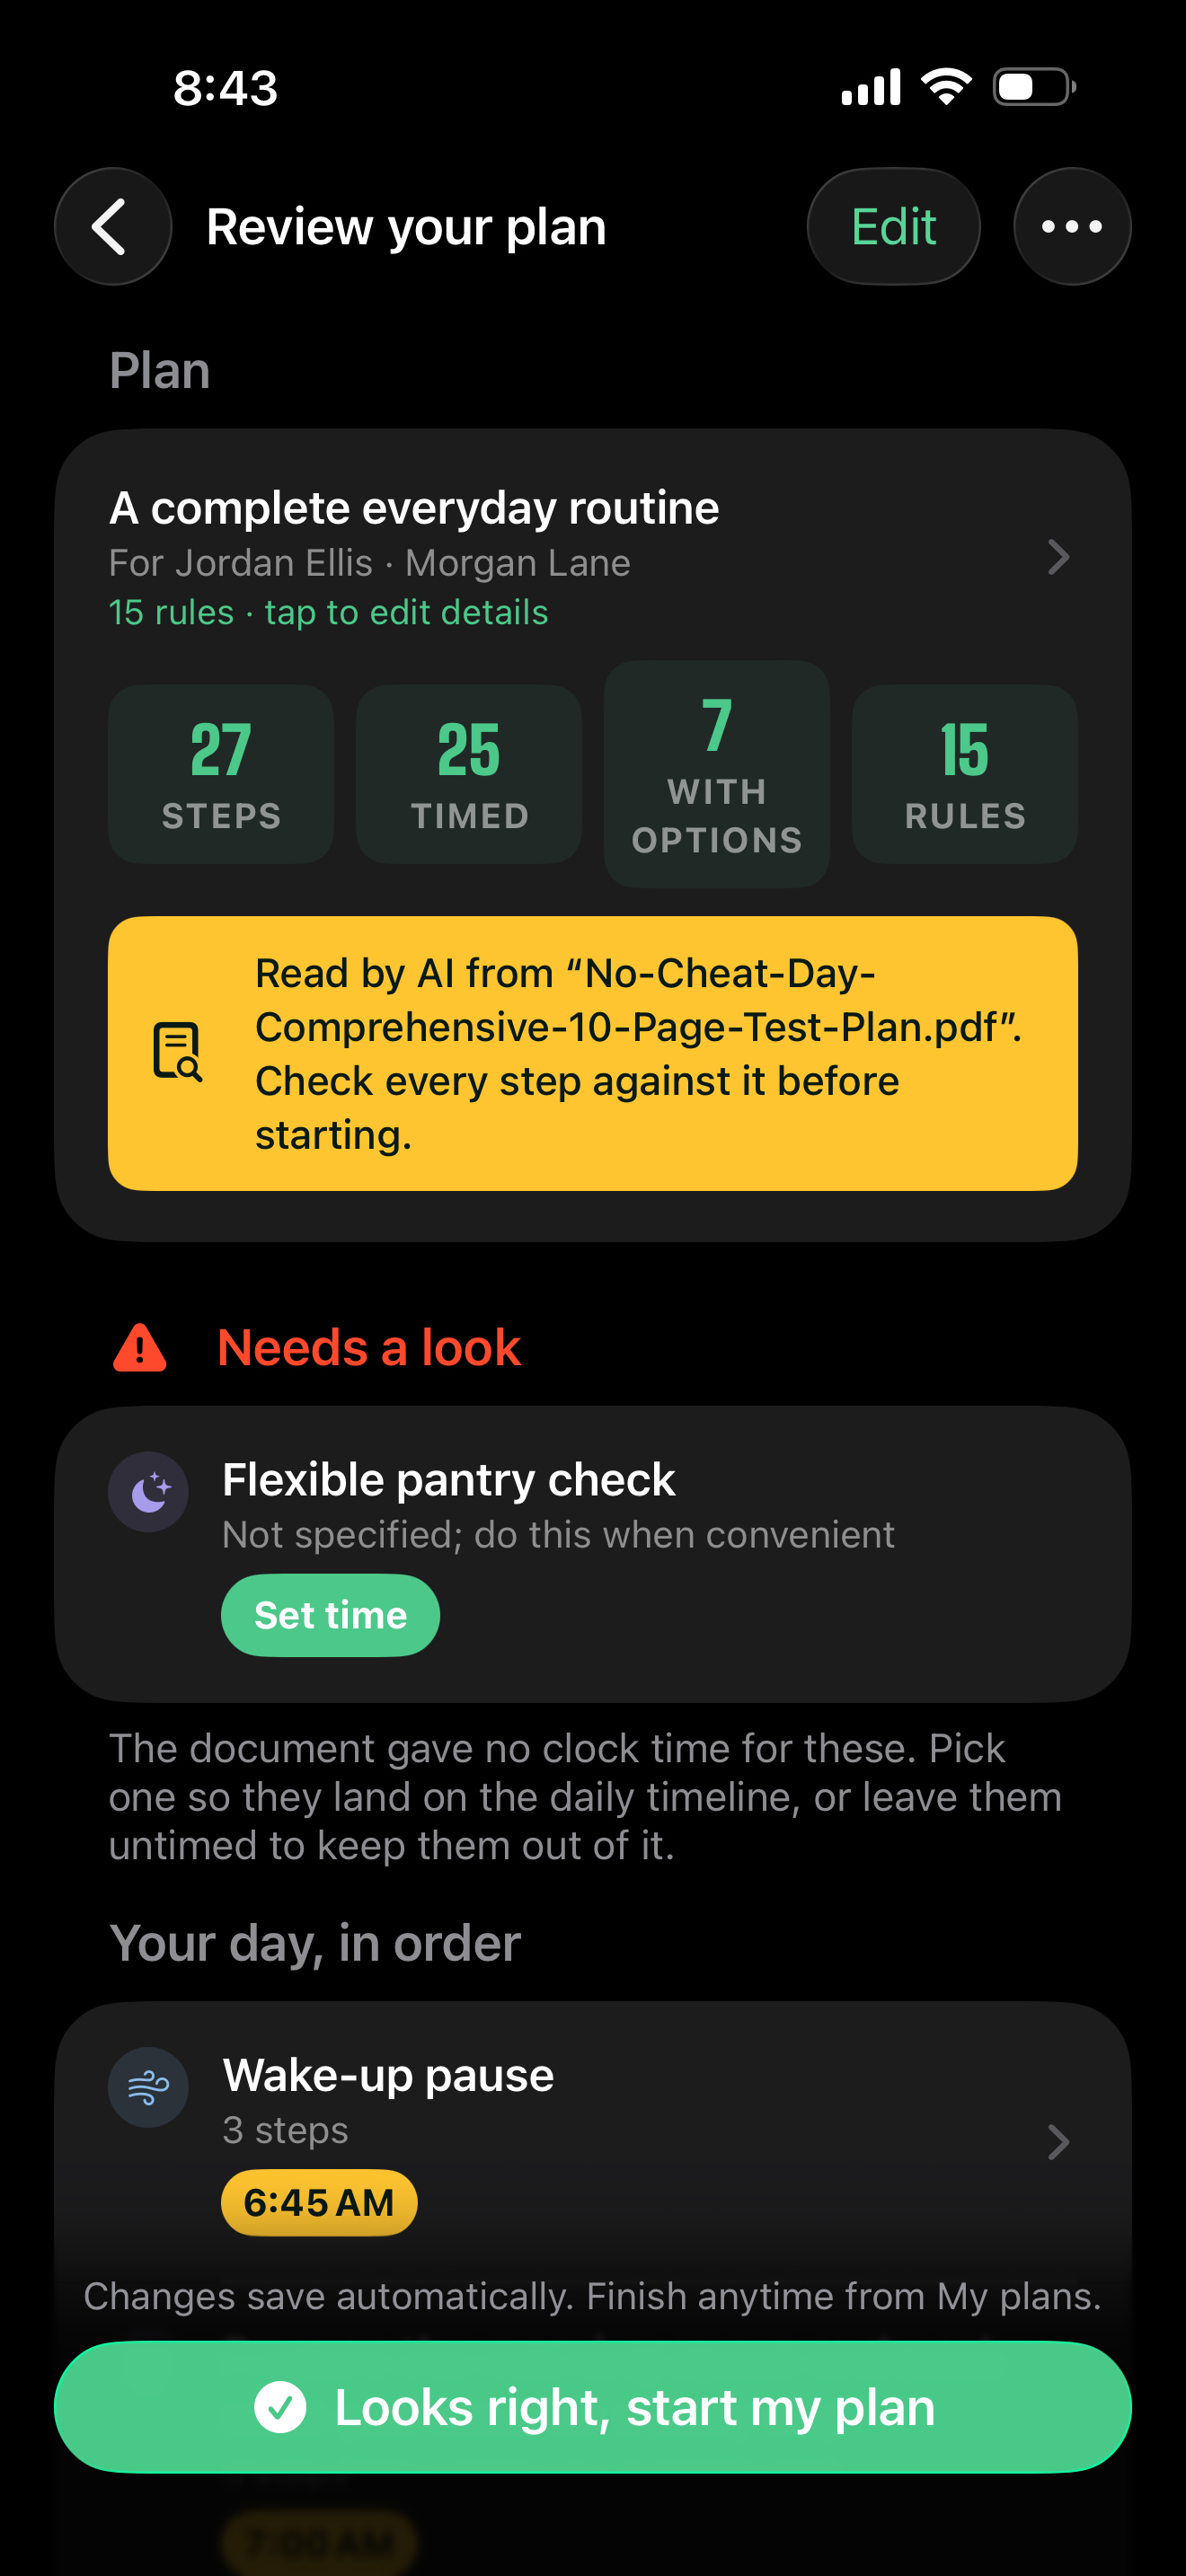
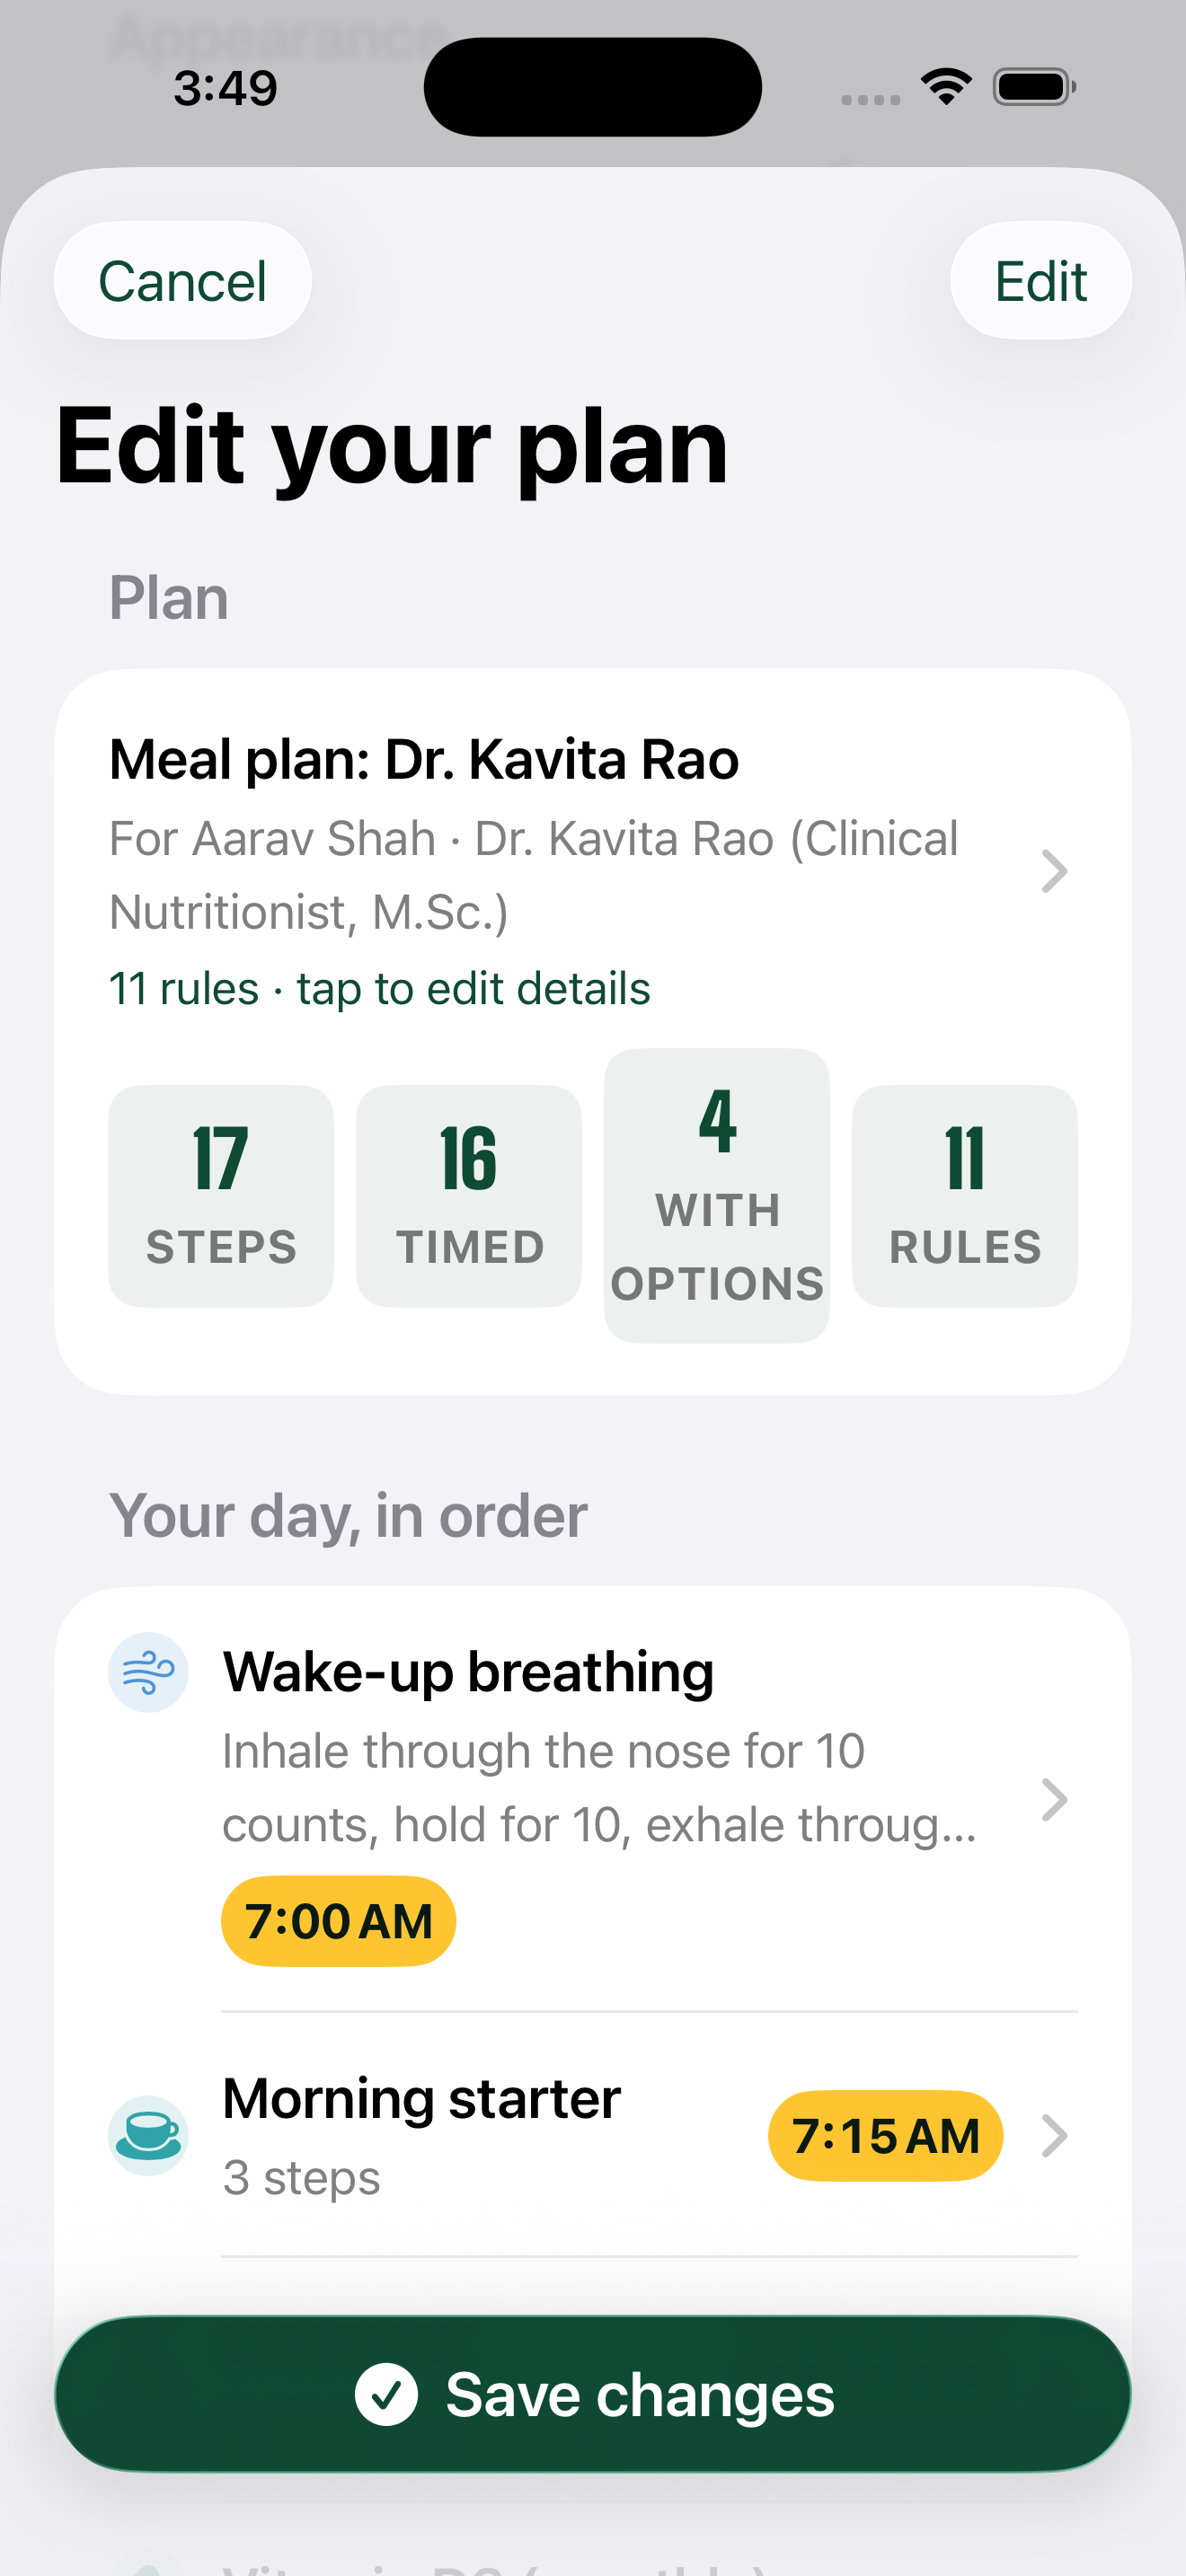
The review screen is where you verify the AI's work. Scroll through the entire plan before finishing.
- Plan details: check its name and any person or nutritionist details.
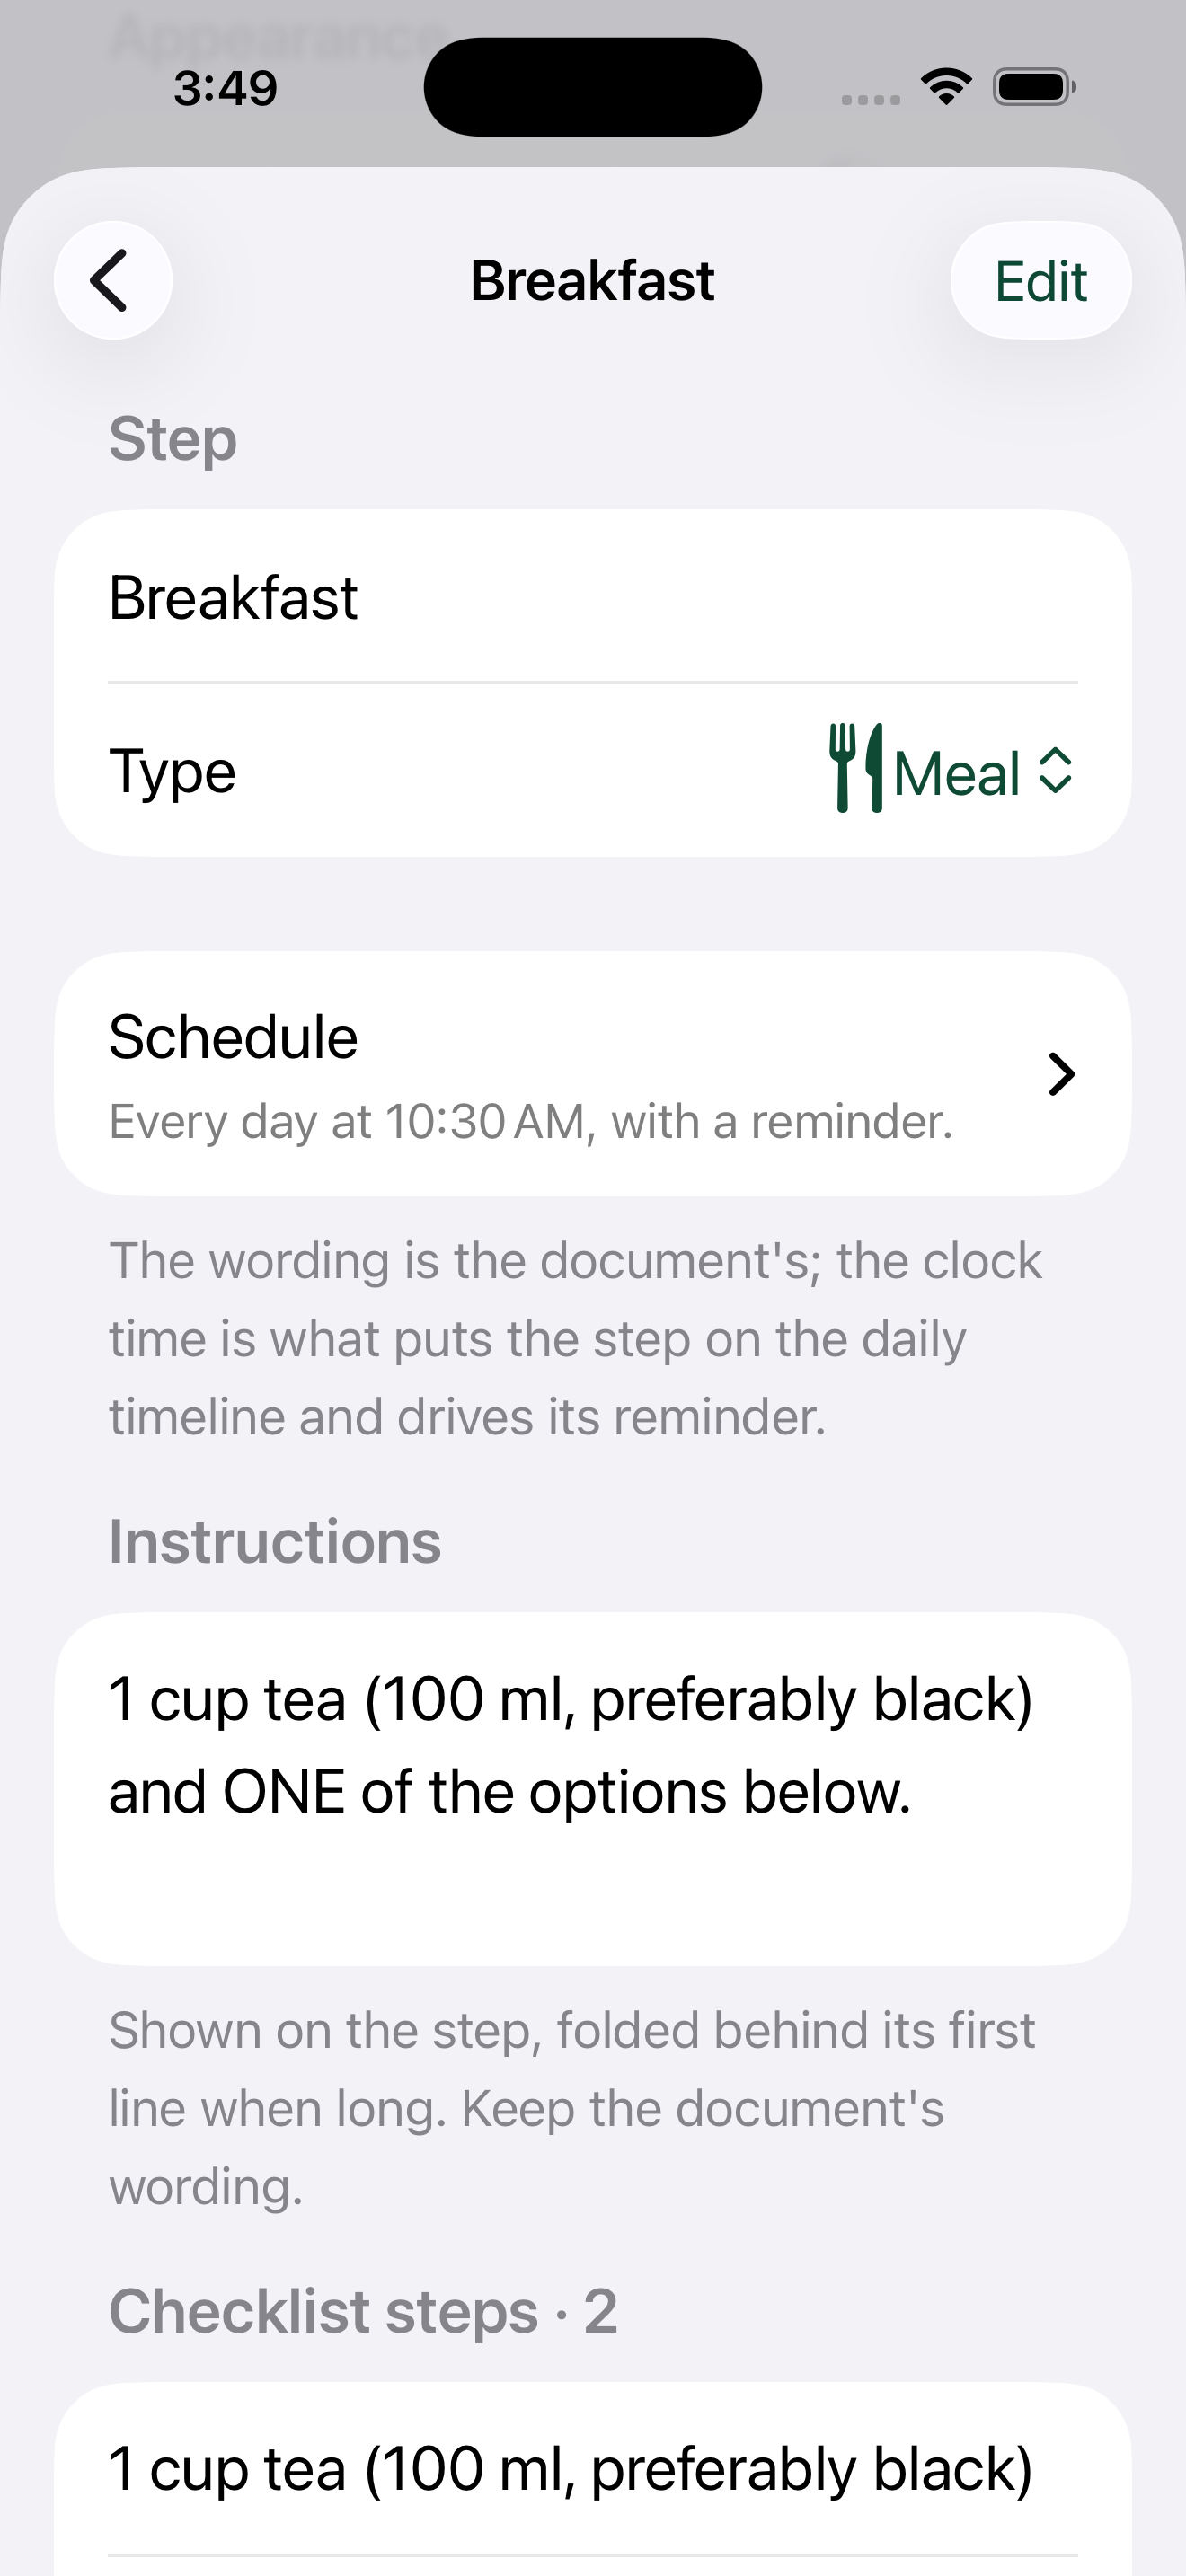
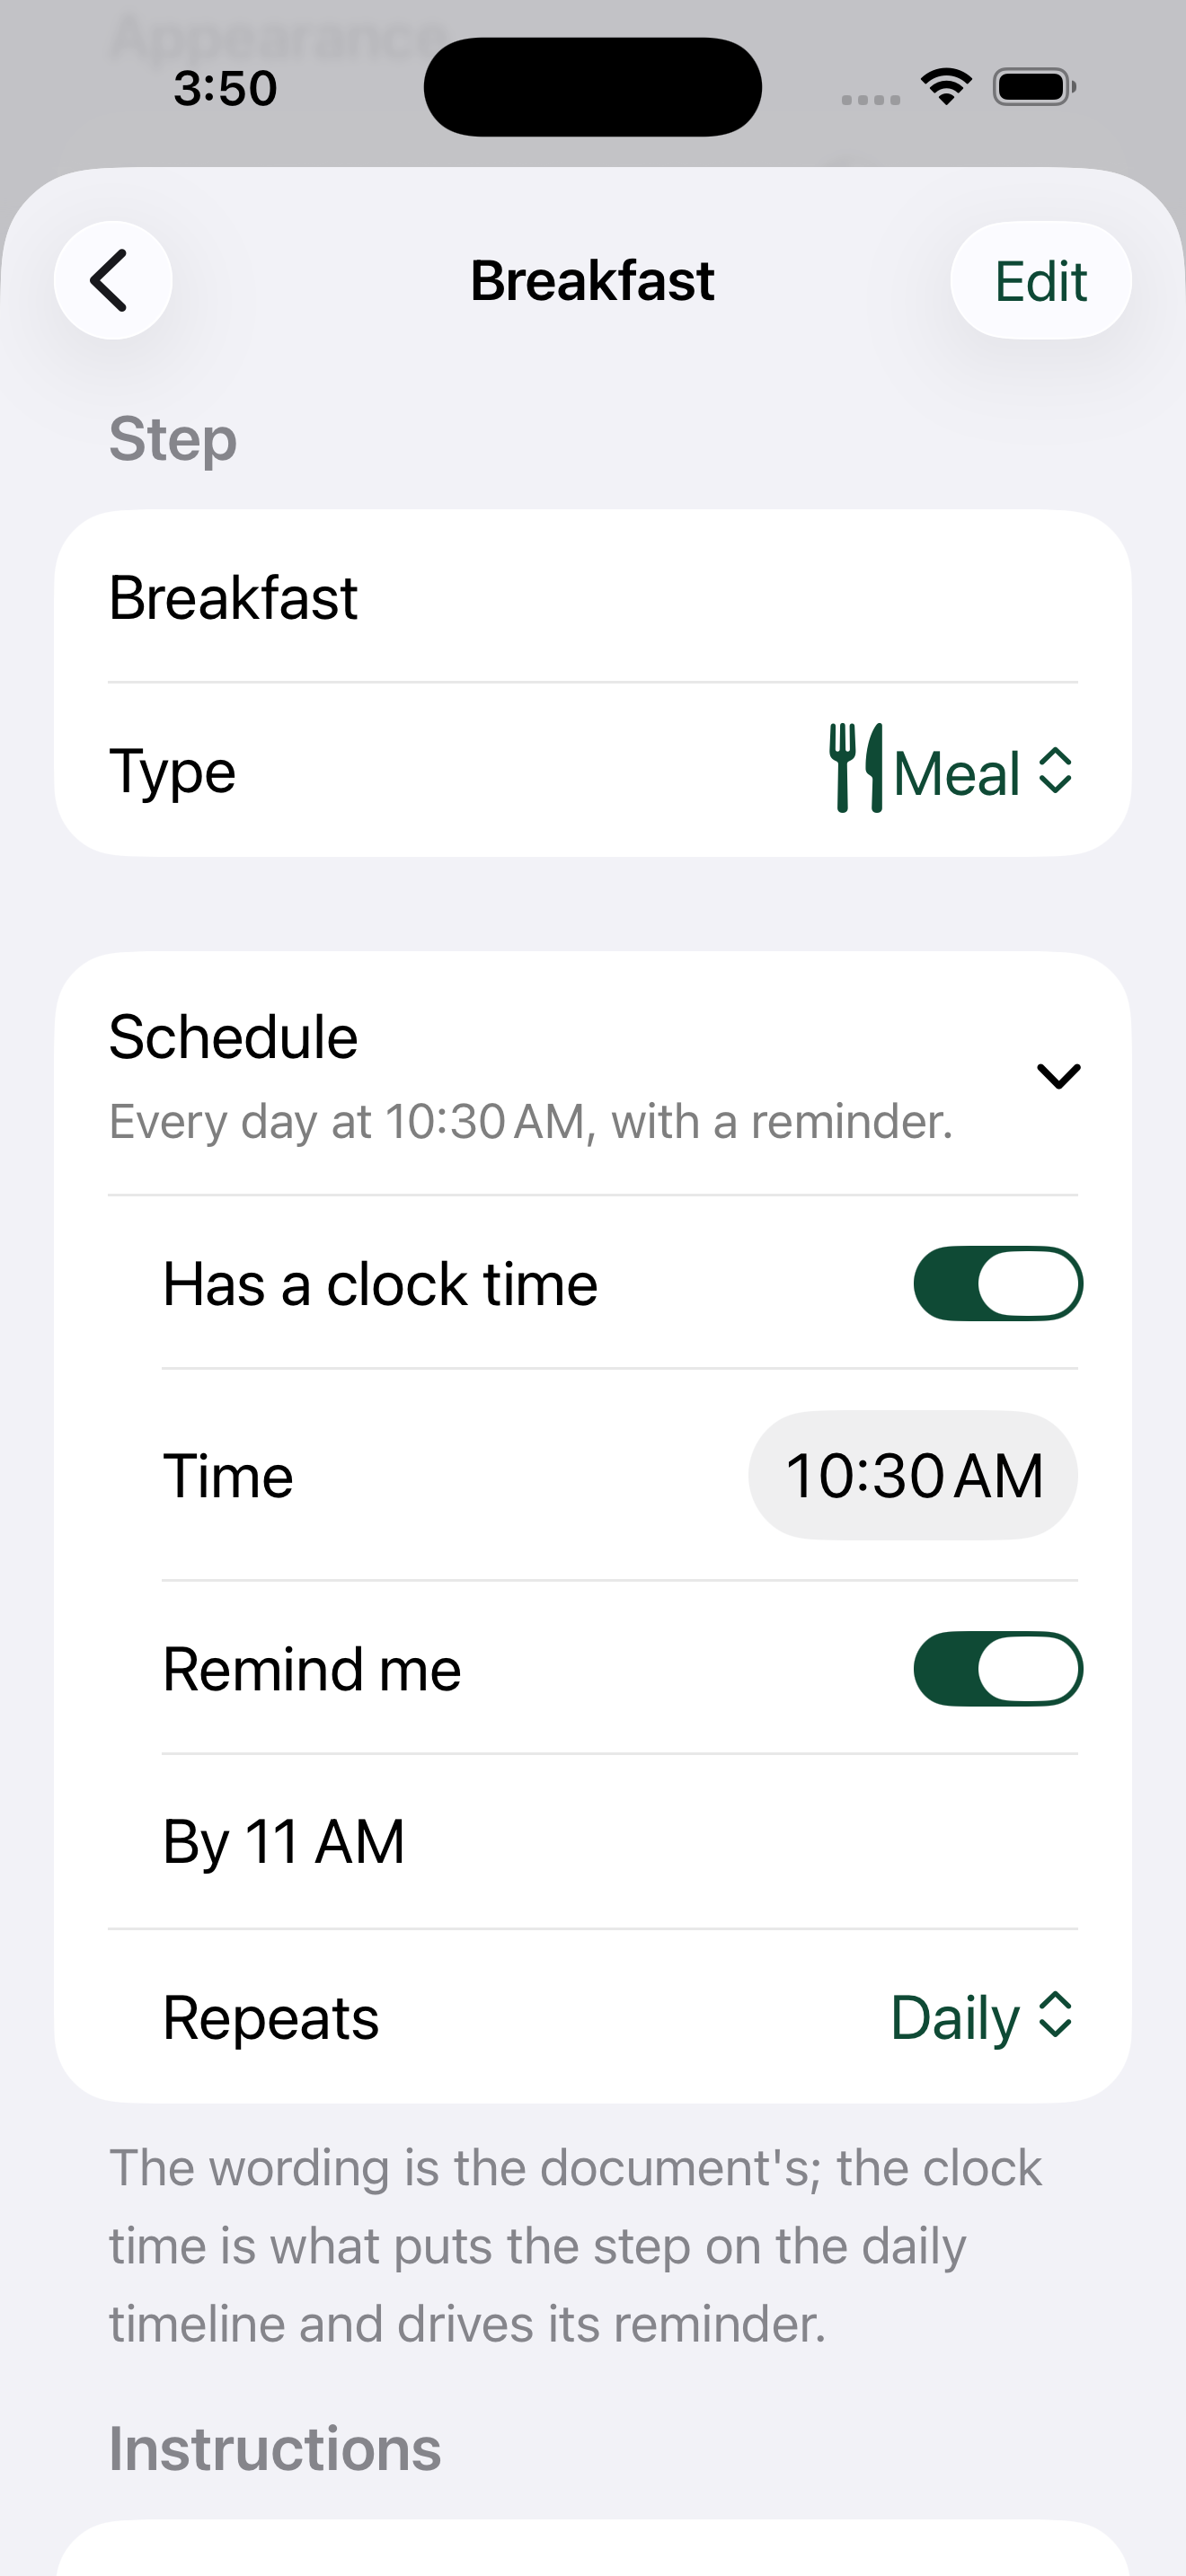
- Each step: check the title, activity type, instructions and notes. Set its time, reminder and recurrence.
- Meal alternatives: preserve the choices your plan allows. Check each option's portion, preparation notes and recipe.
- Checklists: break a routine into useful actions you can mark individually.
- Order and completeness: add missing steps and remove duplicates. A weekly task should not become a daily reminder.
A plan can include meal alternatives, recipes and routines that repeat on specific days. These illustrate the editor; follow your own professional's plan.
Tap Looks right, start my plan (or Start my plan at larger accessibility sizes). An imported plan awaiting review can appear under Waiting to finish in My plans. Manual work does not currently have the same durable draft recovery, so finish saving before leaving it.
Check the order and fill in missing times.
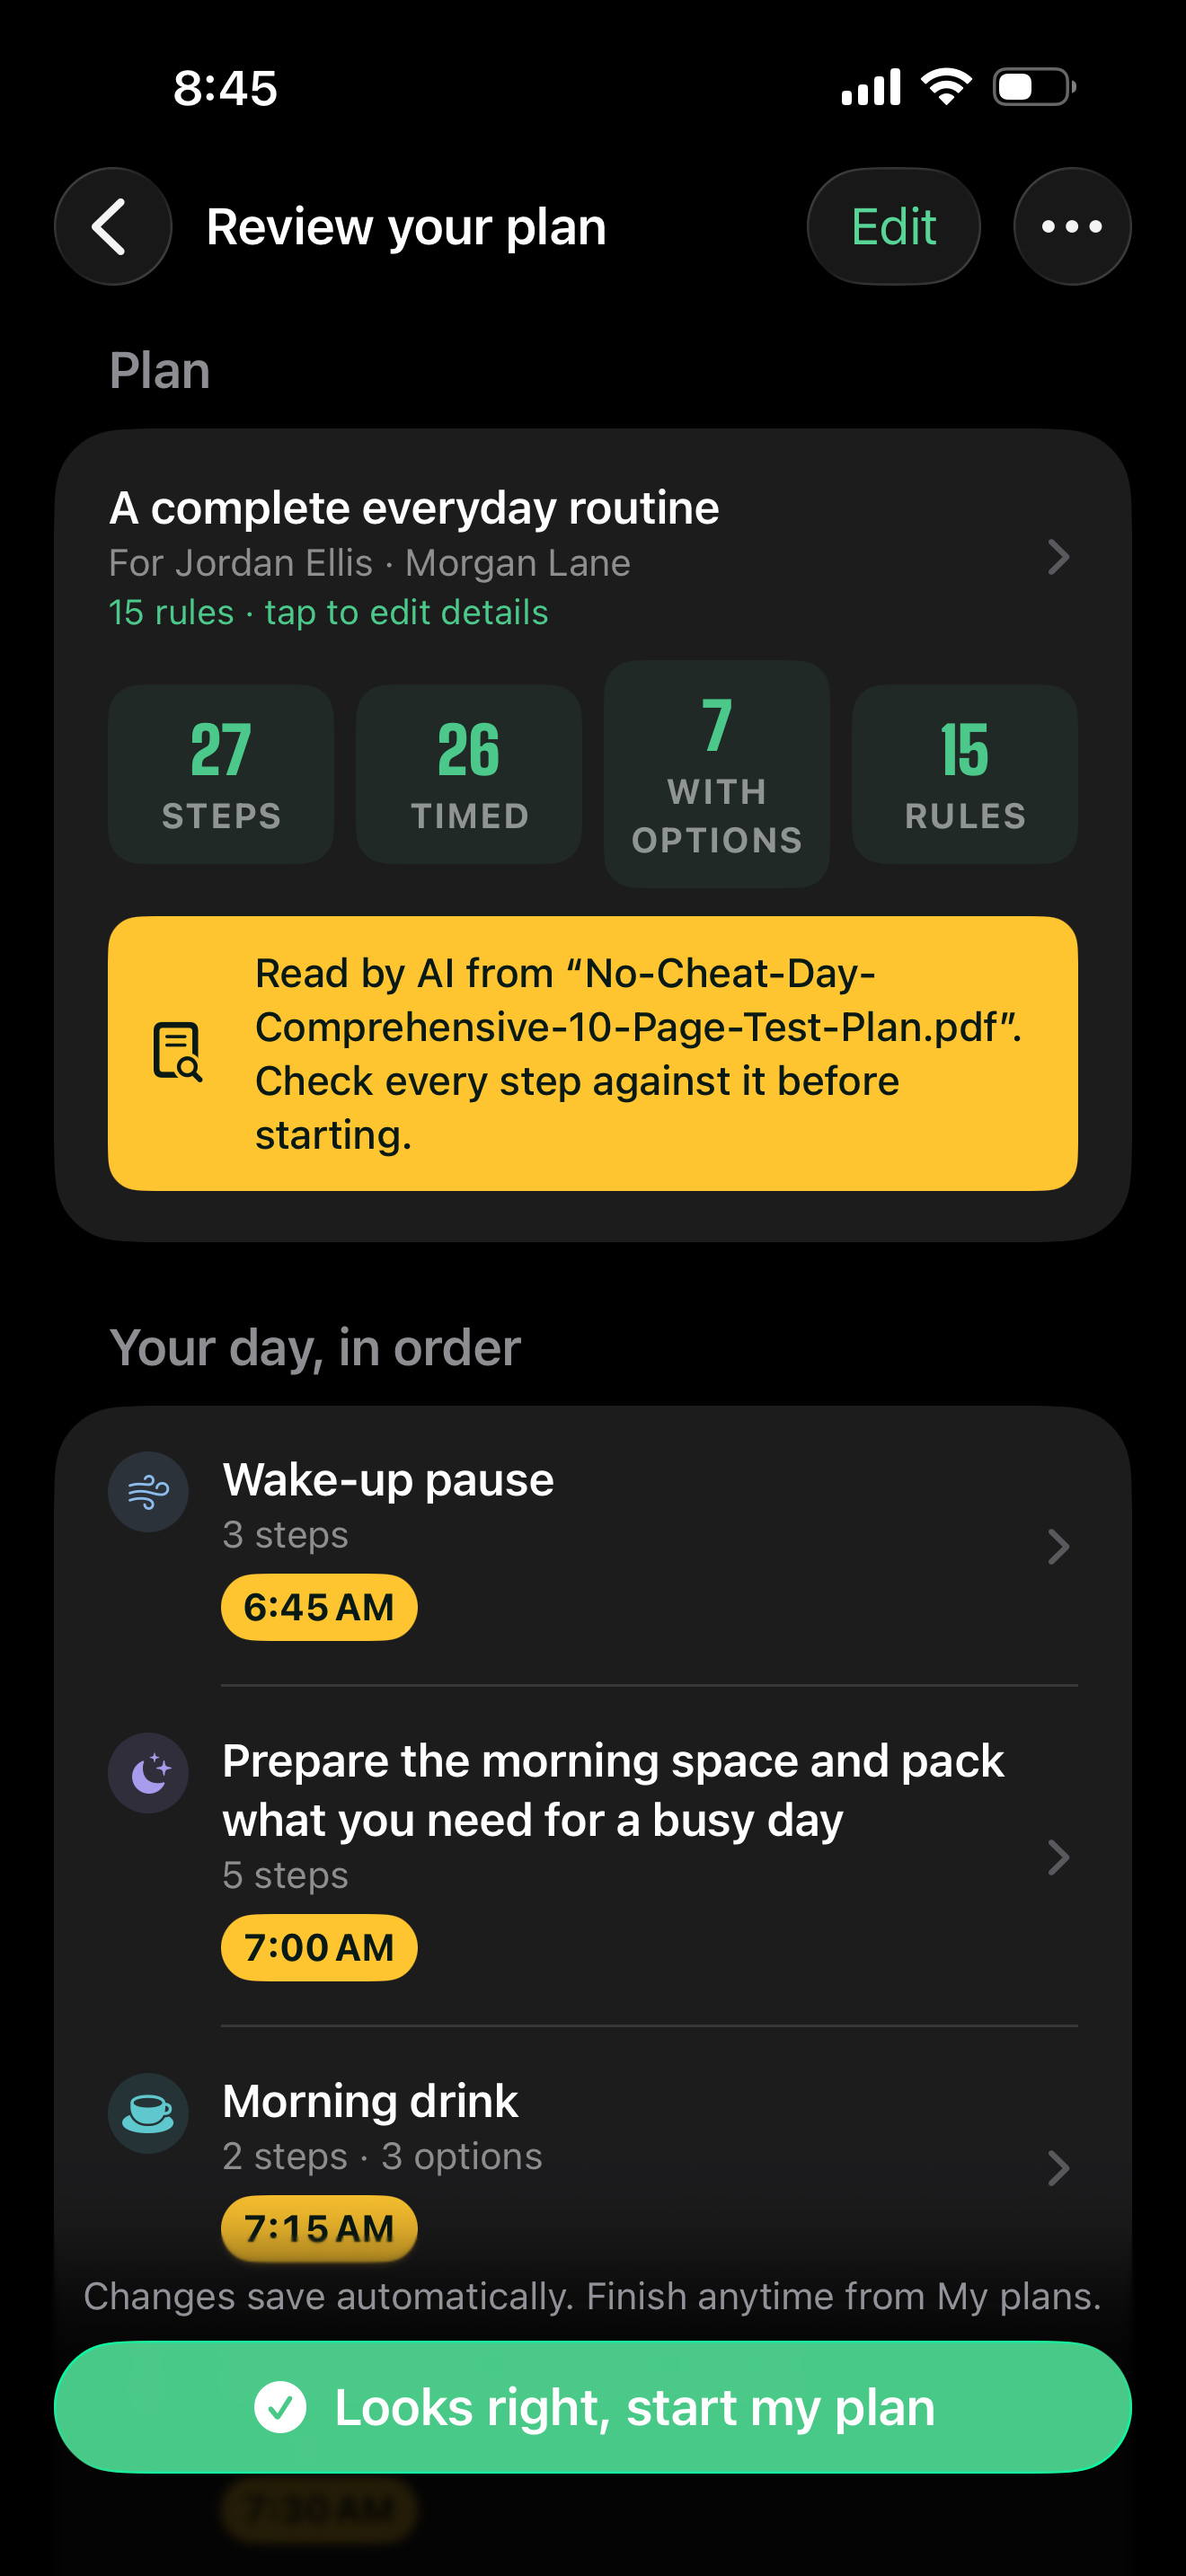
This imported example shows 27 activities. The pantry check has no time in the source, so it appears under Needs a look. Tap Set time, choose a suitable time and tap Use this time. The number of timed steps increases from 25 to 26; all-day hydration remains untimed. Check meal choices, quantities, recipes and recurrence before starting.


03
Follow one step at a time.
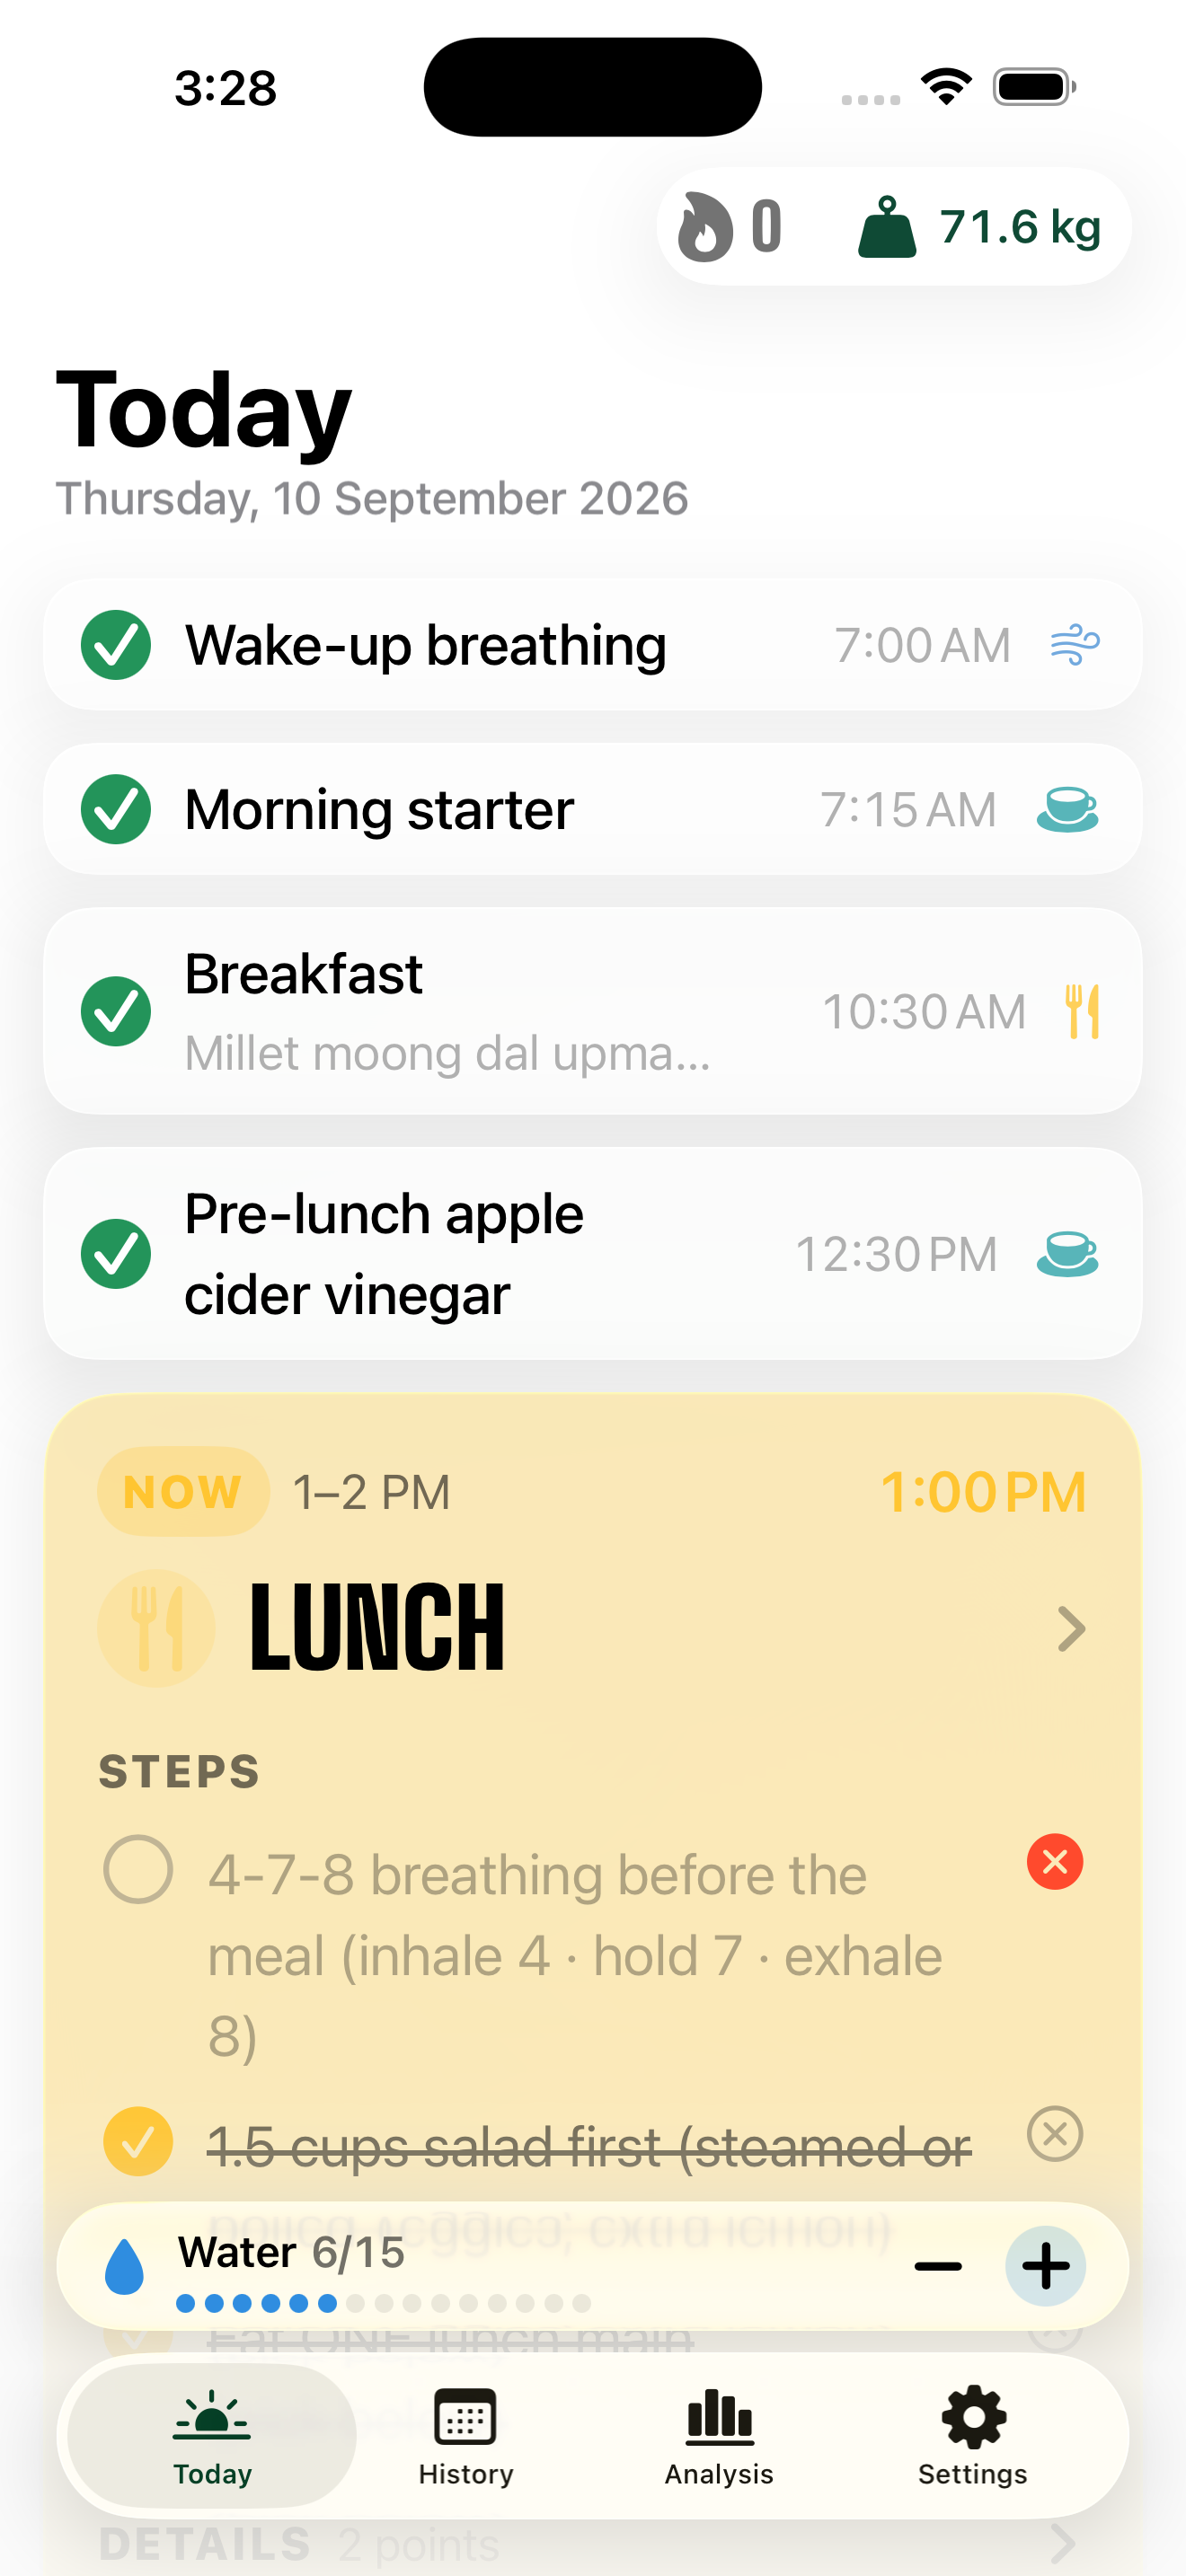
Today highlights the current step and shows what comes next. Open a card for its full instructions, options and notes.
- Tap Done when you complete a step.
- Tap Skip when you do not follow it.
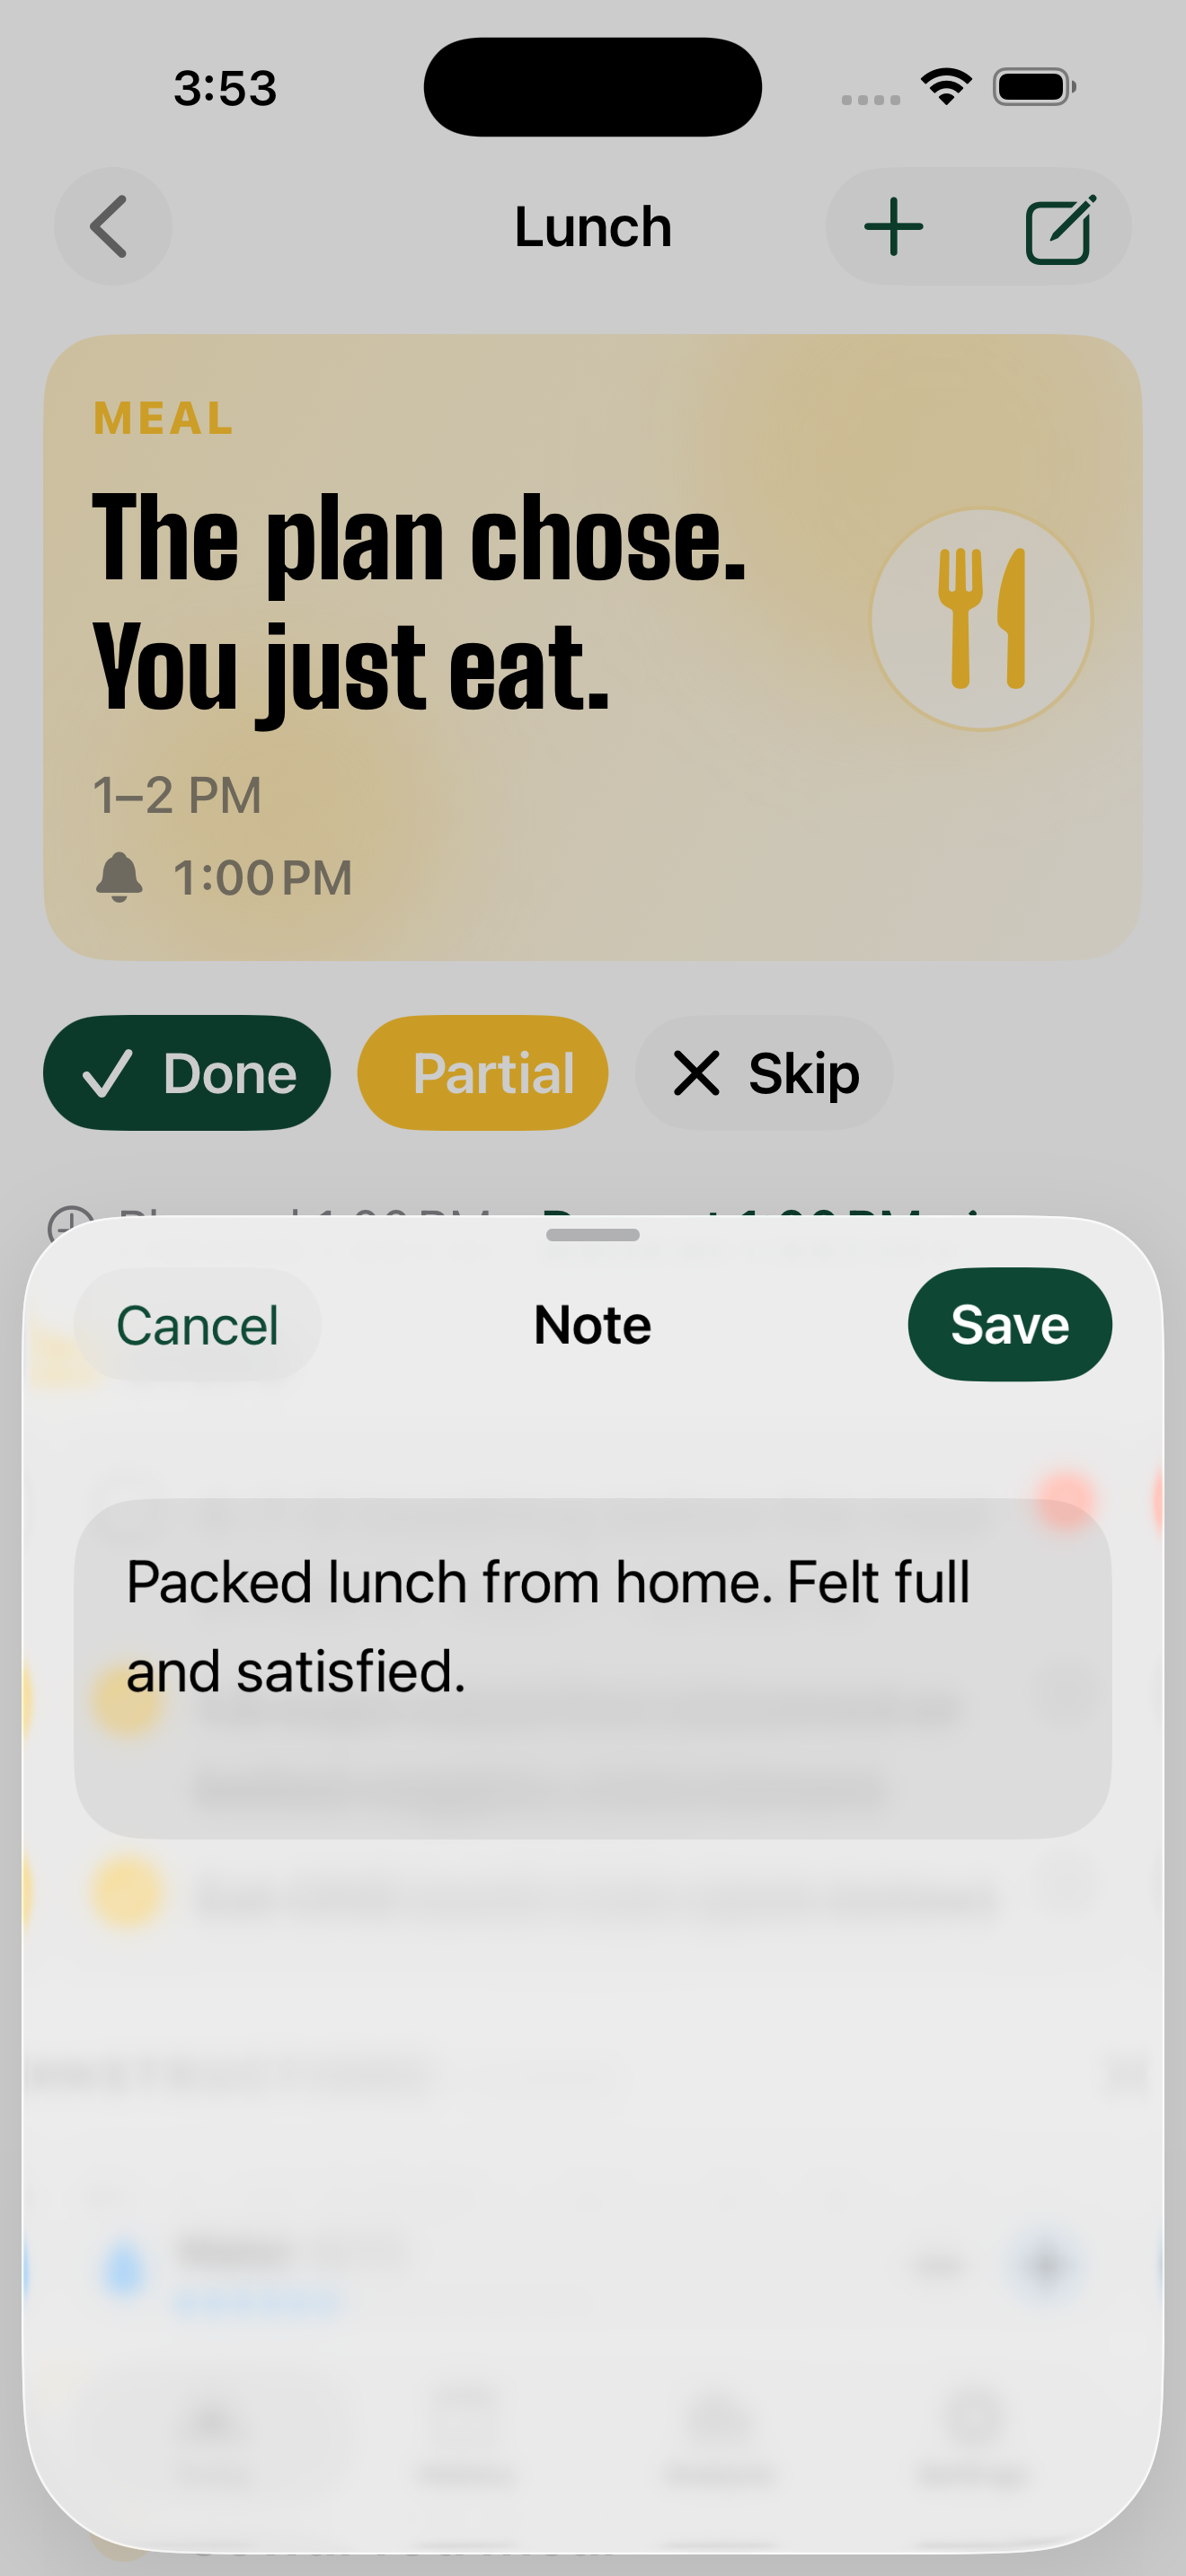
- Use the note action to record context, such as a late lunch or an ingredient swap.
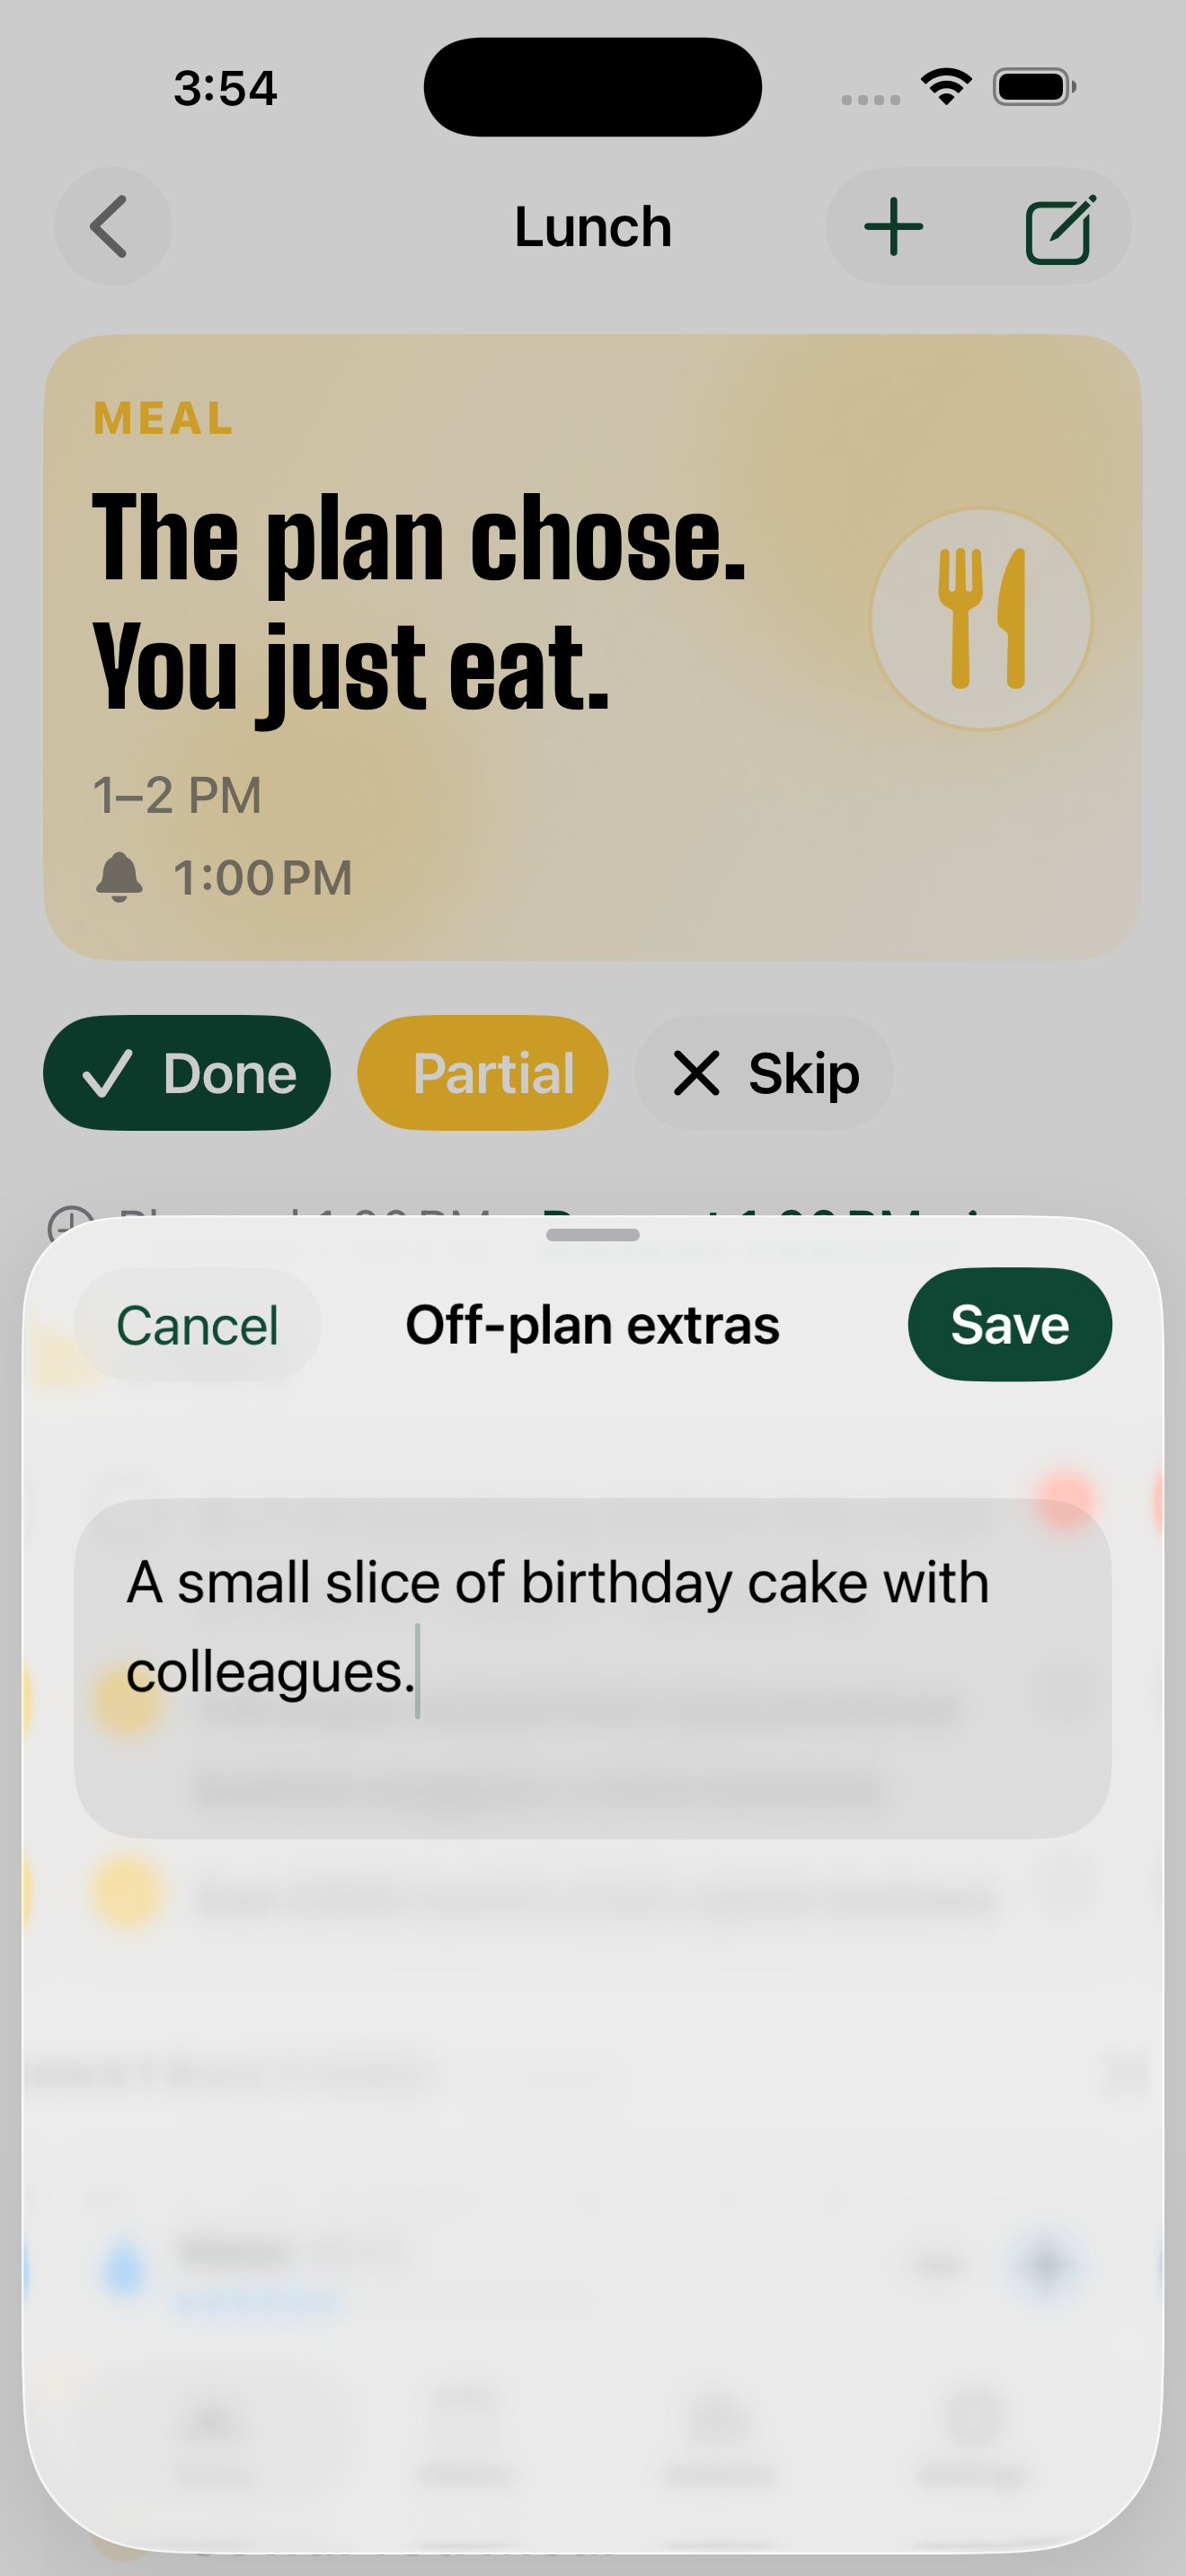
- Use + for off-plan extras, rather than replacing the original instructions.
Record what happened, not what you hoped would happen. A useful note helps you and your nutritionist understand the day. If you marked something incorrectly, reopen the step and correct its state.
04
Keep options, portions and recipes together.
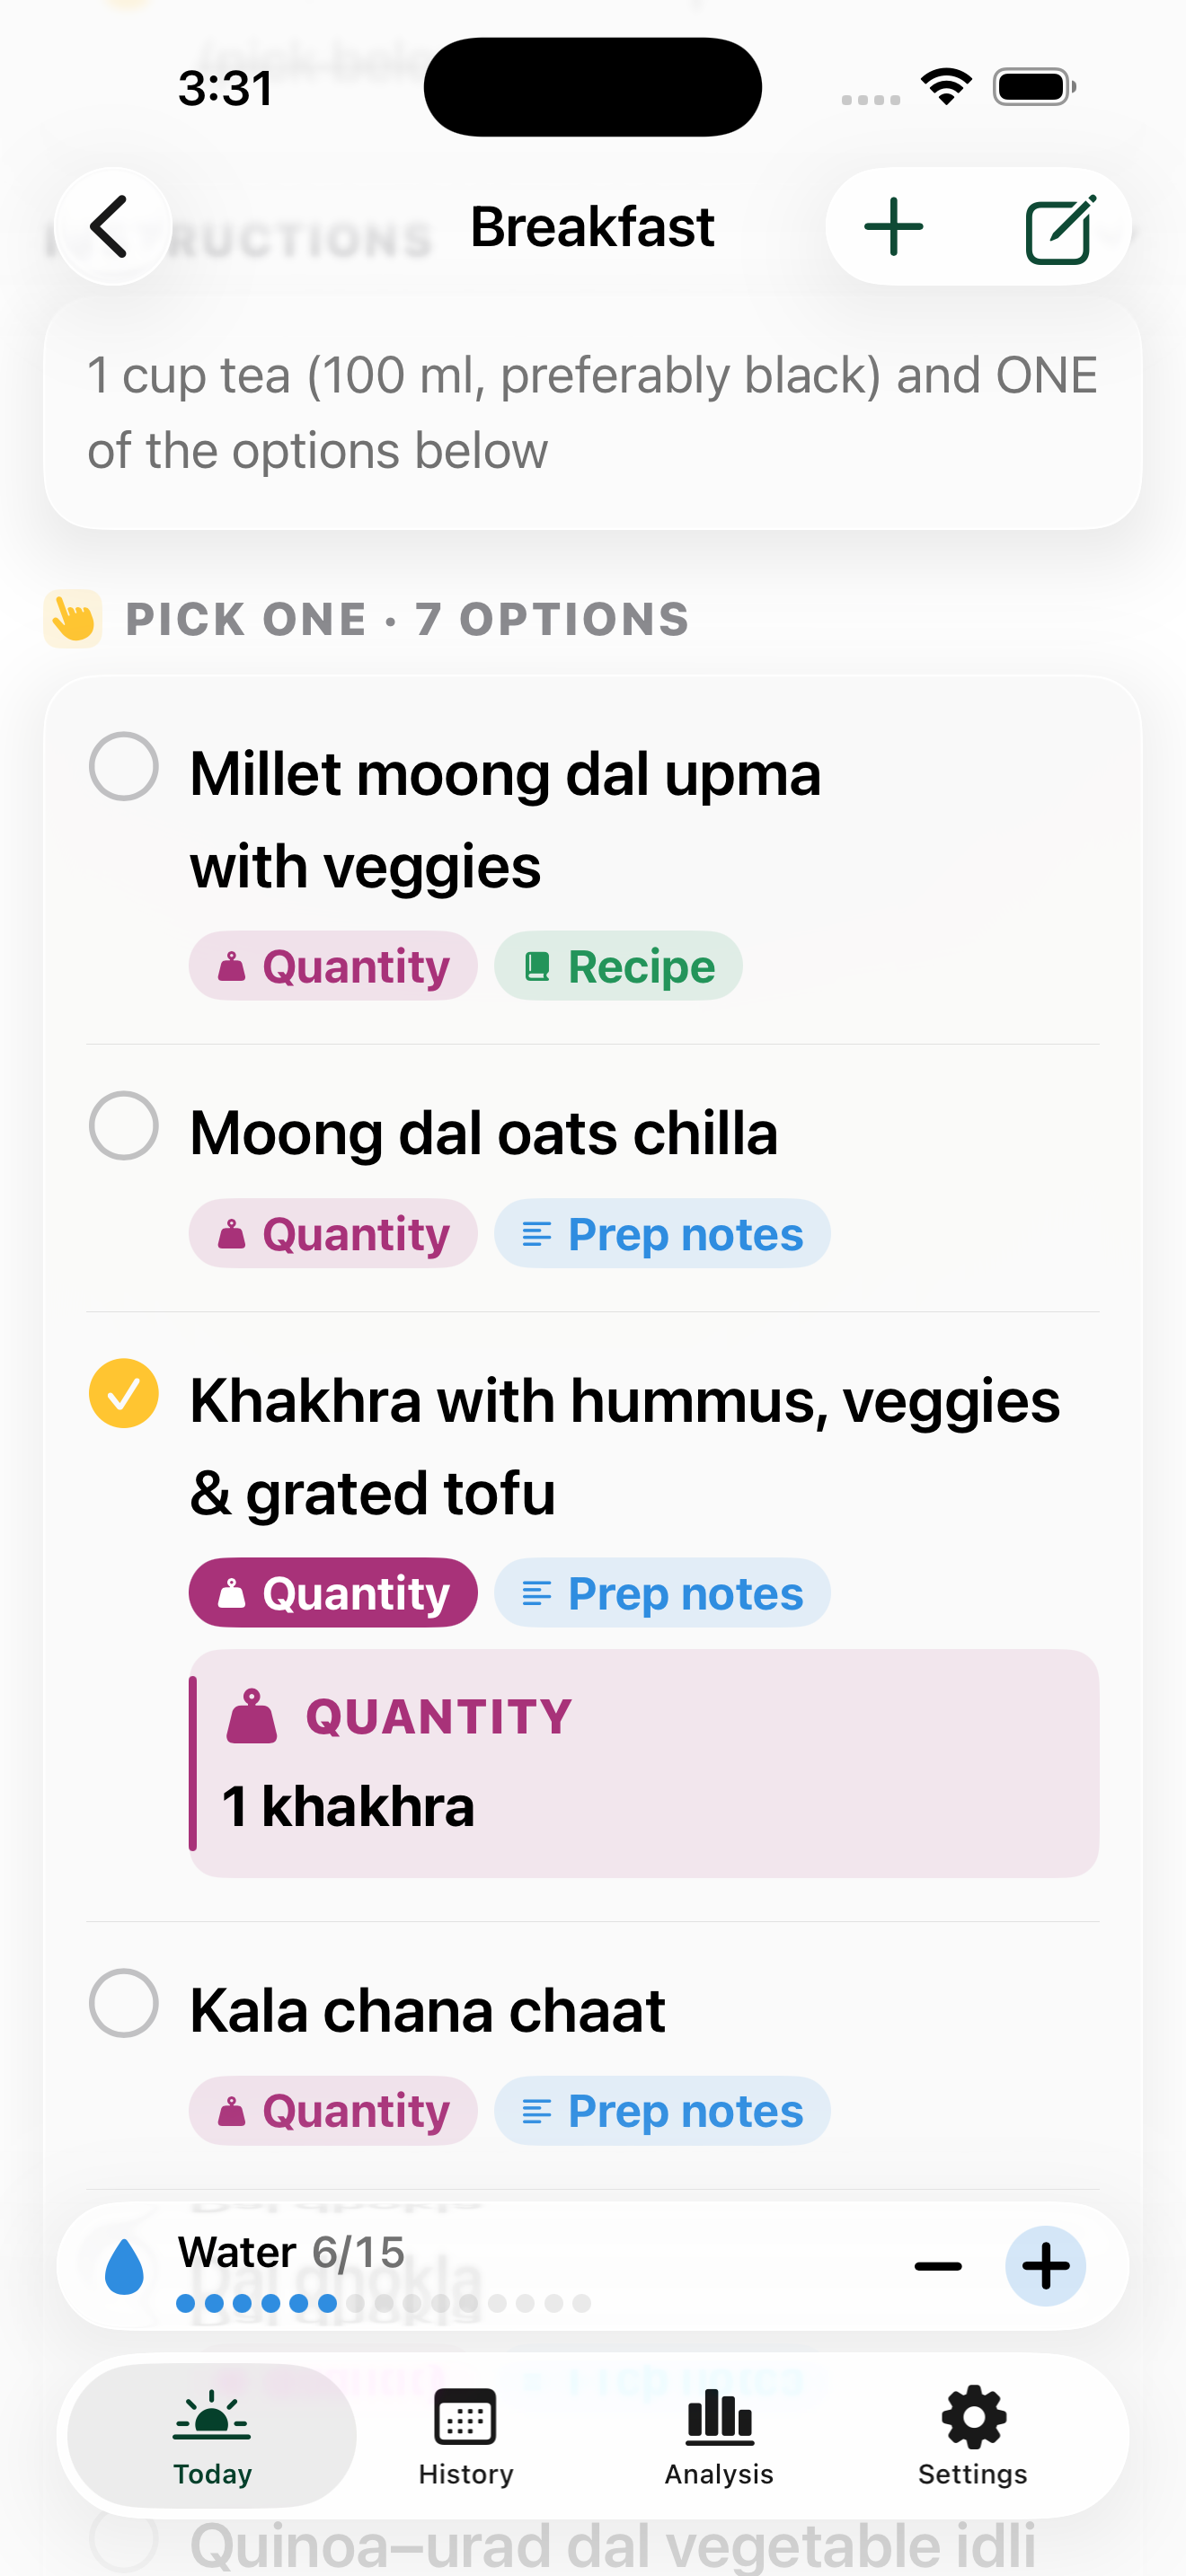
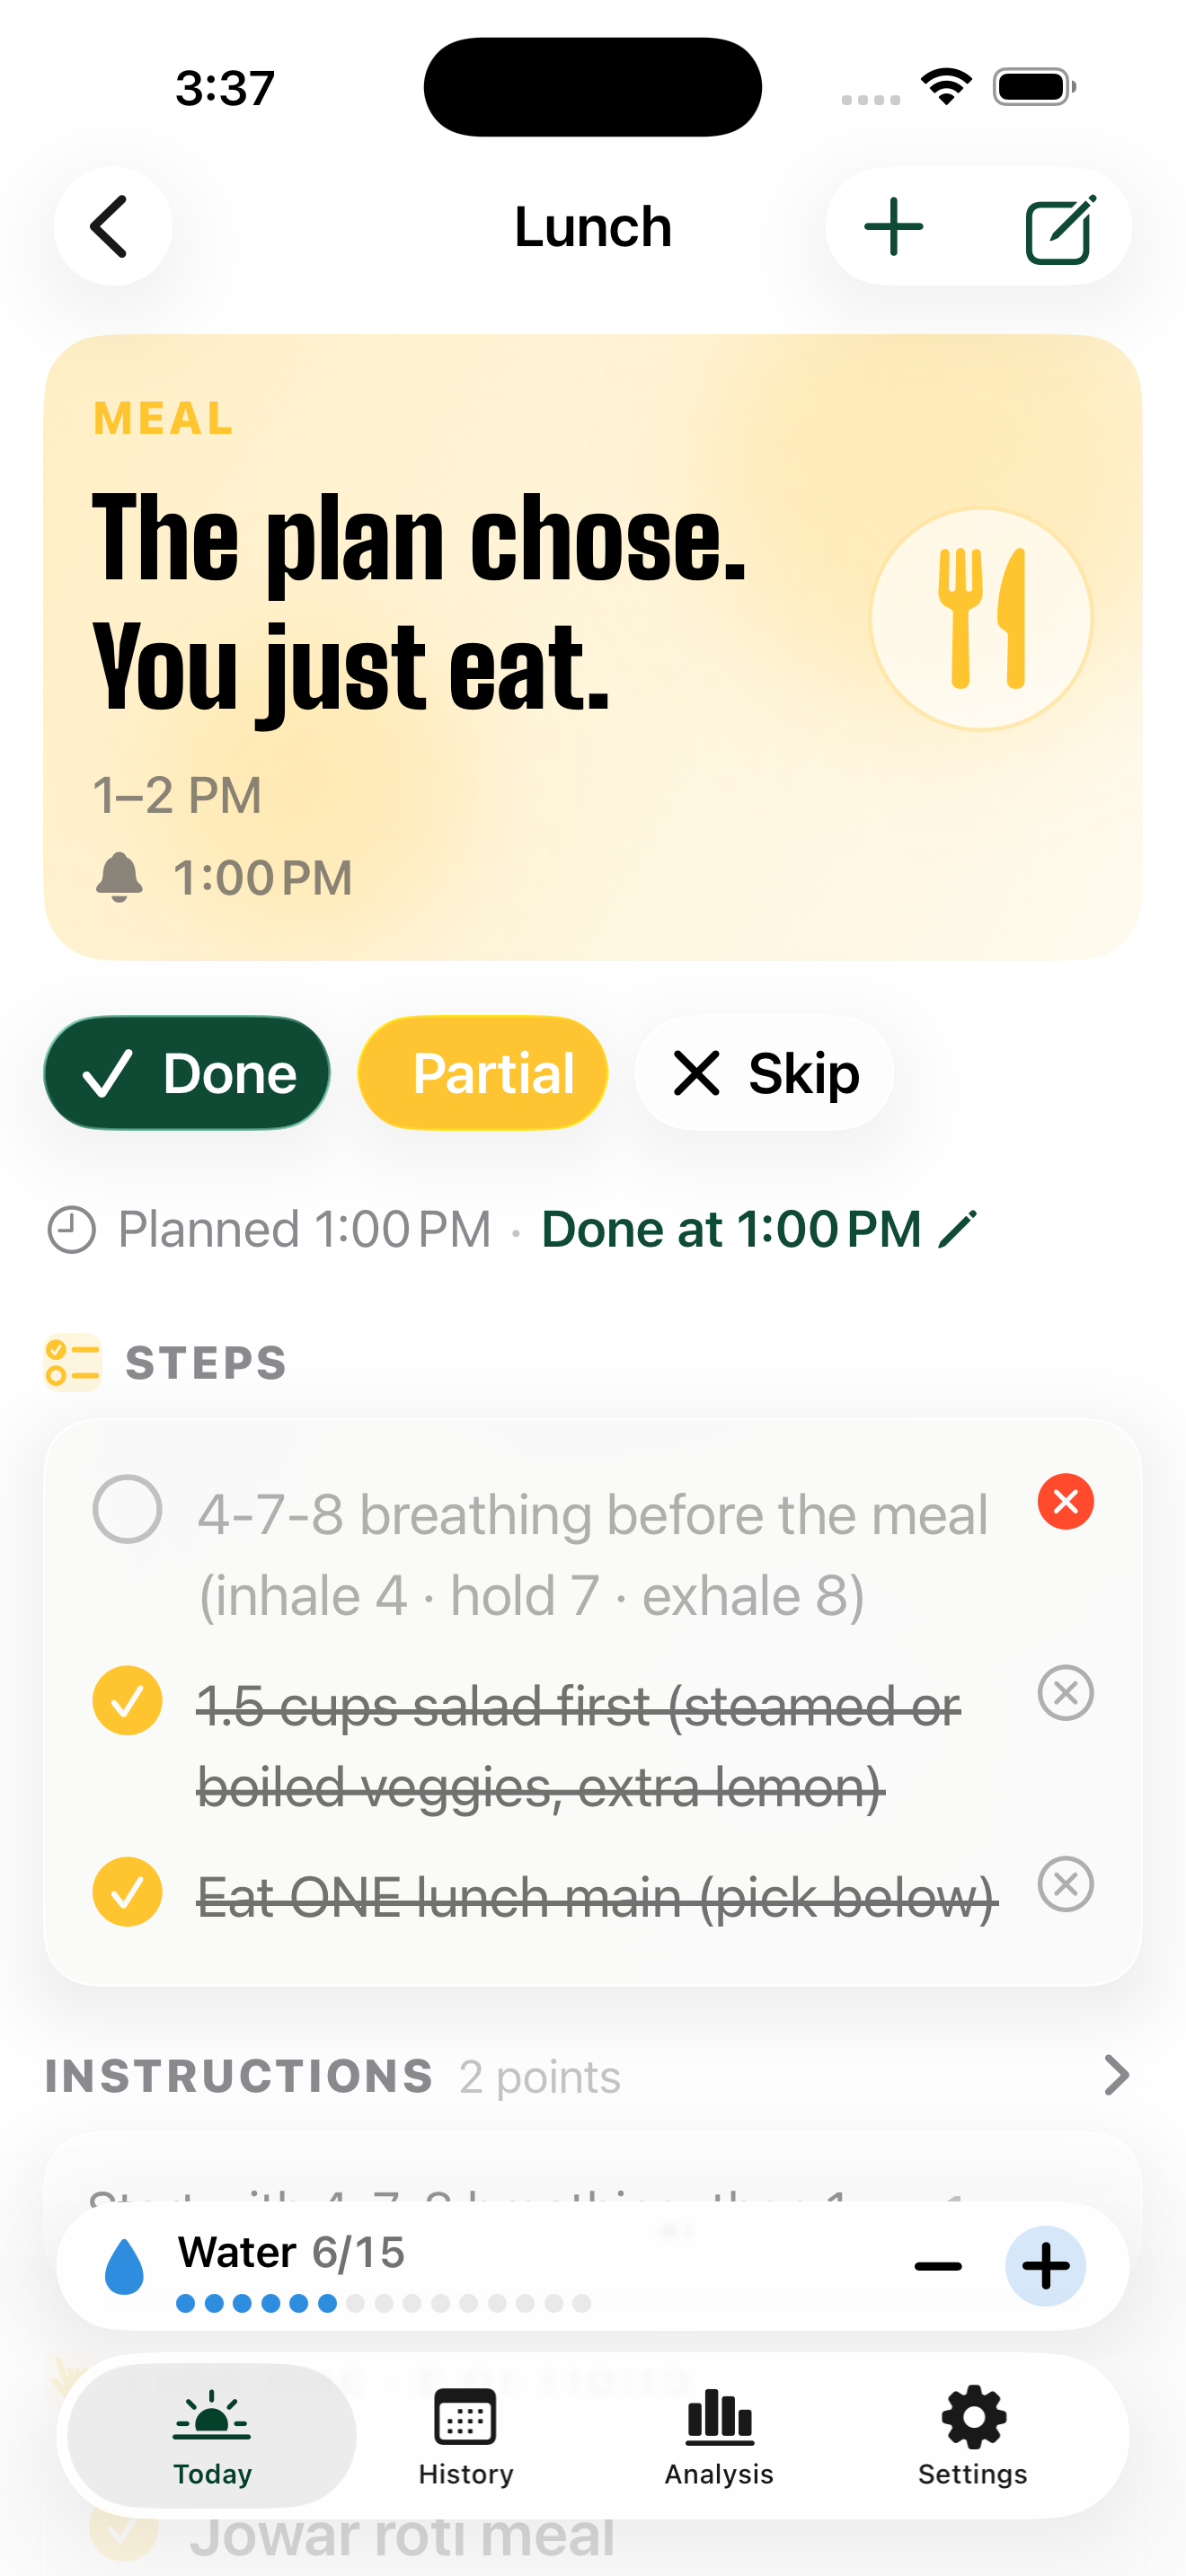
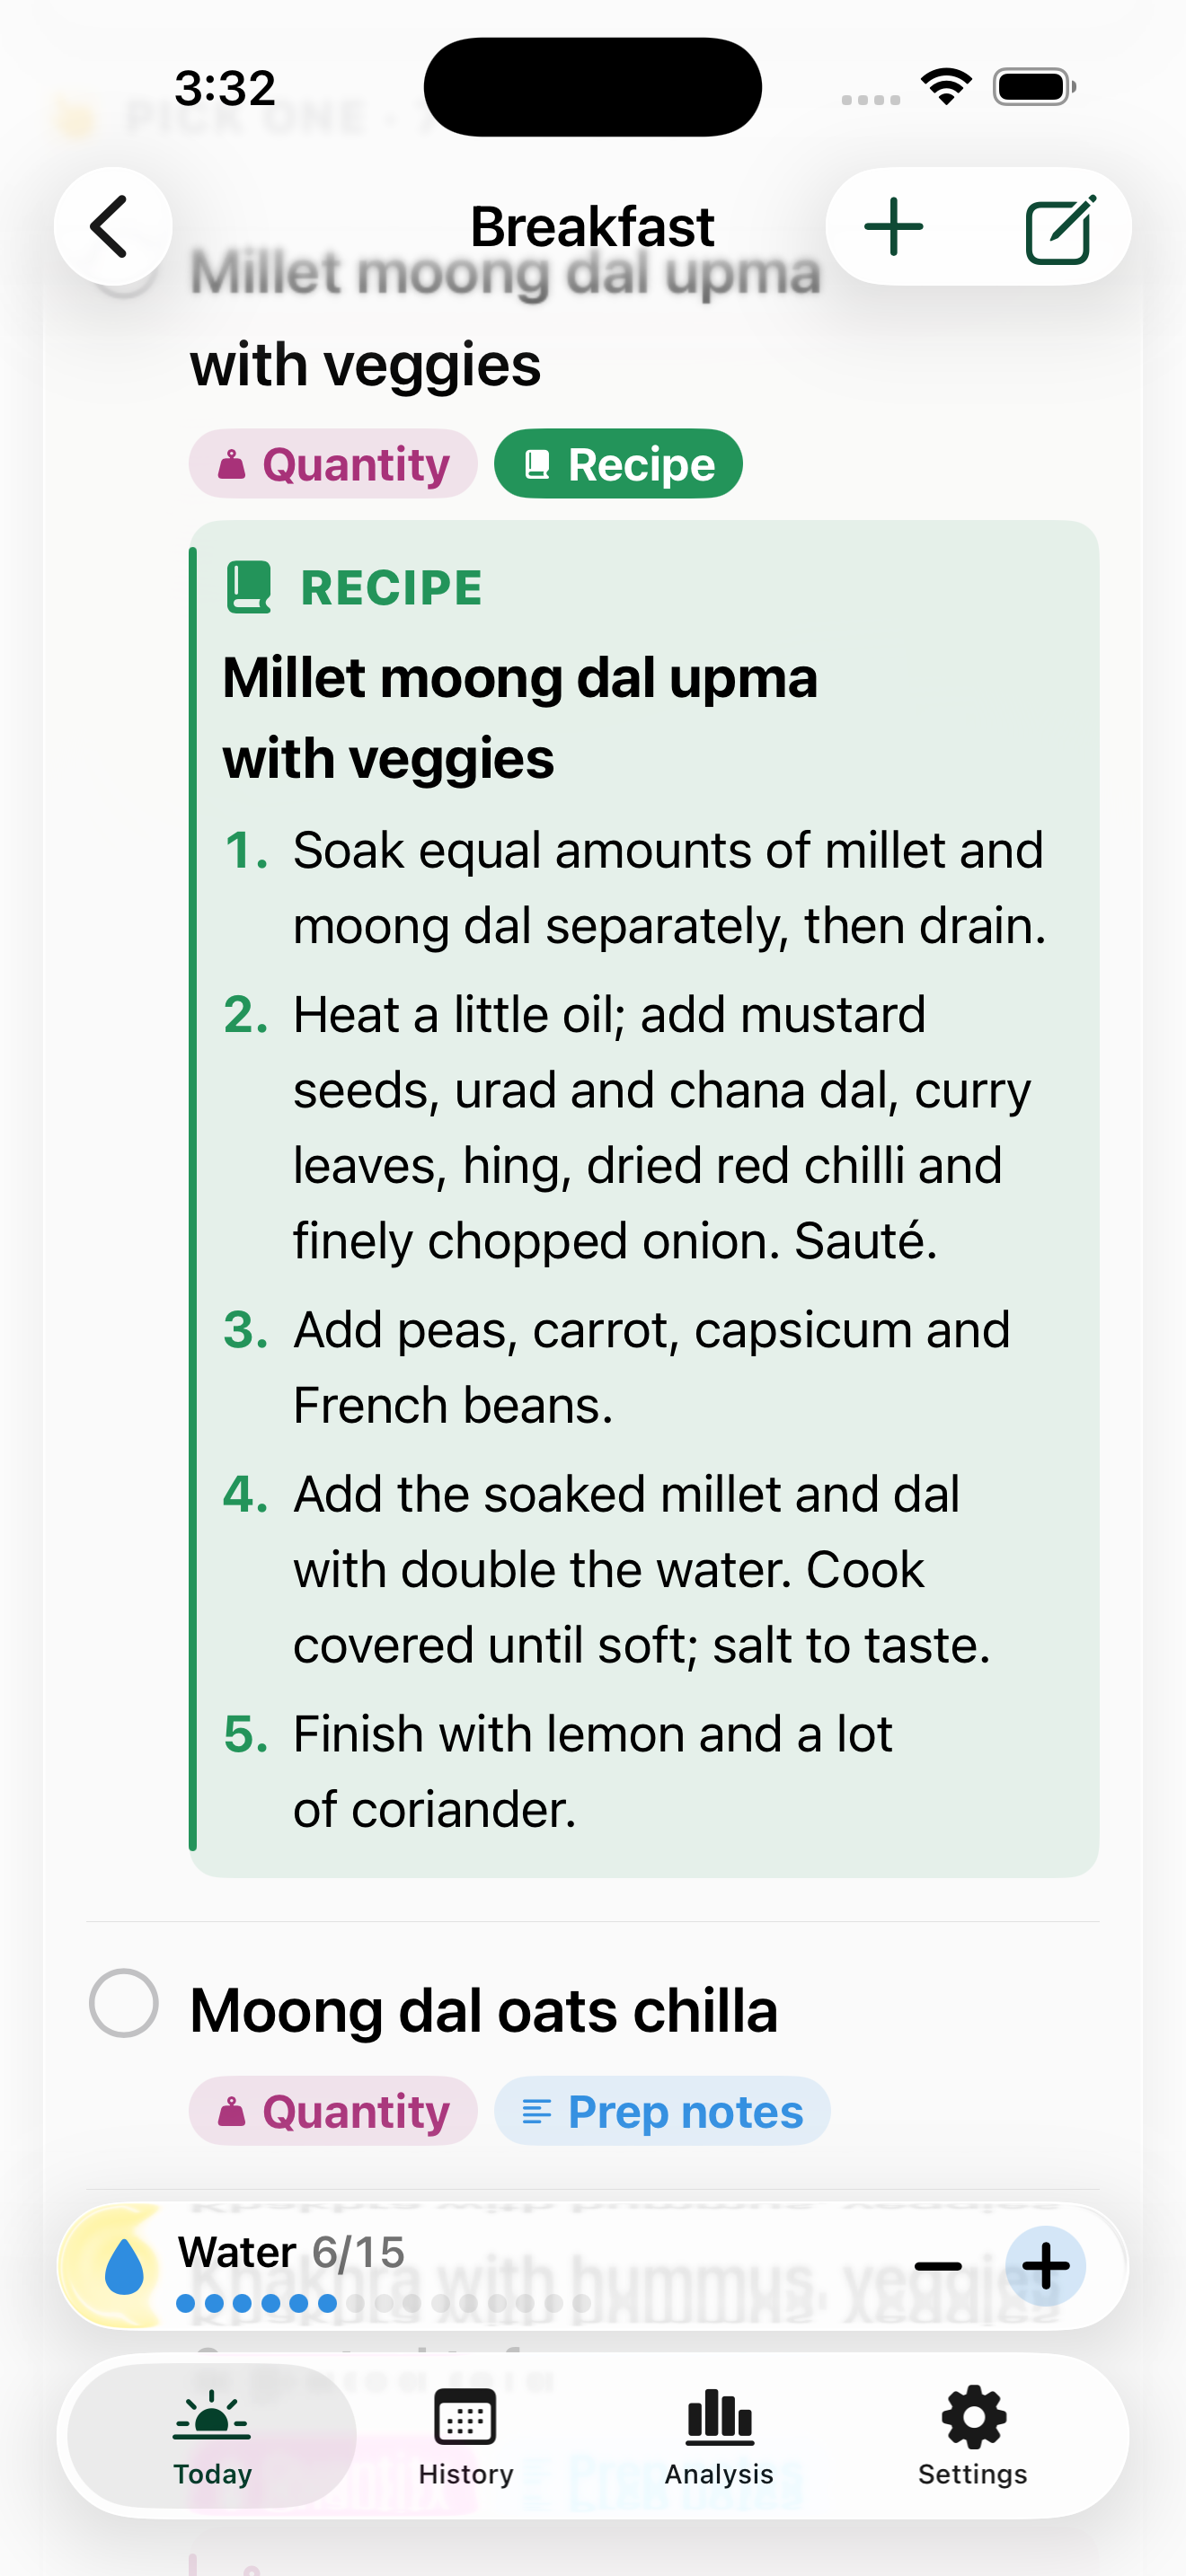
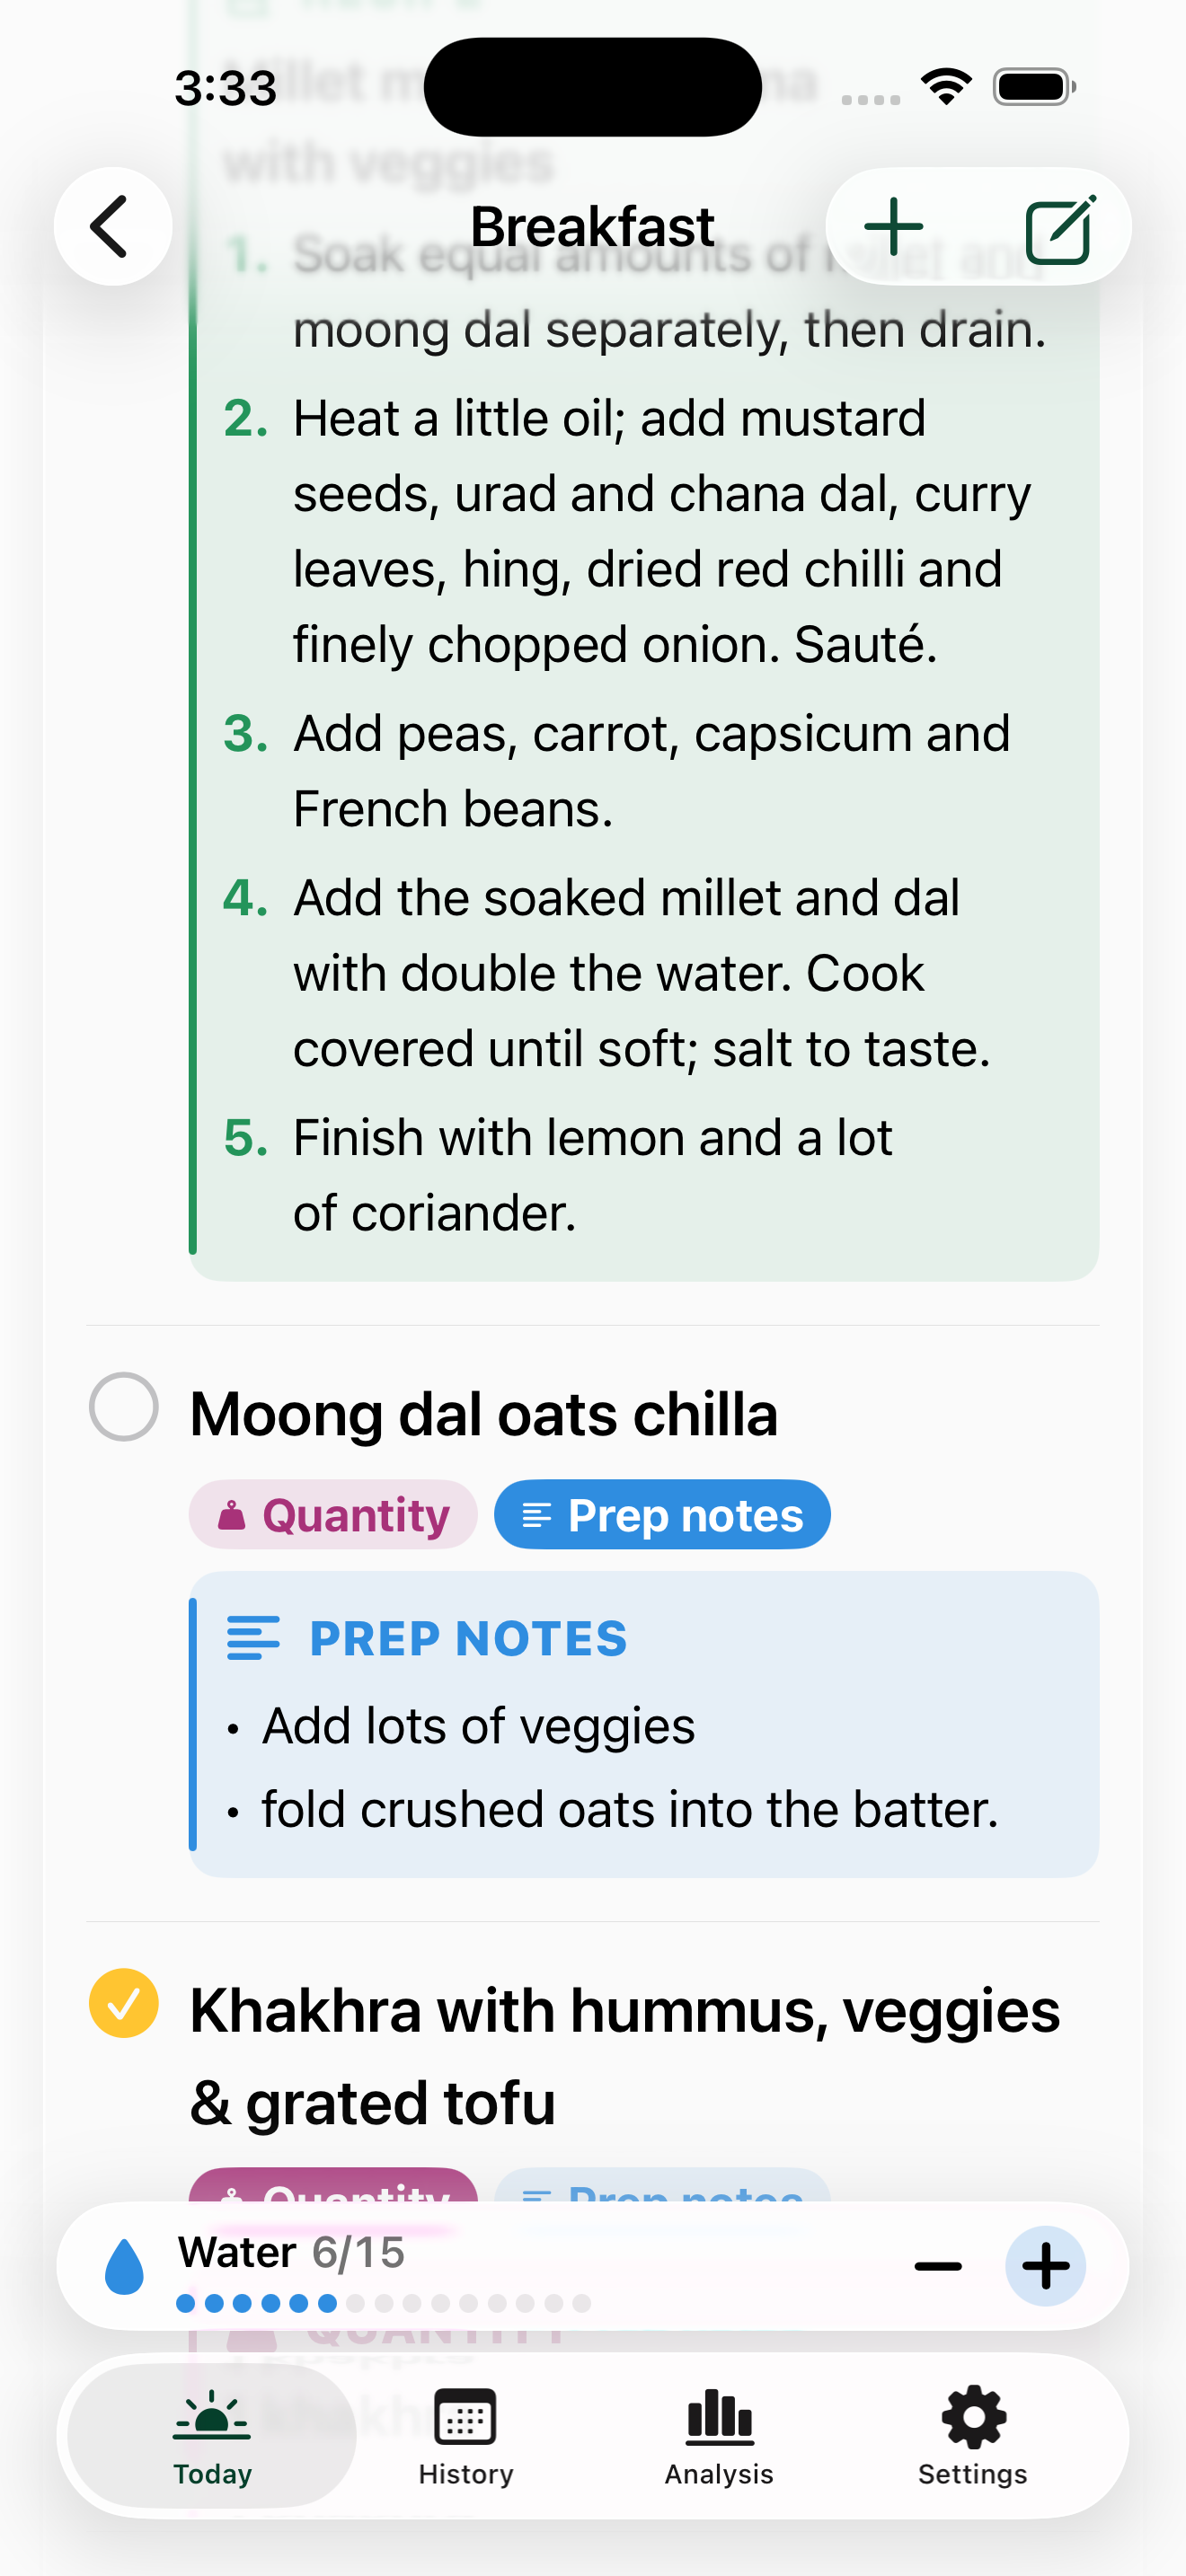
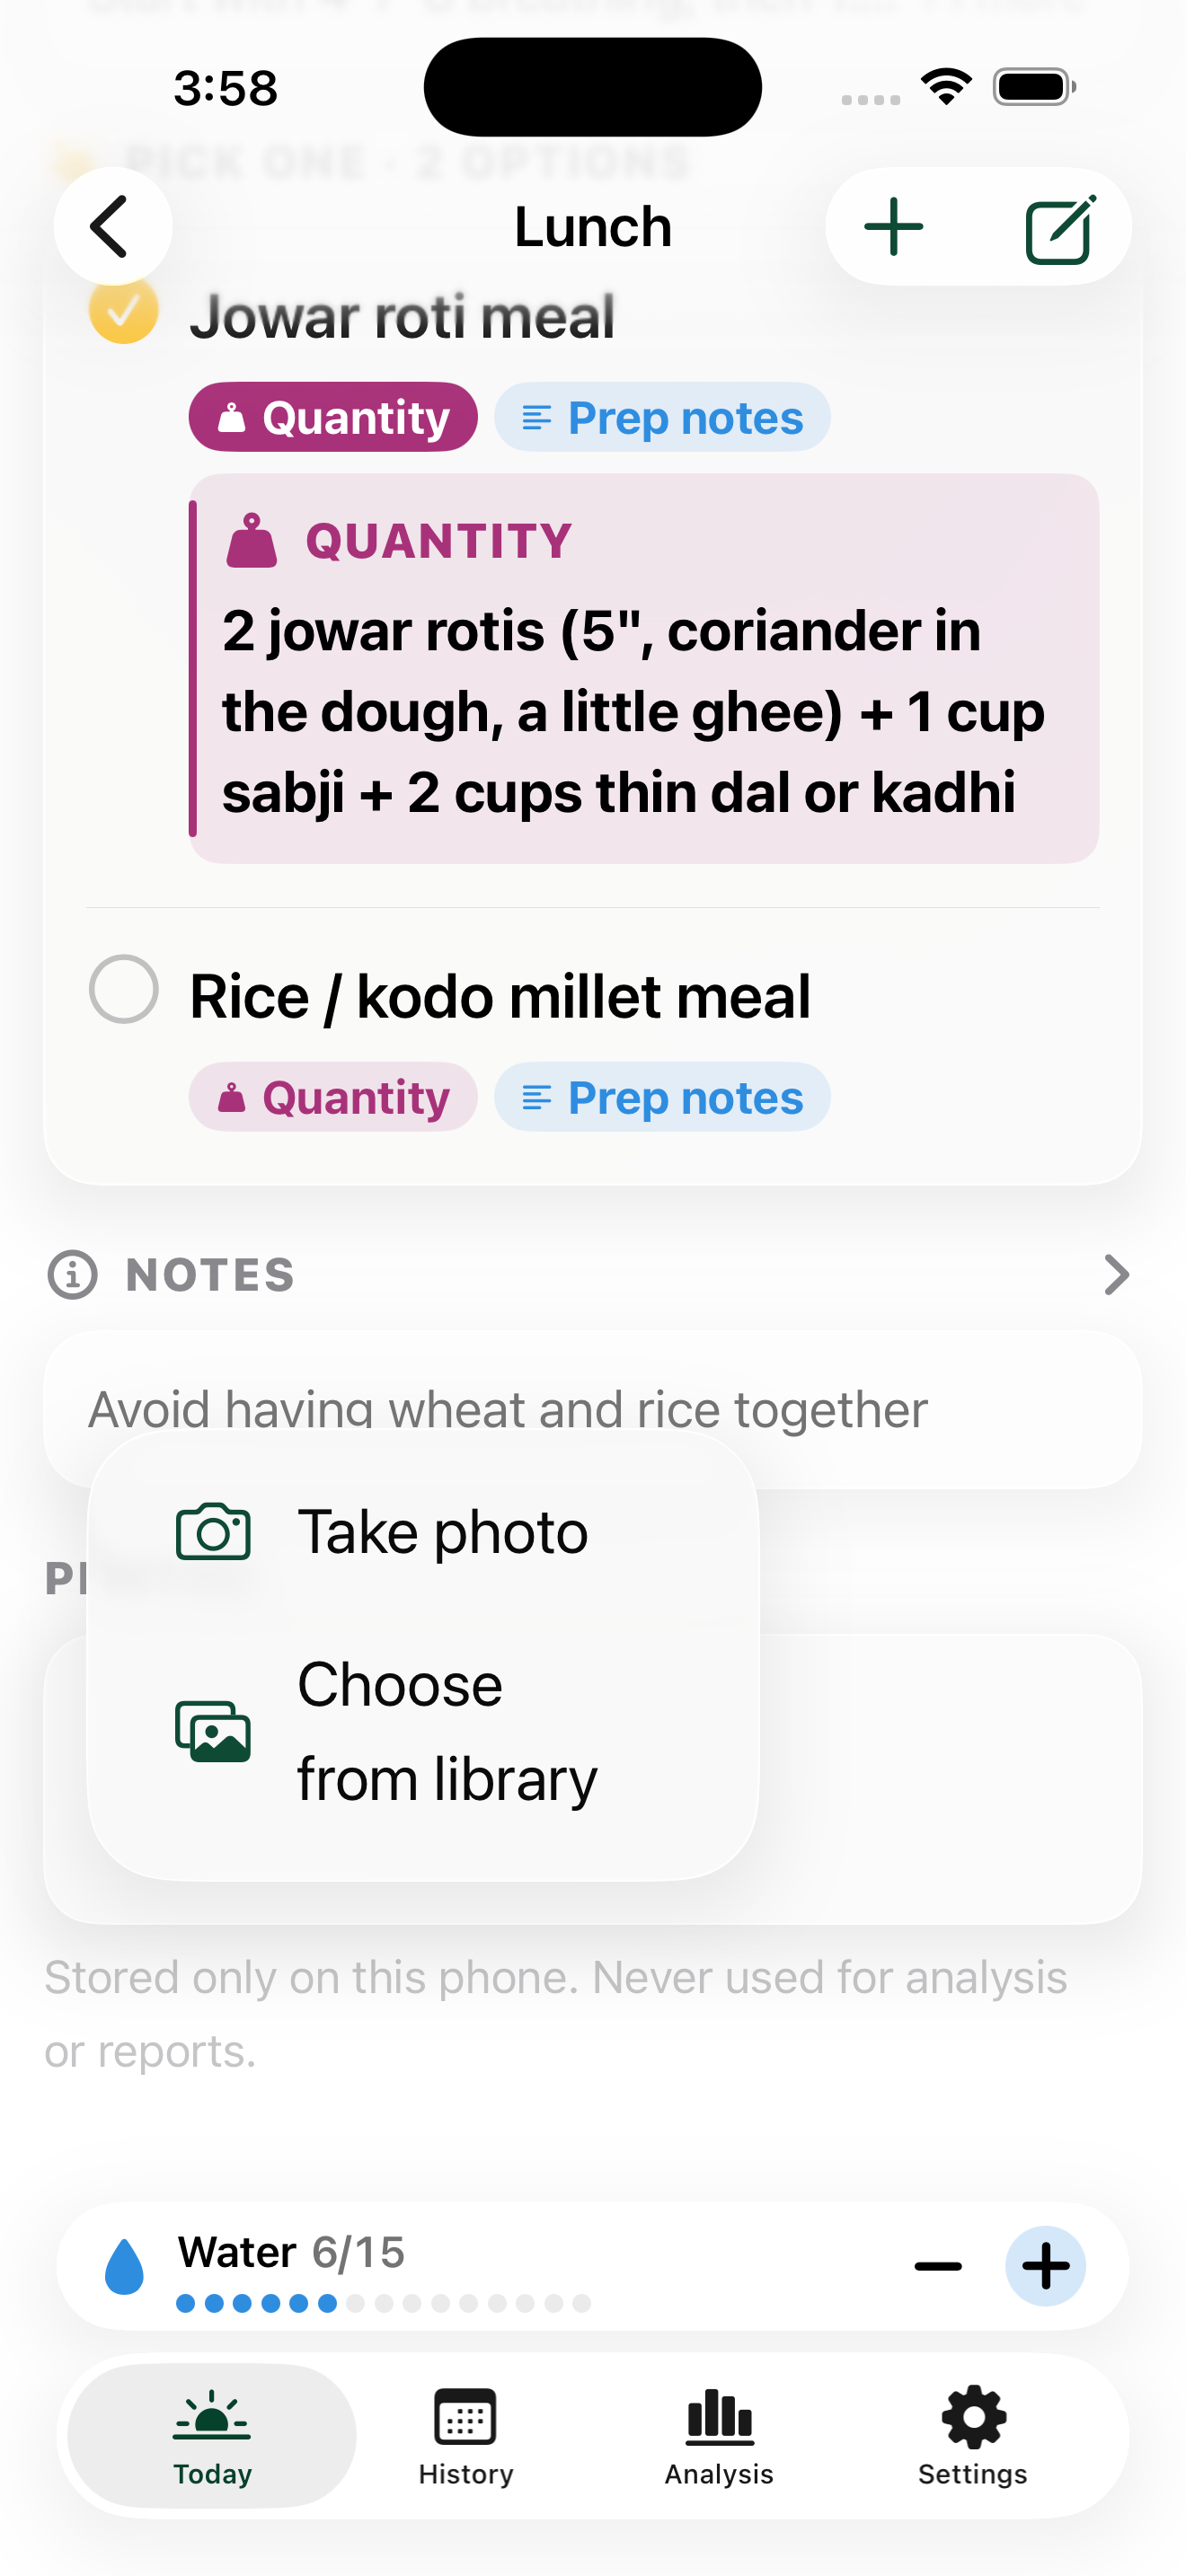
Open a meal to compare its alternatives and select the one you ate. Read its portion and preparation information, and open a linked recipe when available.
For a multi-part routine, mark checklist items separately. A partly completed checklist can show Partial, while a completed or skipped step shows its corresponding status. You can also add a note and adjust the recorded completion time.
Activity photos are optional. They stay in the app's local storage and are not included in AI analyses or PDF/CSV reports. Do not assume they will be restored from a device backup.
05
Record water and weight at your pace.
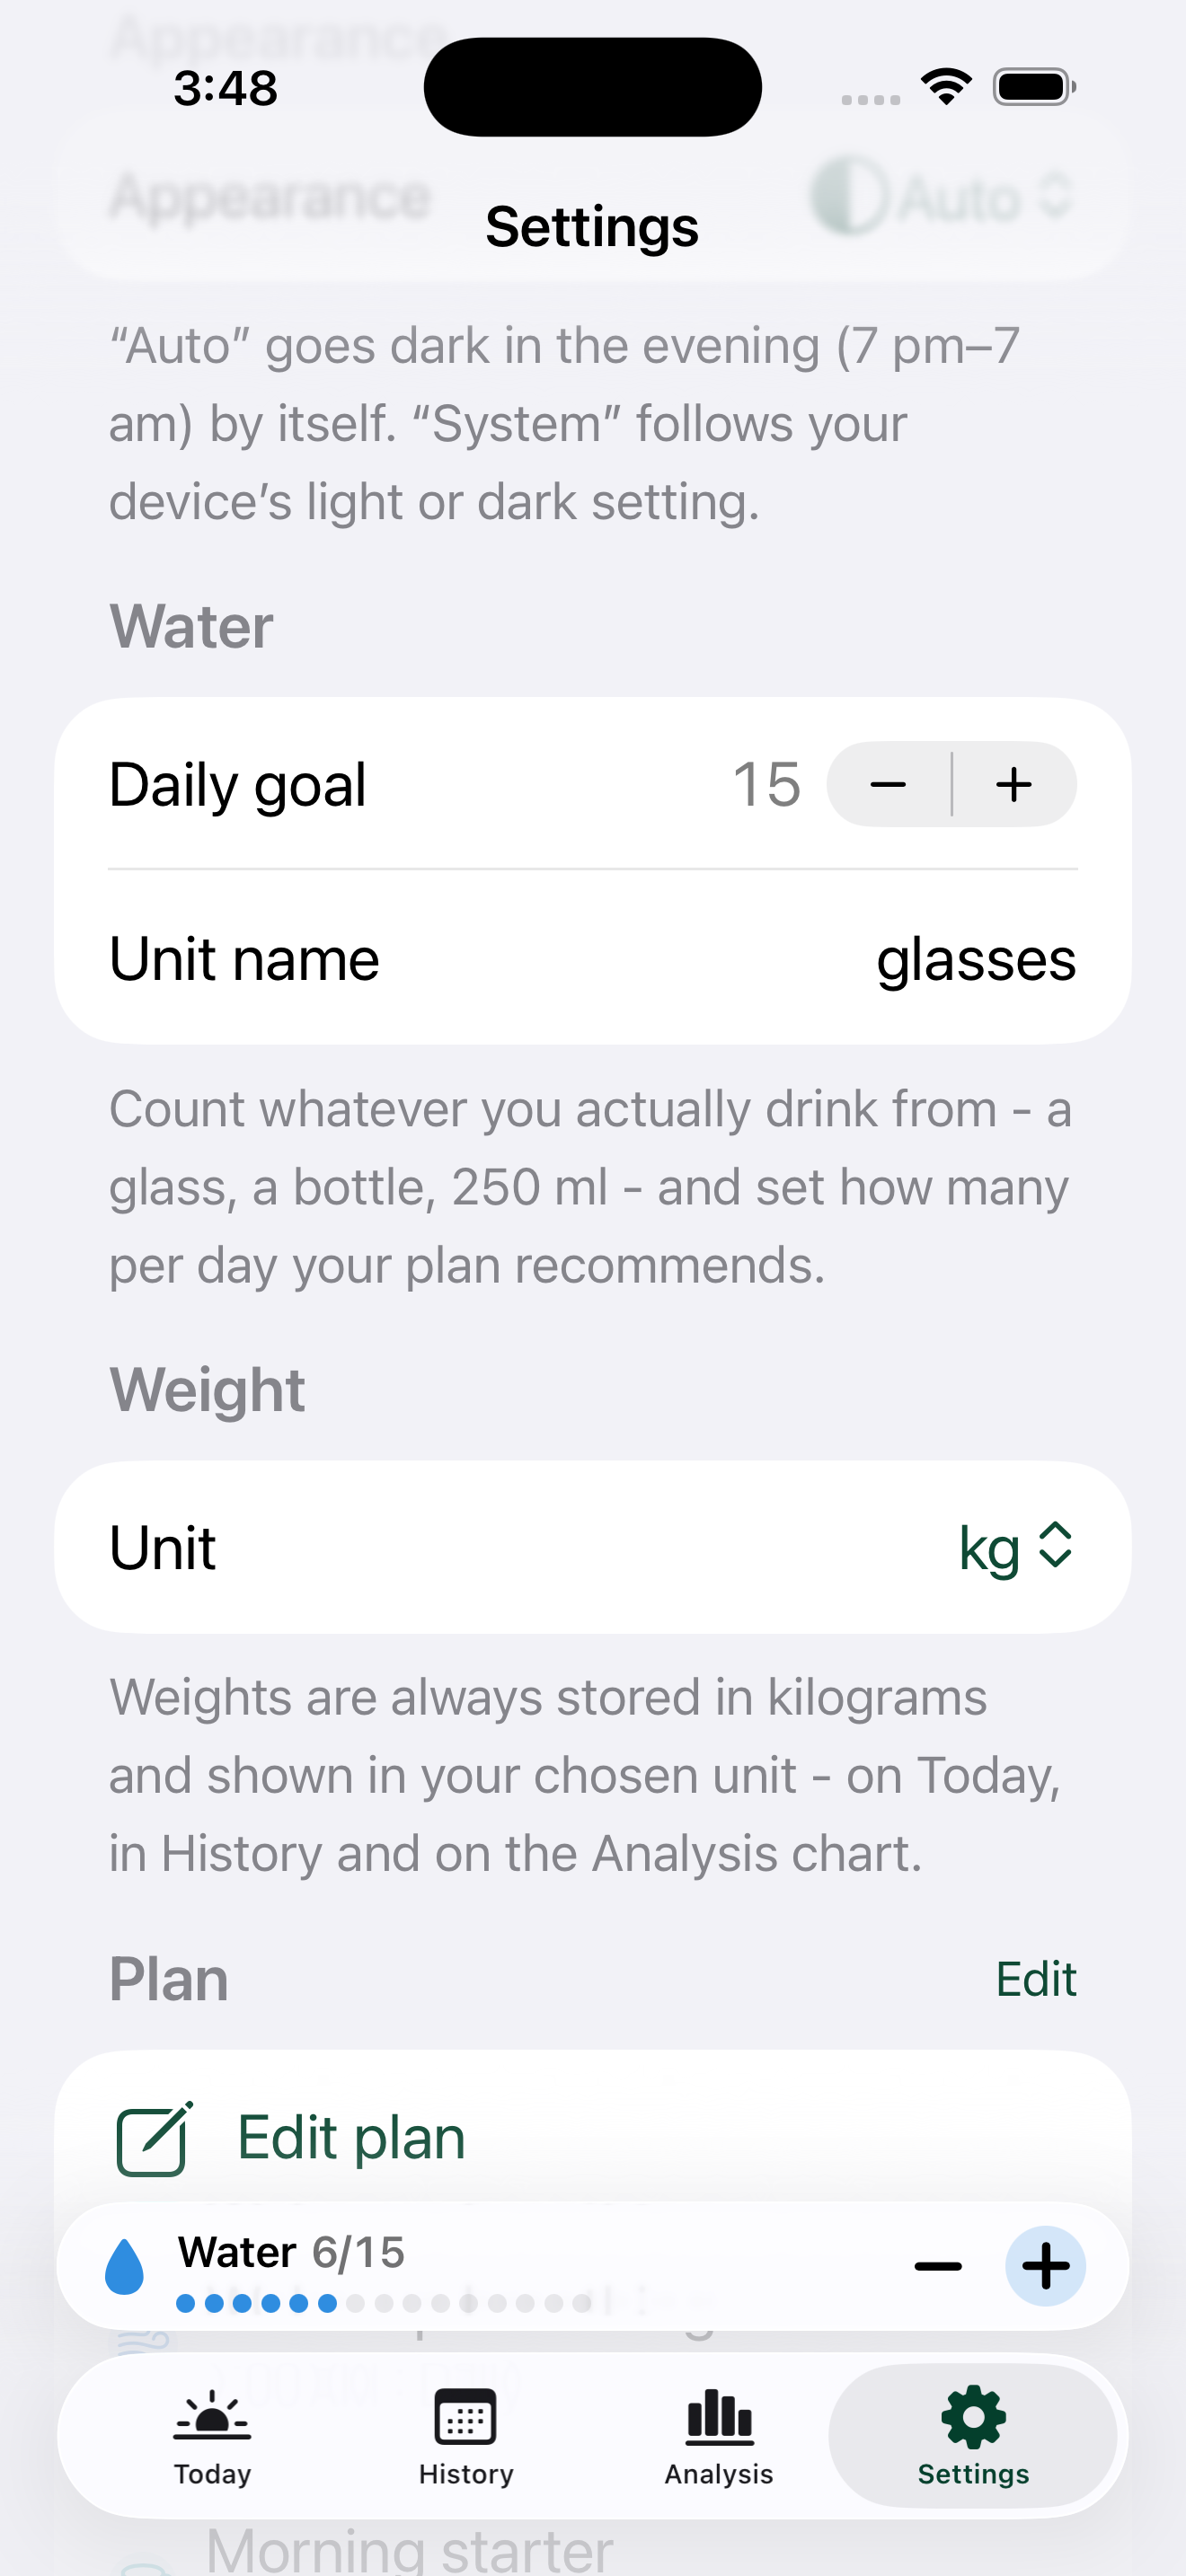
The water control lets you add or subtract a glass. Open Settings → Water to set the goal and the unit description to match your own plan. The app's default is not a personal fluid recommendation.
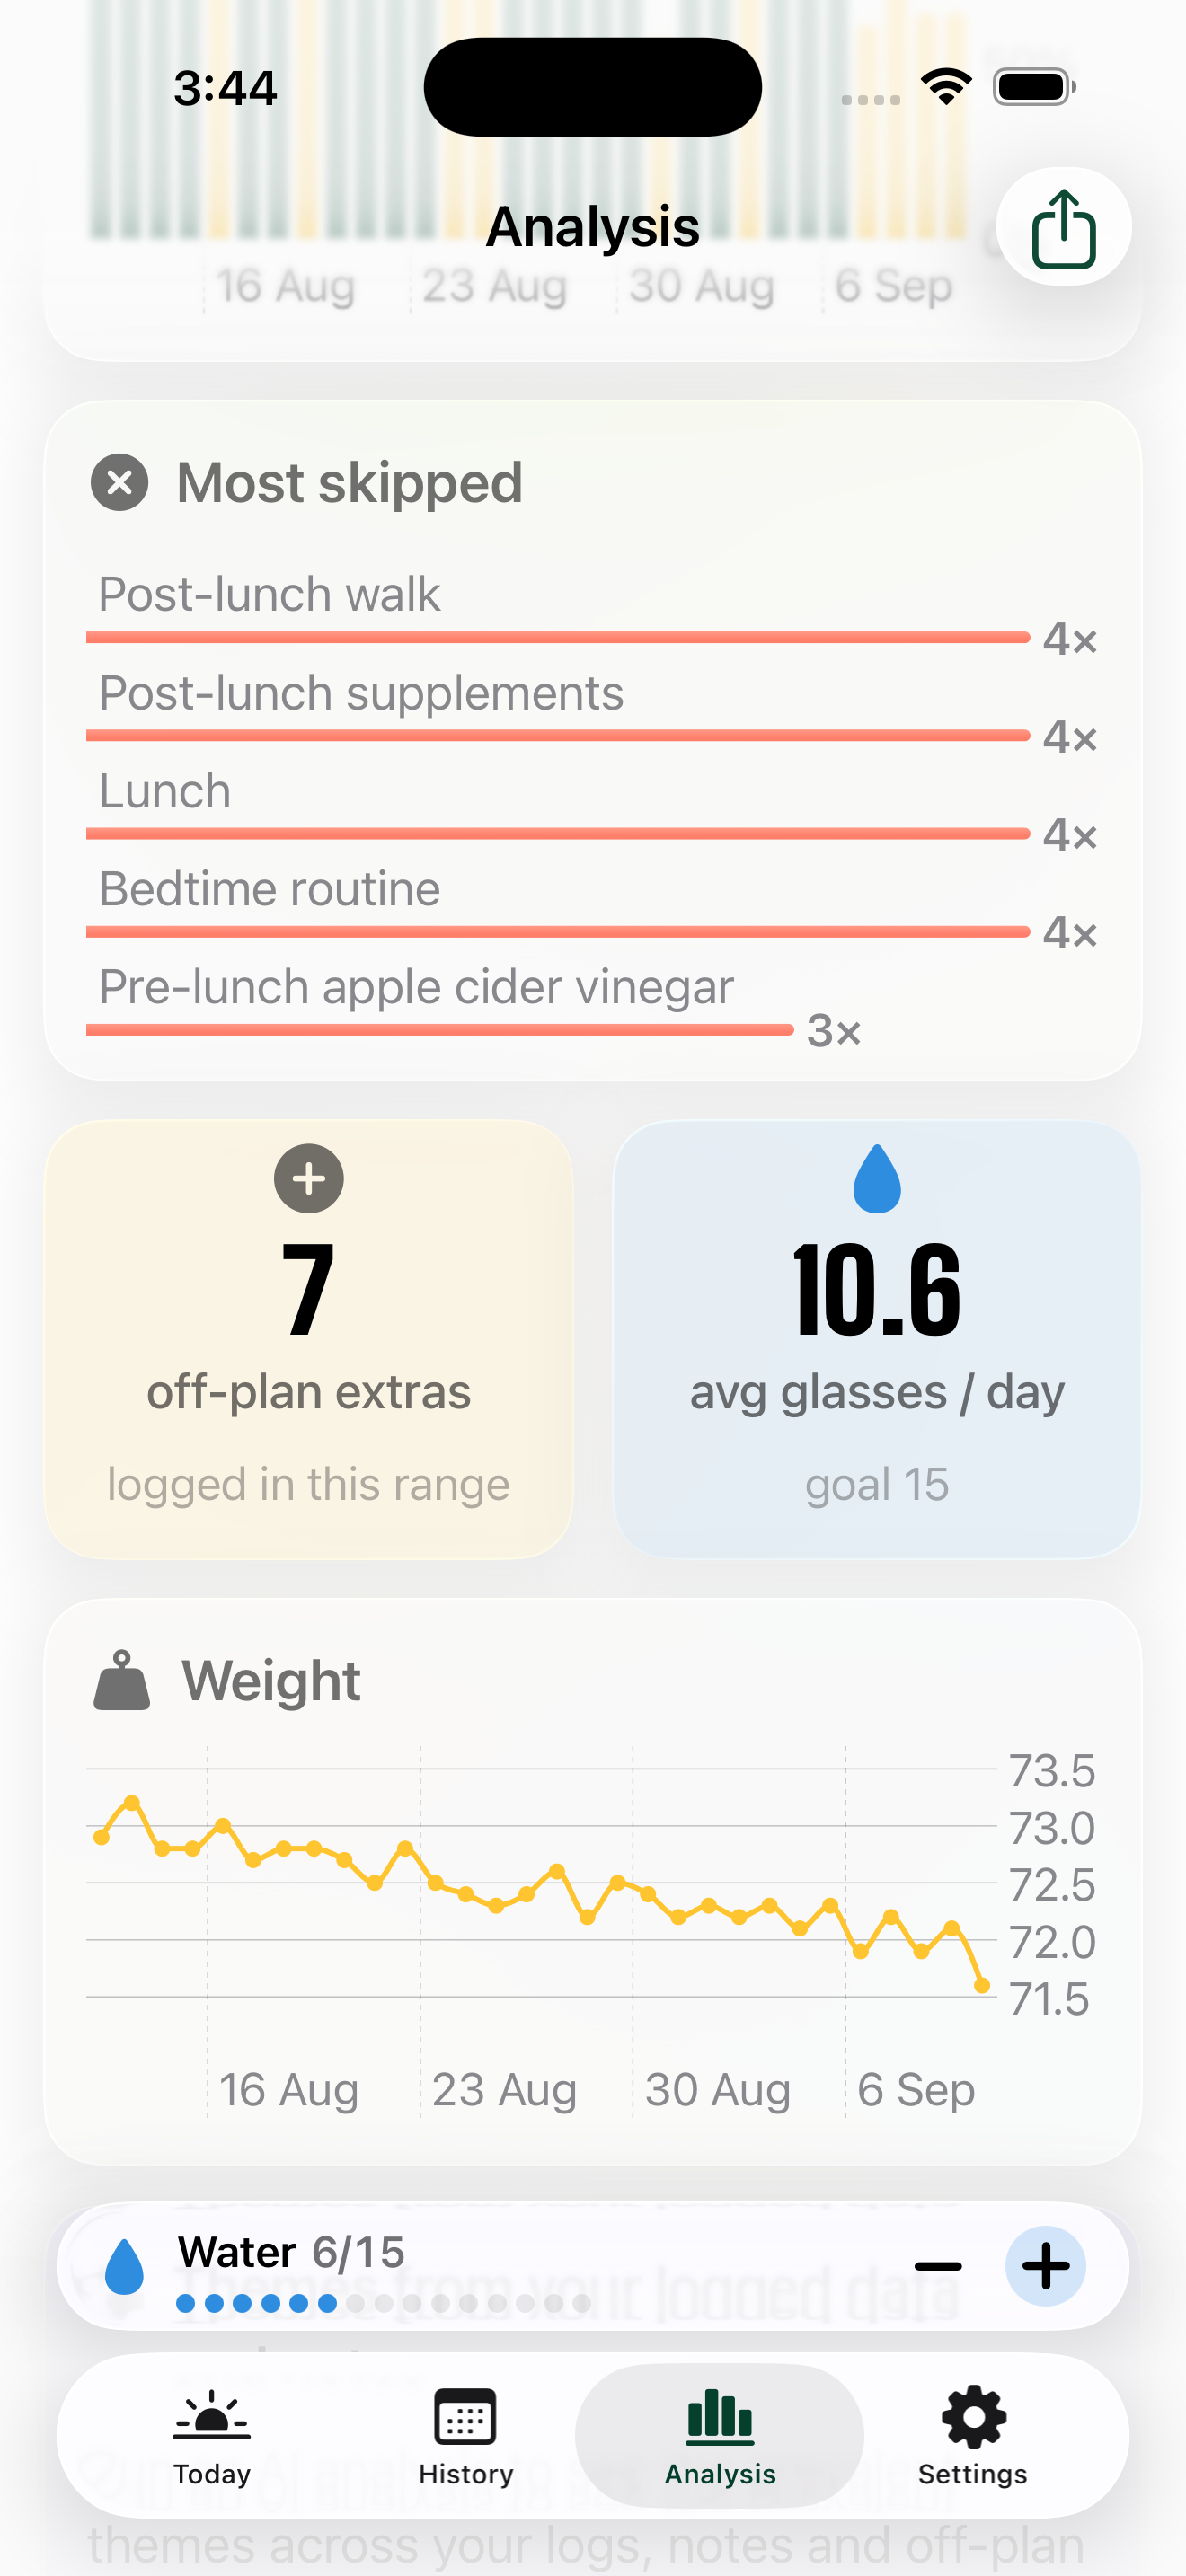
Use Weight on Today to record a measurement if it is part of your routine. Choose kilograms or pounds in Settings. Weight entries appear in local charts and can appear in reports; the dedicated weight fields are not sent for paid AI analysis.
06
Look back before changing anything.
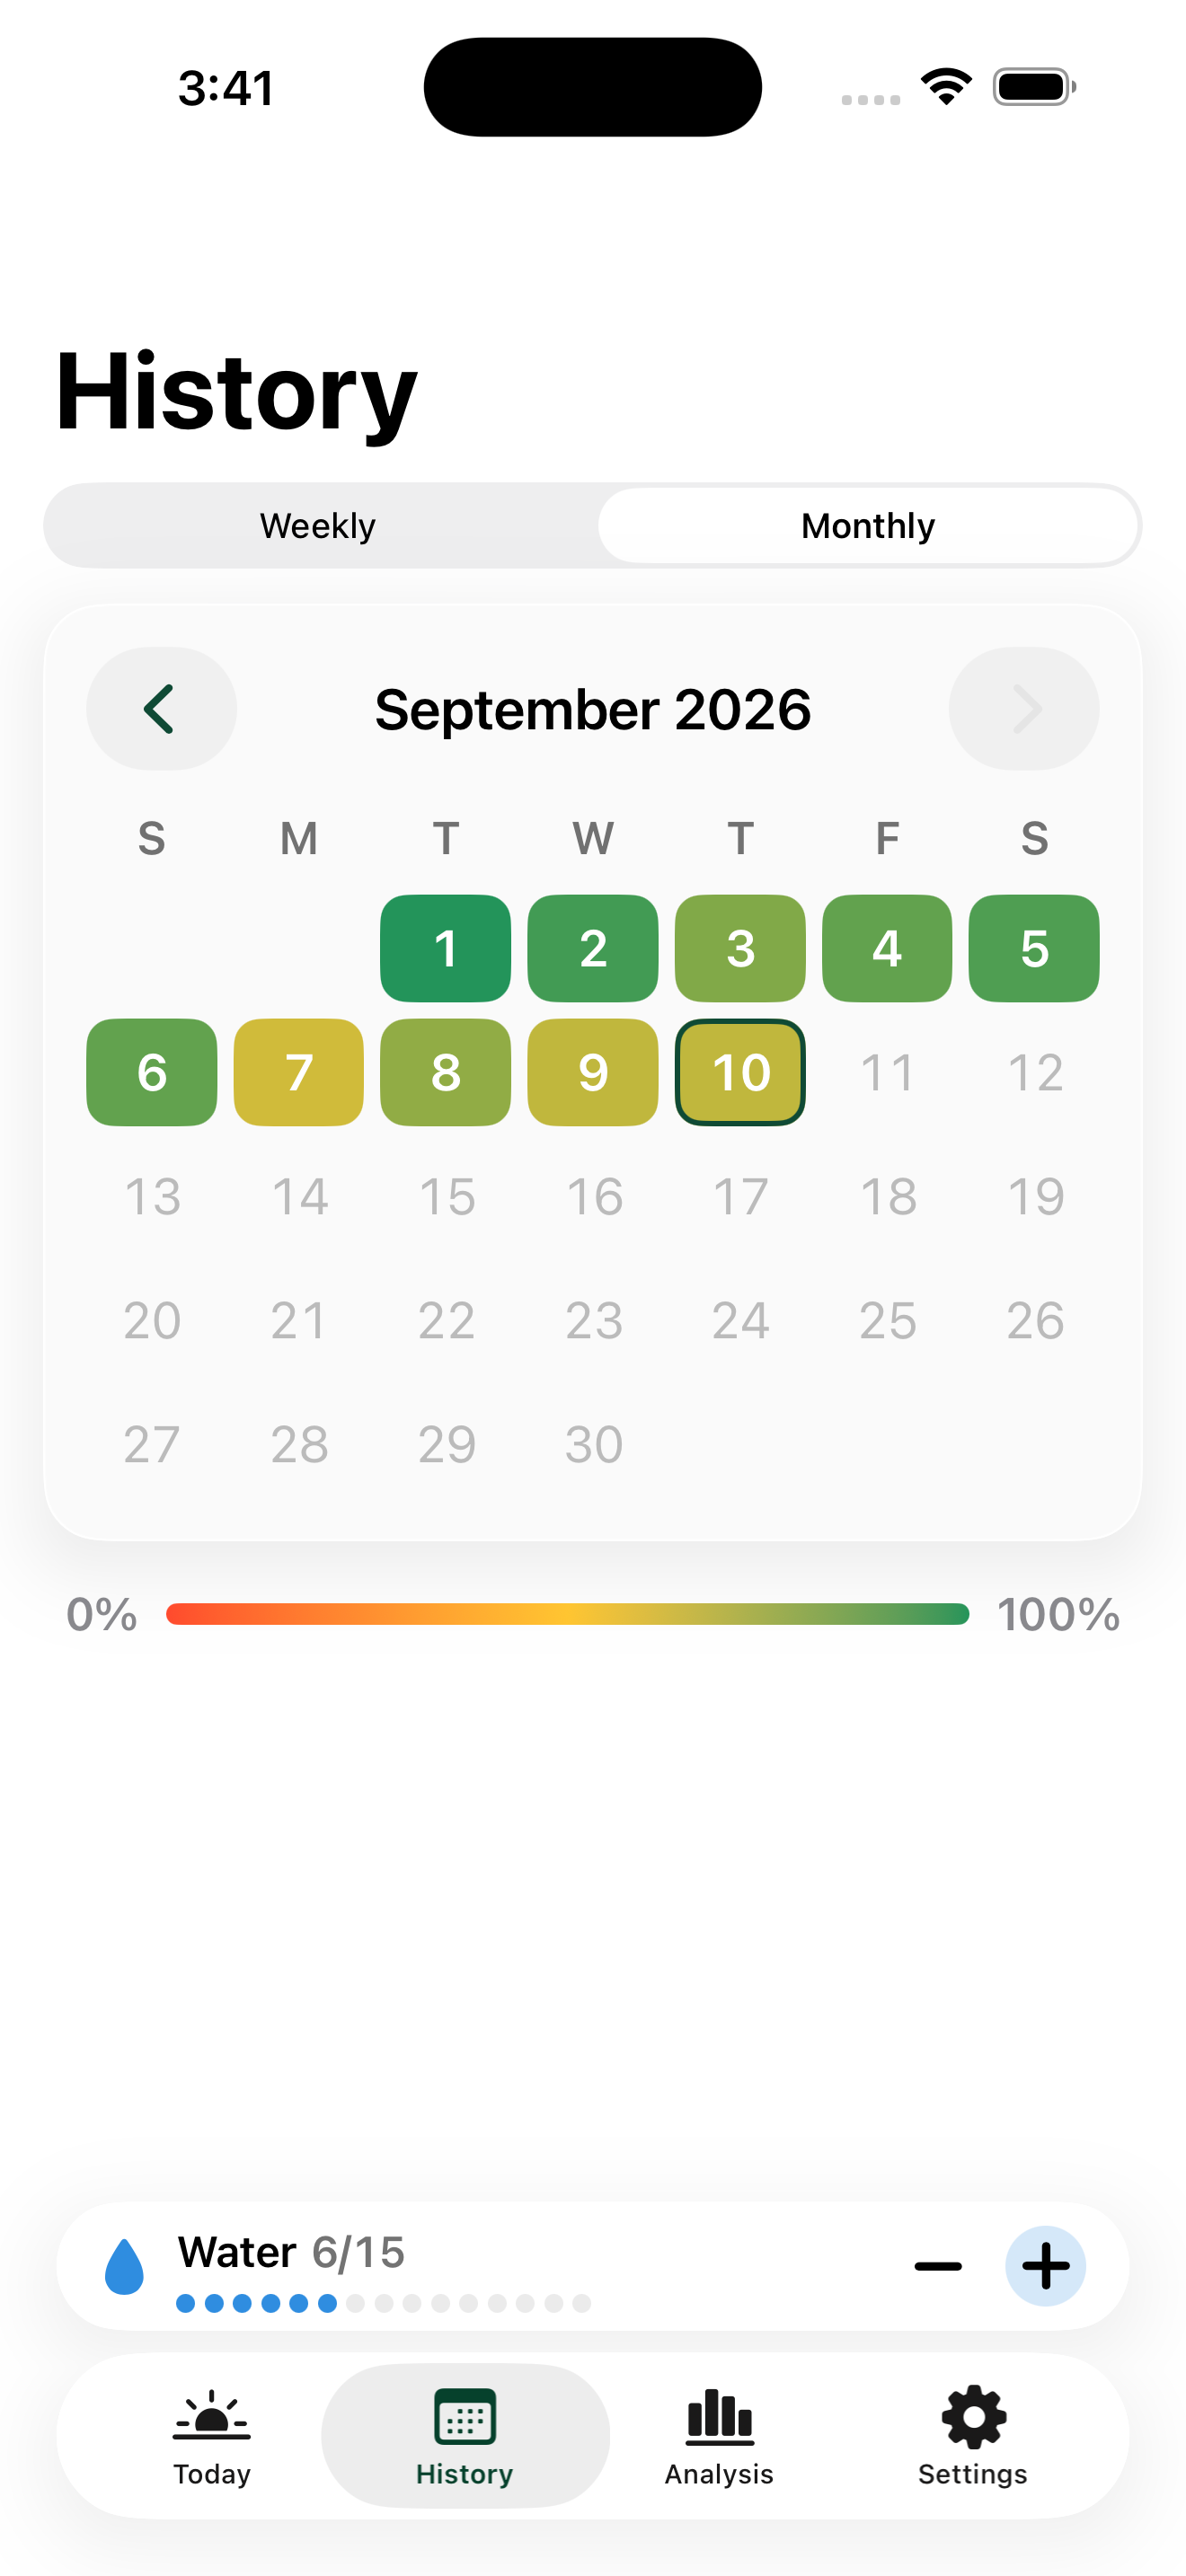
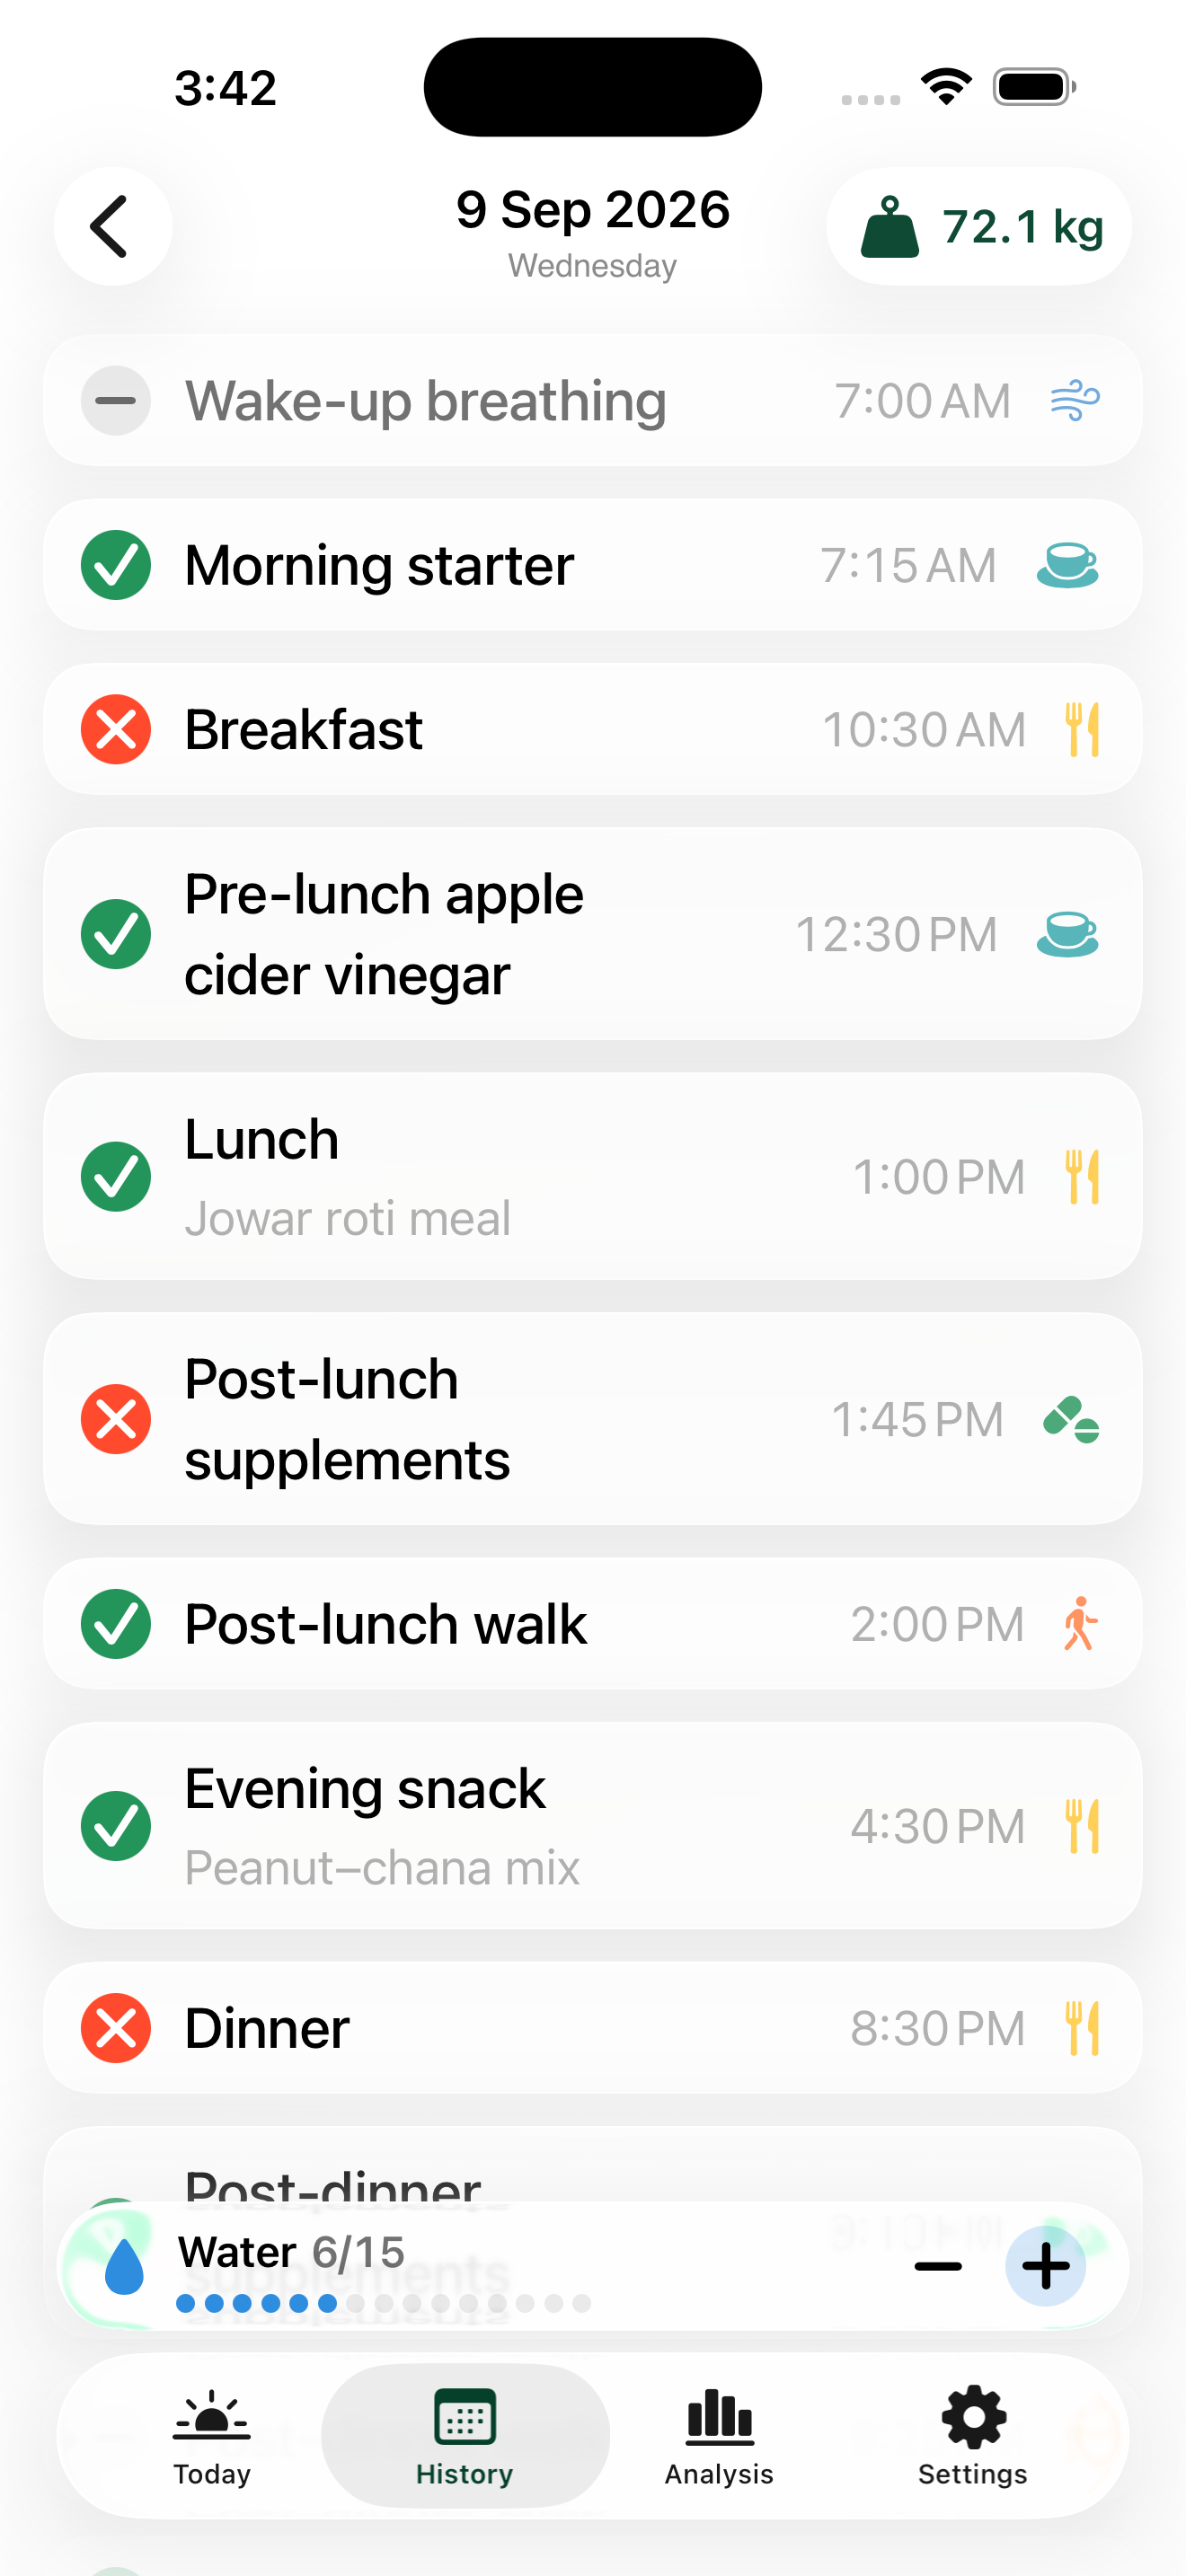
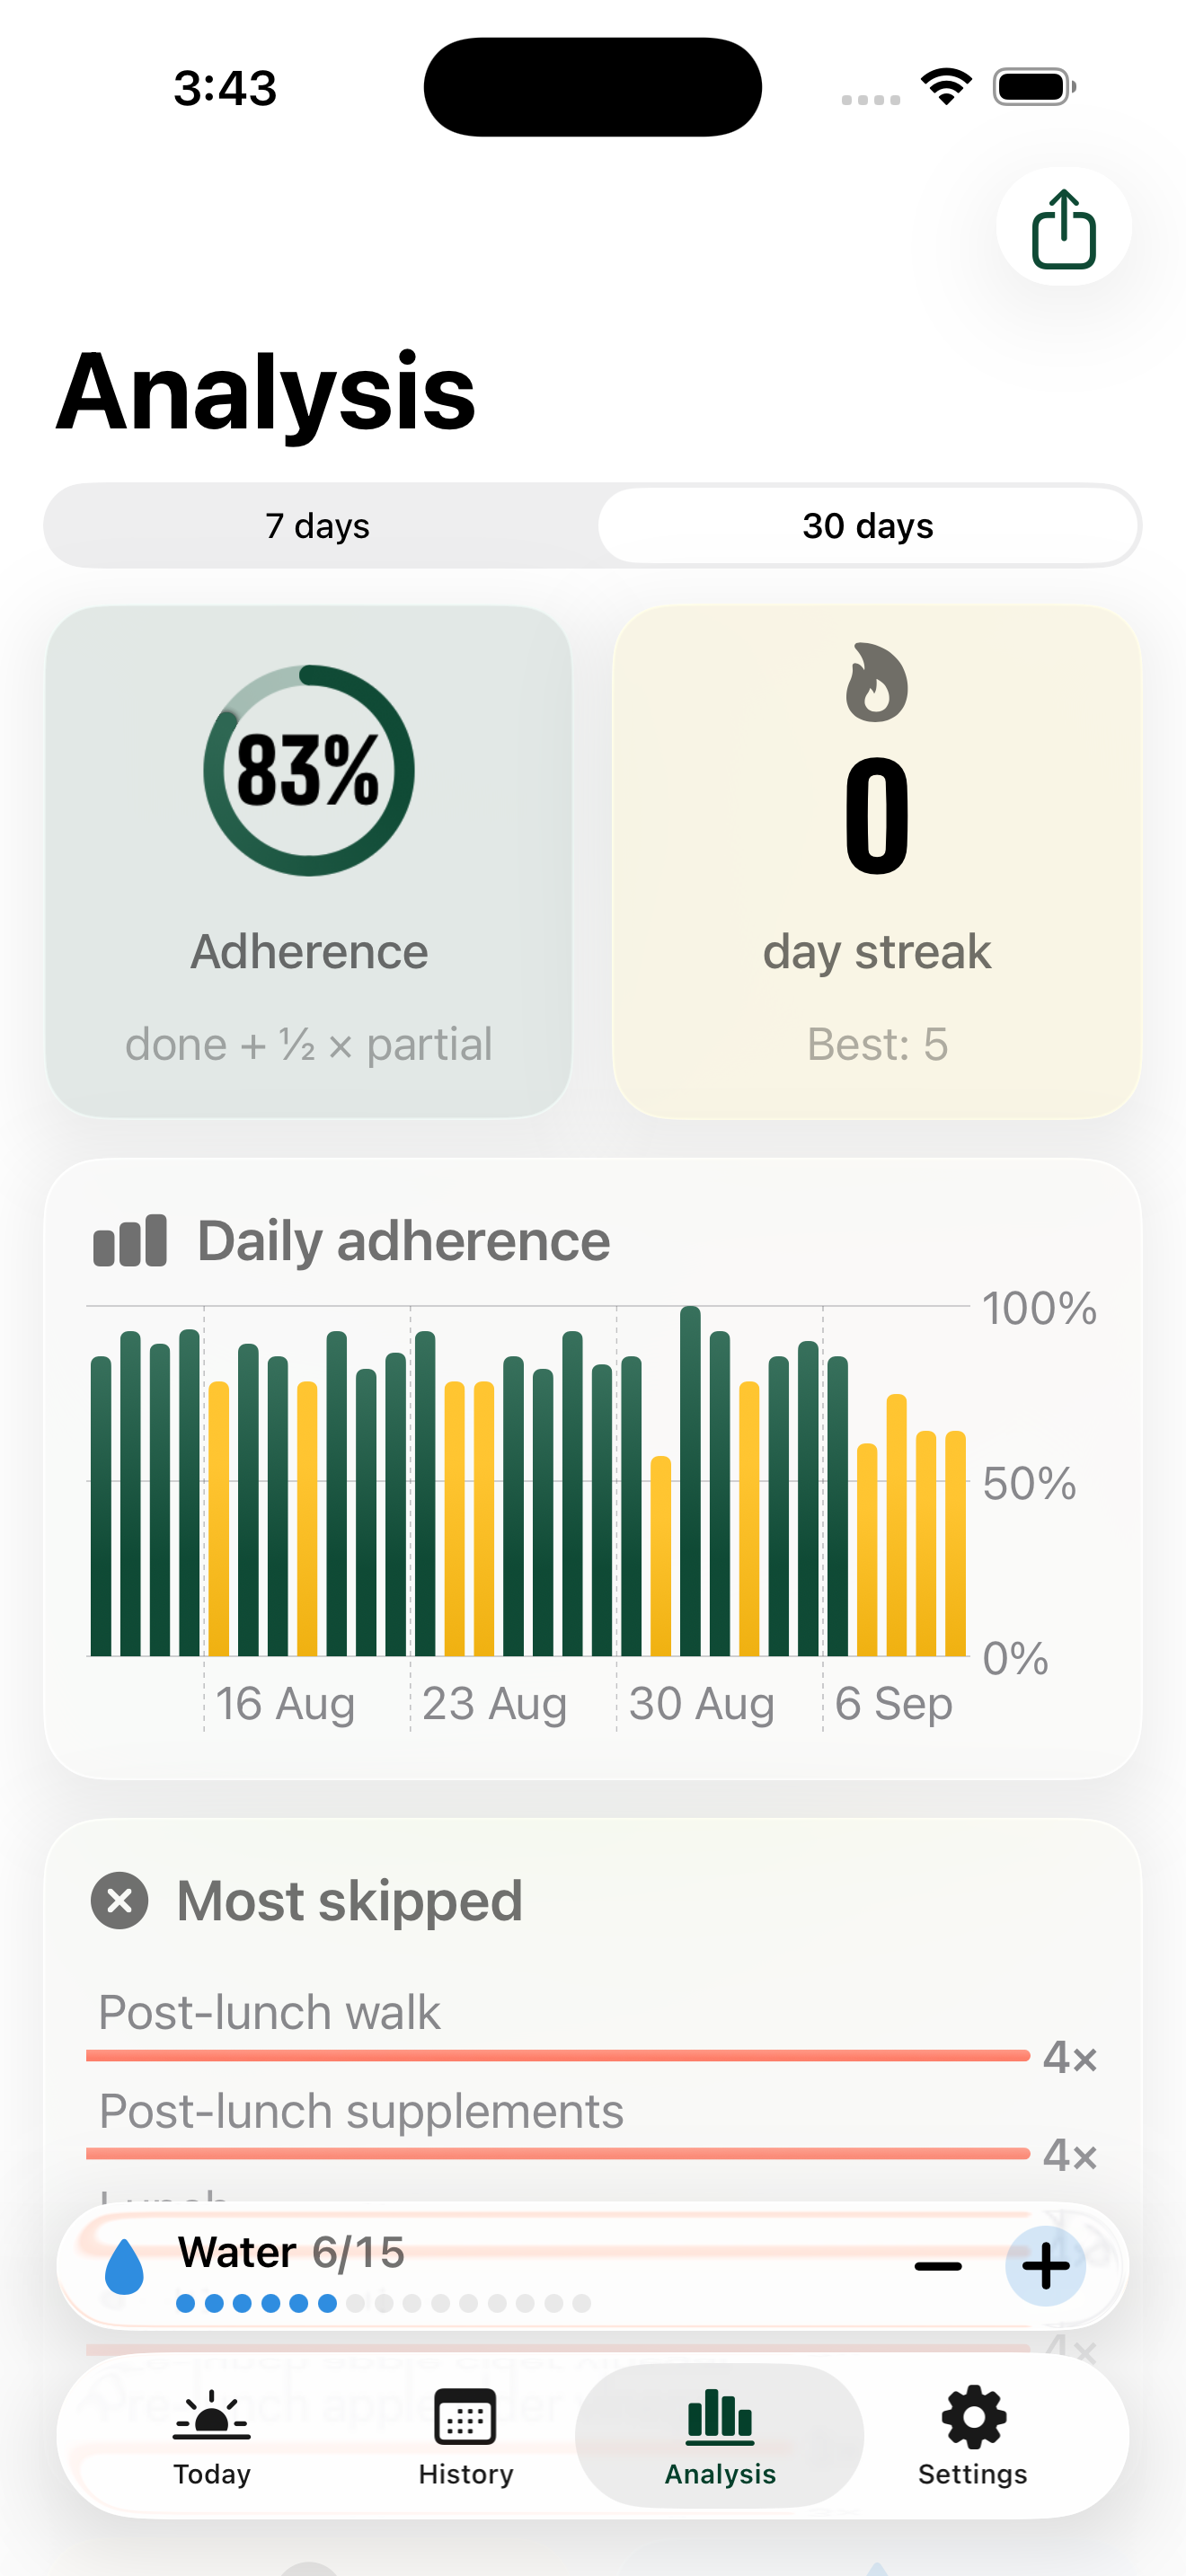
Open History and choose a date to review that day's entries. The Analysis tab provides local adherence and trend views using your logs.
Optional AI analysis is a separate one-time purchase. It sends the chosen period's logs and plan context for a descriptive report, with a maximum supported window of 60 days. Read its processing notice and verify its conclusions. It does not prescribe a new diet or automatically edit your plan.
07
Share a useful report.
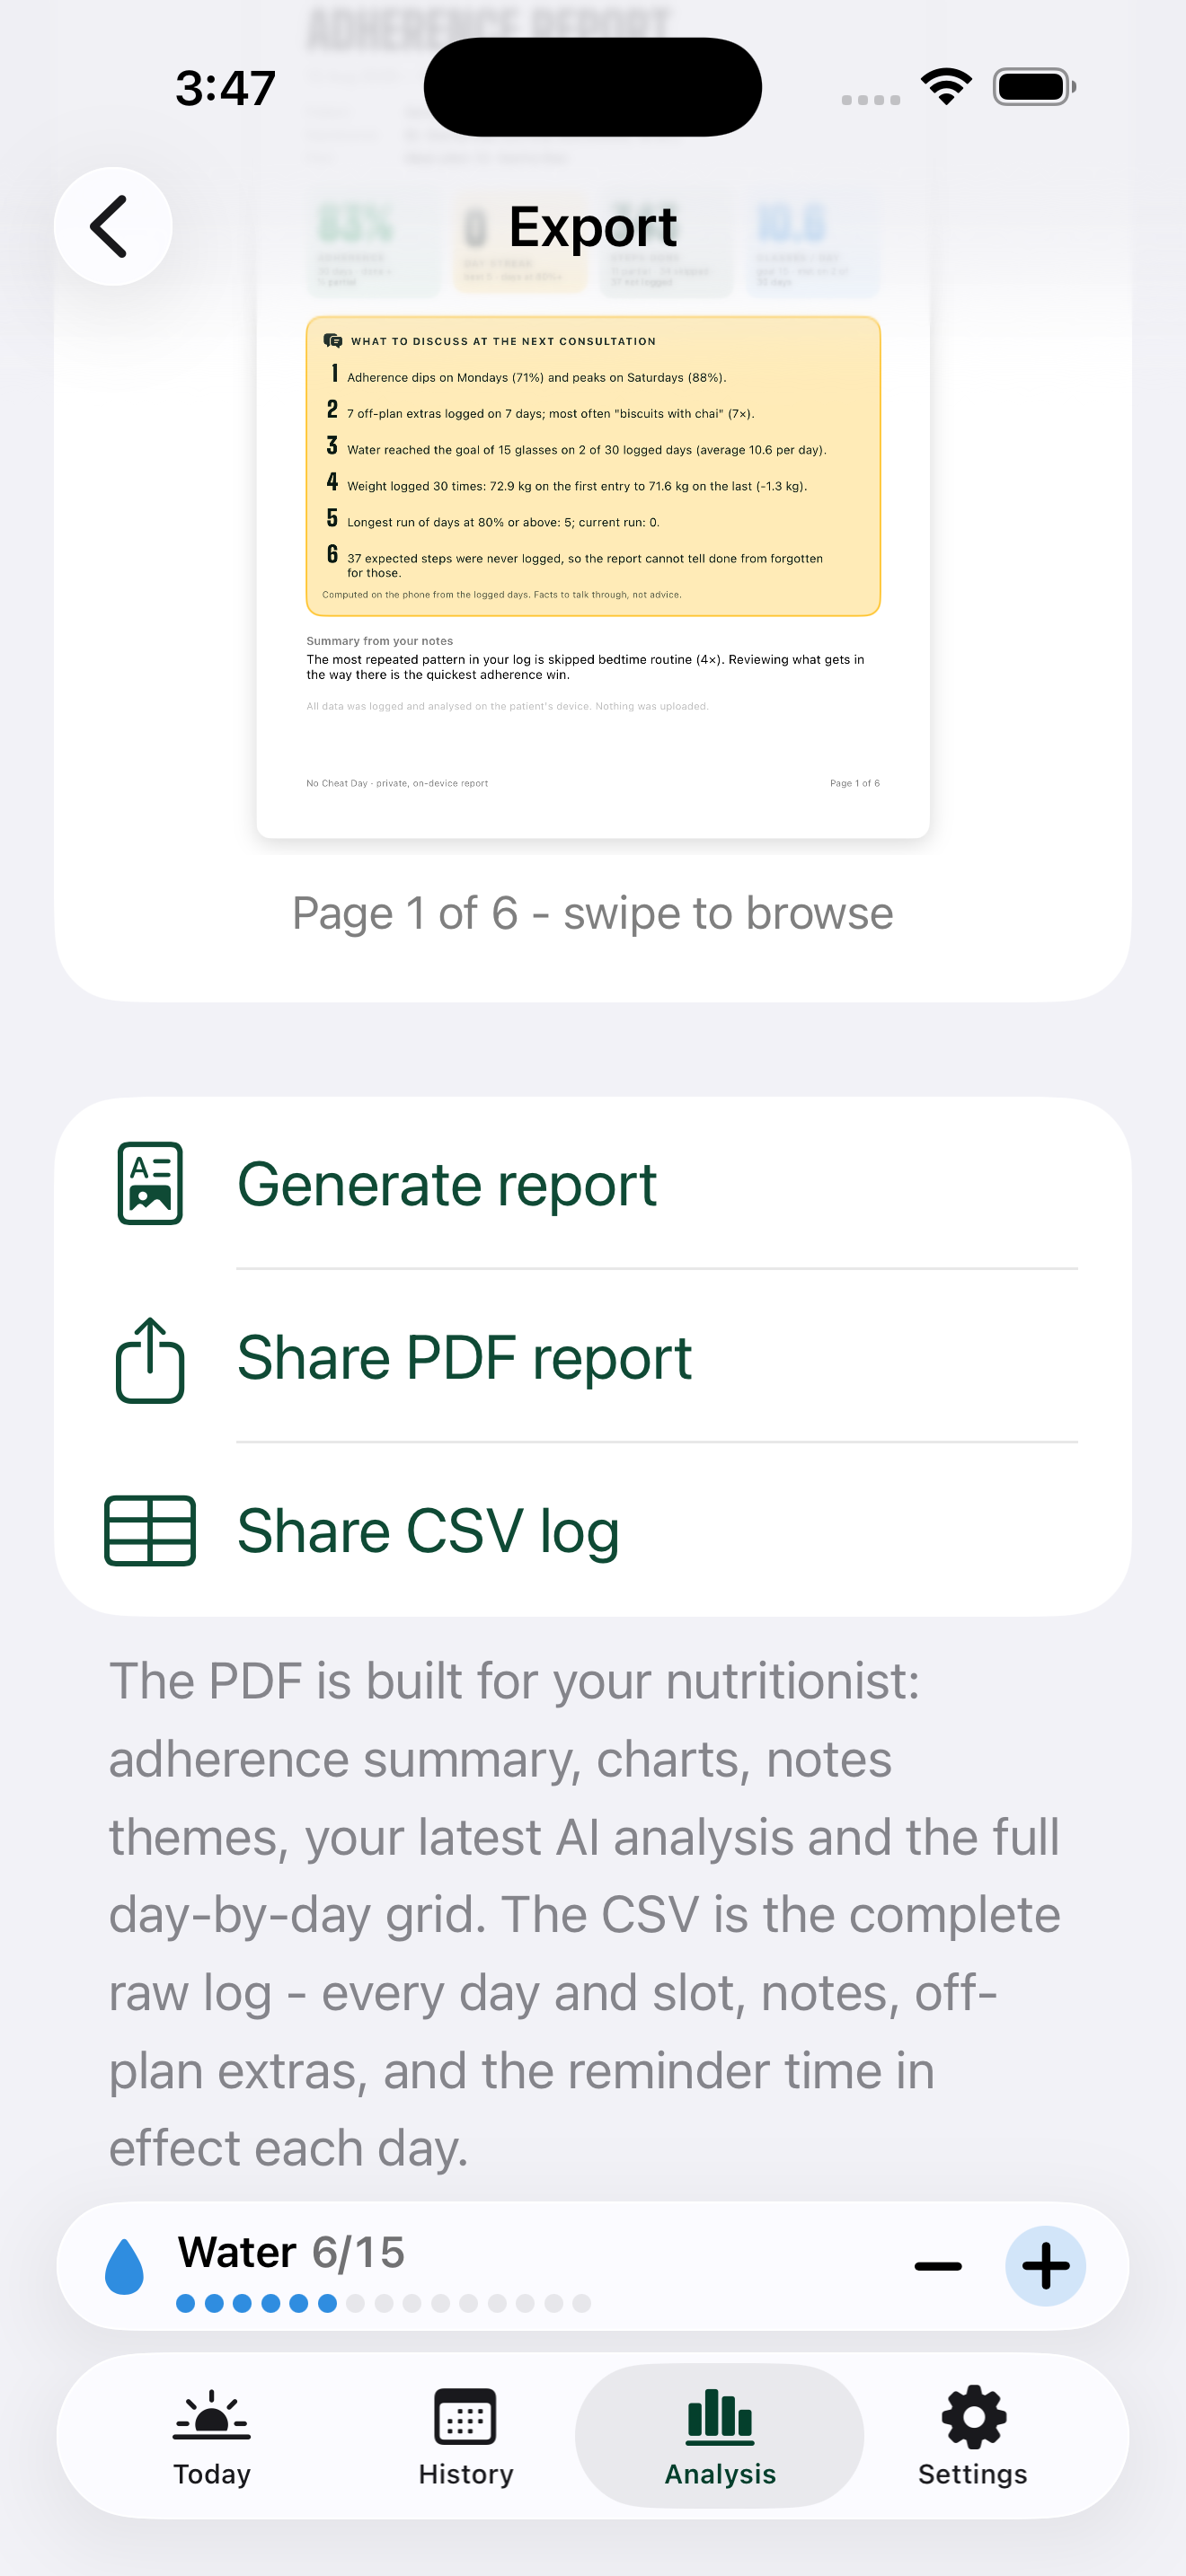
- Open Settings → Export report & CSV.
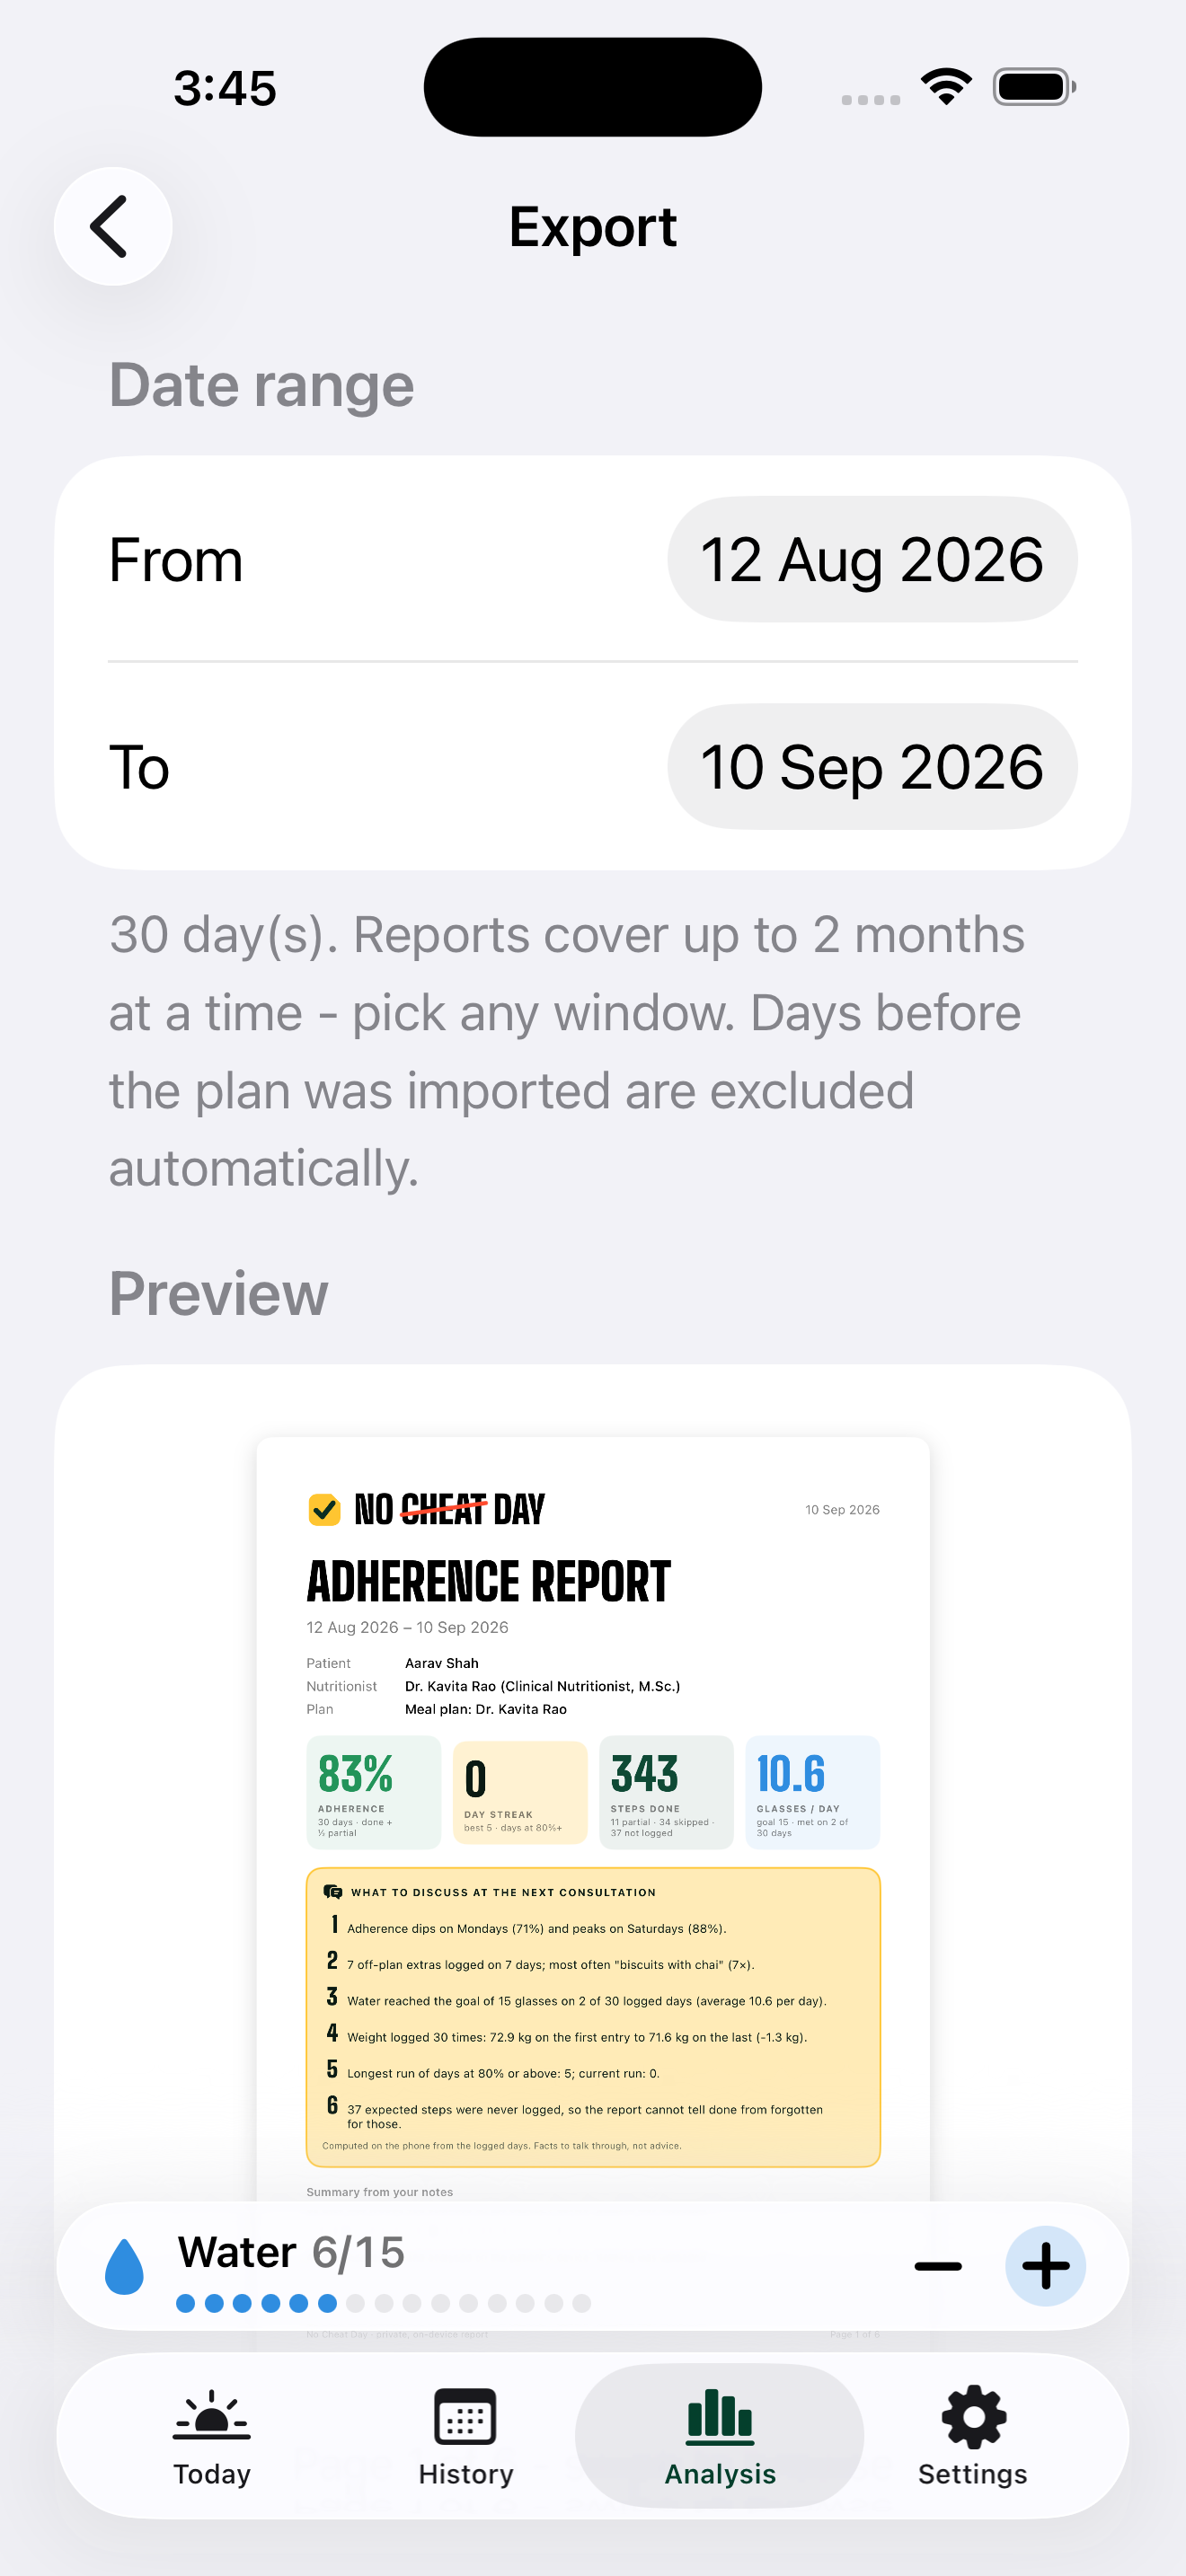
- Choose the period you want to discuss.
- Preview the PDF and check the plan, dates, notes and figures. If an AI analysis is included, check its own date range too.
- Use the system share sheet to save or send the PDF. Choose CSV when you need tabular data.
A PDF or CSV is a report, not a restorable backup of the app. Exported copies can contain personal details and health-related notes; choose their destination carefully. Nothing is sent to your nutritionist automatically.
08
Keep several plans organized.
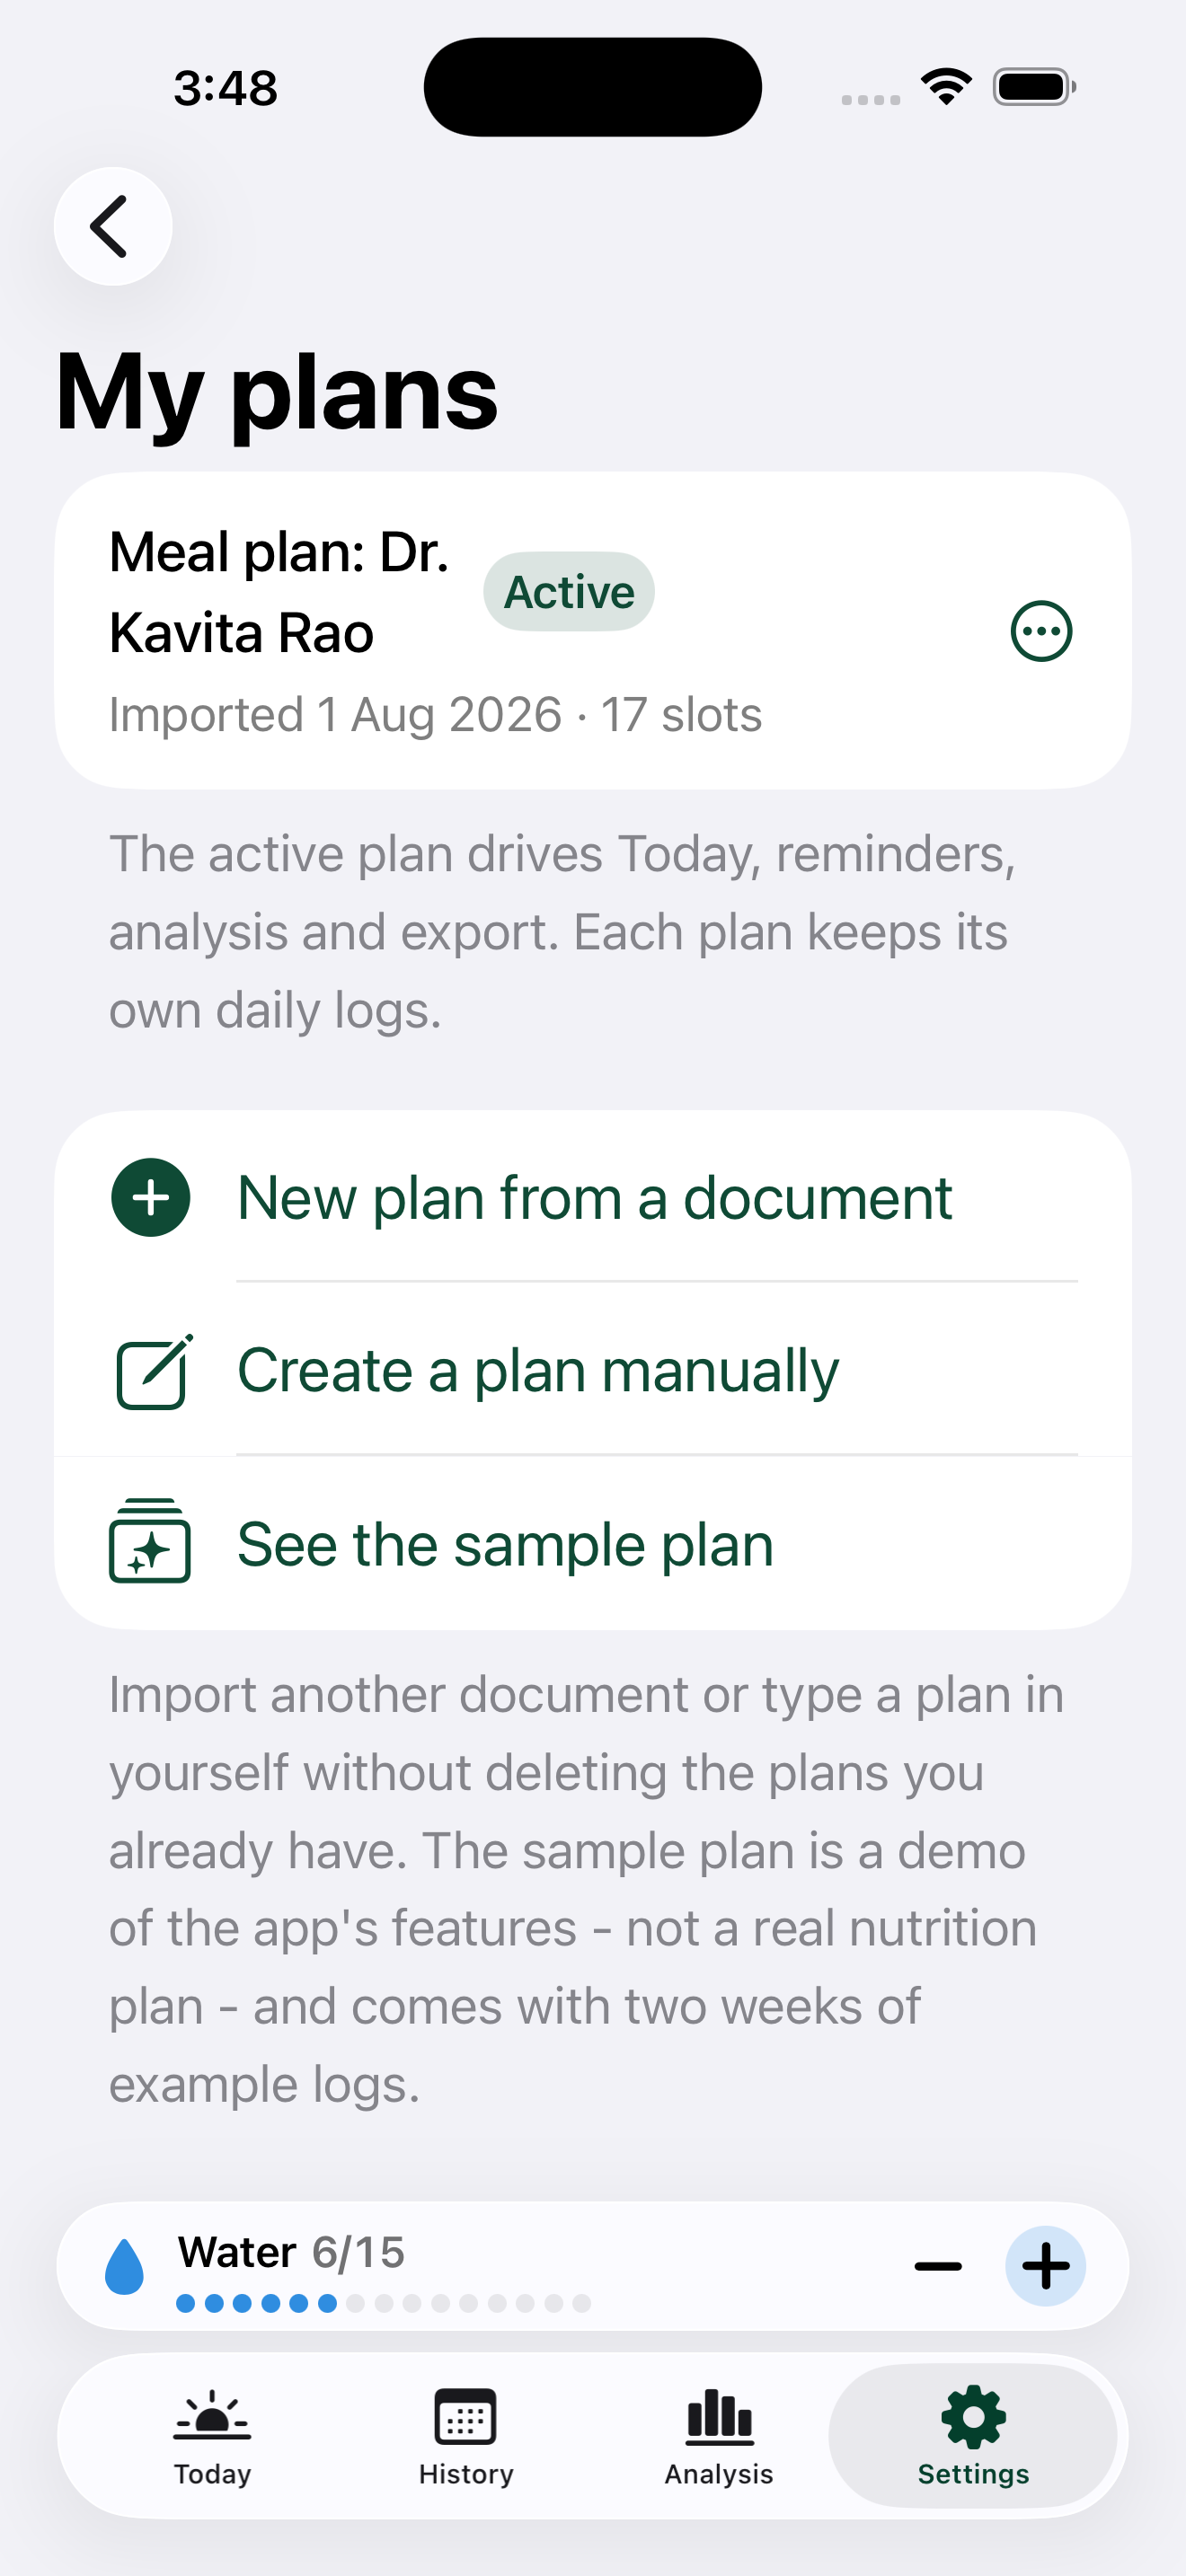
Open Settings → My plans to see saved plans, resume unfinished imported drafts, rename a plan or choose the active one. Each plan has its own daily logs. The active plan drives Today, reminders and reports.
Use the plan's editing action for corrections. Before substantial changes, export any historical report you want to preserve. Deleting a plan and its logs cannot be undone in the app.
Storage cleanup is separate from plan editing. Read the confirmation carefully; clearing logs or photos is not a way to fix a delayed purchase. See the privacy policy for what deletion and device backups do and do not remove.
A closer look at the details.
Open any screenshot to view it at full size.
Make it comfortable to use.
Reminders: allow notifications when asked, then check the step's reminder toggle and time. If notifications are quiet, check iPhone Settings → Notifications → No Cheat Day, Focus and Scheduled Summary. Open the current step inside the app if you are unsure which day or plan an old notification belongs to.
Larger text: use iPhone Settings → Display & Brightness → Text Size, or Accessibility → Display & Text Size → Larger Text. Scroll to reach controls that move lower on the page. The screenshots in this guide were captured using a larger system text setting.
Appearance: choose the app's light, dark, automatic or system appearance in Settings.
Something didn't go as expected?
Start with the recovery steps for missing plans, stalled processing, purchases and reminders.
Open troubleshooting & FAQs →